


















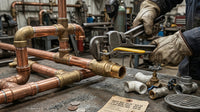


A toilet that keeps running, hisses after a flush, or needs handle jiggling may have a small tank component out of alignment or past its useful life. Before buying parts, identify whether the problem points to the flapper, fill valve, chain, handle, or another connection. That simple check helps homeowners avoid replacing a working part and gives maintenance teams and contractors a clearer fit target.
Browse Integrity Supply's plumbing supplies to compare toilet repair parts and related components.
A toilet repair kit may combine parts such as a flapper, fill valve, flush valve, chain, handle, seals, or related hardware, but contents and compatibility vary. The two most common causes of a toilet leak are the flapper and fill valve, according to NYC Department of Environmental Protection guidance: learn more about leak causes.
Start by mapping the parts inside the tank and matching the symptom to the component involved. Then compare the old part, toilet model, dimensions, and manufacturer guidance before choosing a complete kit or a single replacement.
What Is a Toilet Repair Kit?
A toilet repair kit is a package of replacement components intended to address one or more problems inside a toilet tank. Depending on the product, it may combine parts such as a flapper, fill valve, flush valve, chain, handle, overflow tube, seal, or related hardware. The exact contents vary, so check the product specifications before assuming a kit includes every part your toilet needs.
How the main tank components work together
The tank components form a connected system. The fill valve admits water after a flush and shuts off when the tank reaches its set level. The flapper covers the flush valve opening, then lifts when the handle and chain activate the flush. The overflow tube helps manage excess tank water, while the handle, trip lever, chain, valve seat, and seals connect the user's action to the flush and refill cycle. Portland Water's component diagram identifies these parts, including the shutoff valve, flapper, valve seat, chain, overflow tube, fill valve, and handle. Review the component diagram before taking parts out of the tank.
Two common sources of a toilet leak are the flapper and the fill valve, according to New York City's Department of Environmental Protection. A worn flapper may fail to seal the flush valve opening, while a fill-valve problem can allow water to keep entering the tank. A chain, trip lever, or flapper that no longer aligns correctly can also leave a gap and permit leakage. NYC DEP's leak guidance explains these possible causes.
Complete kit or single replacement part?
A complete kit is suited to a repair where several connected tank components are worn, damaged, or due for replacement. It may also simplify a planned refresh when the included parts match the toilet's design. A single replacement part is often the more focused choice when diagnosis identifies one failed component and the remaining parts are in suitable condition.
Before buying, identify the failed component, compare the old part, and verify the toilet model, dimensions, and manufacturer instructions. Treat the word "kit" as a description of what is packaged together, not as proof of universal fit or a guarantee that every tank component is included.
Which Components Should a Toilet Repair Kit Include?
There is no universal parts list for every toilet repair kit. Some packages combine the parts needed for a common tank repair, while others focus on one failed component. Before buying, compare the kit contents with the parts inside your tank and with the toilet manufacturer's specifications.
Core tank and flush components
A flapper is the flexible seal that lifts when you flush and closes afterward. It can deteriorate or collect mineral buildup over time, which may let water pass into the bowl. The flapper must sit correctly on the flush valve seat. The 3-inch fill valve and flapper kit is a useful product-specification reference when comparing this type of combination kit, but its listed parts should not be treated as a universal fit for every toilet.
The fill valve controls water entering the tank and typically includes a way to adjust the refill level. A flush valve is the larger tank opening and valve assembly that releases water into the bowl. Depending on the toilet design, a replacement package may include the flush valve itself, a flapper that works with it, or only a seal or gasket. Check the existing valve opening and the manufacturer's instructions rather than relying on the word "universal."
Small parts that affect operation
The chain connects the handle's trip lever to the flapper. It needs enough slack to let the flapper close, but not so much that the handle lifts without opening the valve. A chain that is too short can hold the flapper open. The handle or trip lever may also need replacement if it is loose, bent, or no longer lifts the chain reliably. Misalignment between these parts can leave a gap and cause a leak, according to NYC Department of Environmental Protection guidance.
The overflow tube carries excess tank water toward the bowl when the level is too high. Some kits include an overflow-tube or flush-valve assembly, while others do not. Seals, washers, nuts, mounting hardware, and tank-to-bowl gaskets may be needed for a secure connection, but their size and role vary by repair. Lay out the old parts, note where each one sits, and confirm every replacement against the product specifications before installation.
How Do You Choose the Right Kit for Your Toilet?
Start with the toilet, not the package. A toilet repair kit is only useful when its parts match the tank design, the failed component, and the way the manufacturer specifies the repair. Record the toilet model, inspect the existing parts, and compare measurements before ordering.
Verify the model and the replacement part
Use the owner's manual or the manufacturer's website to identify the correct replacement part number. If the flapper is the suspected failure, remove it only after shutting off the water and draining the tank, then compare the old part with the proposed replacement. The U.S. Environmental Protection Agency notes that bringing the old flapper for comparison can help confirm fit, because replacement flappers do not all fit every toilet. See the EPA's toilet leak guidance for additional selection and testing advice.
| What to check | Why it matters | How to verify |
|---|---|---|
| Flapper style and size | The seal must align with the flush valve opening. | Compare the old flapper and follow the model-specific part guidance. |
| Valve opening and tank geometry | Clearance, mounting points, and the tank shape affect installation. | Measure the opening and inspect the tank before selecting replacement parts. |
| Fill-valve design | Different mechanisms use different adjustment methods. | Identify the existing valve and confirm the new valve's adjustment instructions. |
| Water-saving adjustment | An incorrectly adjusted flapper or water level can affect flushing and leakage. | Use the manufacturer's instructions and confirm the final water level. |
Match the kit to the repair scope
Do not assume a complete kit is automatically the best choice. If diagnosis identifies one worn flapper, a single replacement part may be enough. If several tank components are worn, a complete kit may be more practical, but verify exactly what the package includes. Kits can differ in whether they contain a flapper, fill valve, flush valve, handle, chain, seals, or mounting hardware.
Fill-valve mechanisms vary by manufacturer, although they include a way to adjust the water level. Confirm the valve opening, connection, adjustment range, and tank clearance against the product specifications. For water-saving toilets, the replacement flapper must be adjusted correctly, not merely attached. When documentation and the physical fit disagree, stop and verify the model rather than forcing a part into place. Portland Water's toilet repair guidance provides a useful component reference and adjustment context.
How Can You Diagnose the Problem Before Buying Parts?
Before choosing a toilet repair kit, identify what the toilet is doing and where the water is going. A toilet that runs, hisses, or trickles may have a leak, but some tank leaks are quiet. The Portland Water guide to toilet leaks notes that water can pass through the tank silently, so sound alone is not a reliable test.
Match the symptom to the likely component
- Running or trickling: Start with the flapper and fill valve. The NYC Department of Environmental Protection identifies these as the two most common causes of a toilet leak.
- Handle needs jiggling: A misaligned flapper, loose handle, or chain with the wrong length may be preventing the flush valve from sealing correctly.
- Water level is too high: Water may be entering the overflow tube, which points you toward a fill-valve adjustment or fill-valve problem rather than a flapper alone.
Use a dye test before opening the tank
Remove the tank lid and let the water settle. Add a few drops of food coloring to the tank without flushing. Wait about 10 minutes, then look in the bowl. If colored water appears, the tank is leaking. The EPA WaterSense leak-testing guidance recommends flushing promptly after the test so the coloring does not stain the tank.
Separate flapper clues from fill-valve clues
For a second check, mark the tank's water level with a pencil before flushing and watch how it refills. If the level rises above the mark and then drops, the pattern suggests a flapper leak. If it first rises below the mark and then goes above it, the NYC DEP says a faulty fill valve is more likely. These clues help you decide whether to compare flapper dimensions, inspect the seal, or look for a replacement fill valve. Verify the toilet model and component measurements before buying, since a general-purpose label does not guarantee a fit.
What Are the Safe Steps for Installing Toilet Repair Parts?
Use a controlled process before restoring water
Even a small toilet repair can create a leak if a seal is disturbed or a part is forced into the wrong position. Work slowly, keep the tank area clear, and follow the replacement part's instructions. These steps apply to common tank components, but they do not replace professional help for damaged plumbing or a repair beyond your confidence.
- Shut off the water. Turn the inlet shutoff valve clockwise until the water stops. If the valve will not close, leaks at the connection, or requires excessive force, stop and address that problem before opening the tank.
- Drain the tank. Flush the toilet after shutting off the supply. Hold the handle down as needed to remove as much water as possible. A sponge can collect the small amount that remains, reducing spills while you work. This shutoff-and-flush sequence follows Portland Water's repair guidance.
- Remove the old part carefully. Disconnect the chain, trip lever, or other connection without bending the handle or damaging the flush valve. Set the old component aside so you can compare its shape and attachment points before selecting a replacement.
- Inspect the valve seat. Look for corrosion, grit, or buildup where the flapper seals. Clean the seat if necessary, using a method allowed by the product instructions. A damaged or uneven seat may prevent a new flapper from sealing.
- Match the replacement. Confirm the part against the old component, the toilet model, and the manufacturer's documentation. Not every flapper fits every toilet. If the correct match is uncertain, pause rather than relying on appearance alone.
- Install and align the part. Place the replacement flapper squarely on its valve seat and reconnect the chain or lever. Misalignment can leave a gap and cause a leak. Keep the chain neither too long nor too short, as recommended by Portland Water.
- Adjust the water level. Use the fill valve's adjustment method and the manufacturer's instructions. A general reference point is about one-half to one inch below the top of the overflow tube. Too much water can spill into the tube, while too little may reduce flushing performance.
- Restore water and test. Open the shutoff valve gradually and watch every connection as the tank fills. Flush several times, check that the flapper reseats, and listen for running or hissing. If water continues to escape, the repair is unclear, or the issue is more complicated, call a plumber rather than continuing by trial and error.
When Is a Complete Kit Better Than a Single Replacement Part?
Choose the repair scope based on what you can diagnose, not simply on how many components a package contains. A single replacement part is usually the more focused choice when testing points to one failed component and the surrounding parts are in good condition. A complete kit can make more sense when several tank components show wear, when the repair involves related parts, or when replacing one worn piece would leave another likely failure point untouched.
Start with the symptom and the repair scope
For example, a flapper that does not seal may cause water to pass from the tank into the bowl. If the chain, handle, or valve seat is also damaged or badly misaligned, replacing only the flapper may not solve the underlying problem. The New York City Department of Environmental Protection identifies the flapper and fill valve as common sources of toilet leaks. Portland Water lists the chain, overflow tube, fill valve, handle, and valve seat among the tank components involved in operation. Review those parts before deciding whether you need one replacement or a broader set of components.
A complete kit is not automatically the better value or the correct fit. If the diagnosis points to a fill valve and the flapper still seats properly, replacing unrelated parts can add work and create new fit questions. Conversely, a kit may be practical when multiple parts are worn and you have confirmed that its contents match the toilet's design.
Verify fit and water level before replacing parts
Do not assume that a familiar-looking toilet repair kit fits every toilet. Compare the old component with the replacement, check the owner's manual or manufacturer's part information, and follow the product specifications. Water level matters as well. A level that is too high may spill into the overflow tube, while a level that is too low can produce an inefficient flush. Fill-valve designs vary, but they include a way to adjust the level. After installation, adjust and test the tank according to the manufacturer's instructions.
If the repair involves a hidden leak, damaged tank, or work beyond your confidence, stop and seek qualified help.
Browse Integrity Supply's plumbing supplies to compare toilet repair parts and related components. Verify the exact component, dimensions, and instructions before ordering.
Frequently Asked Questions
How do I know what toilet repair kit to buy?
Start by identifying the failed component, then compare the old part with the toilet model, tank design, and manufacturer documentation. For a flapper, check the owner's manual or manufacturer's website for the correct part number, and use the old flapper for a direct fit comparison. A complete kit makes sense when several tank components are worn; a single part may be enough when the diagnosis is clear. EPA guidance recommends using the manual or manufacturer information to identify the right replacement.
Do toilet repair kits fit all toilets?
No. Replacement flappers and other tank components can vary by toilet model, flush-valve design, opening size, and water-saving configuration. Confirm dimensions and the manufacturer's compatibility information before ordering. Not every replacement flapper fits every toilet, according to NYC DEP guidance.
How do you repair a toilet that keeps running?
First, listen for running, hissing, or trickling. Then check whether the flapper seats correctly, whether the chain length is appropriate, and whether the fill valve shuts off at the proper level. A dye test can confirm a silent tank leak: add food coloring to the tank and check the bowl after about 10 minutes. Color in the bowl indicates a leak. Shut off the inlet valve before replacing a part, and follow its instructions.
Should I buy a complete kit or one replacement part?
Choose a complete kit when inspection shows multiple worn or mismatched tank components, or when the kit's contents match your toilet's documented requirements. Choose one replacement part when testing points clearly to a flapper, fill valve, chain, handle, or seal. Avoid replacing unrelated parts solely because they are included. If the repair involves a hidden leak or exceeds your confidence, consult a licensed plumber.
Ready to Choose the Right Toilet Repair Parts?
With the problem identified and your toilet model and measurements in hand, comparing the right components can make the repair more straightforward. Browse Integrity Supply's plumbing supplies to compare toilet repair parts and related components. Check product specifications and manufacturer guidance before ordering, and contact a licensed plumber if the work involves a hidden leak or falls outside your experience.