

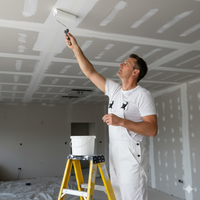



















Learning how to tape and mud drywall is mostly a matter of preparation, thin coats, and patience between steps. A well-finished joint is flat, firmly bonded, and blended far enough beyond the seam that it does not show through paint. This guide walks through the work in order, from checking the board and choosing tape to final sanding and cleanup.
Call to ask about painting and drywall supplies at +18669180300
What Does It Mean to Tape and Mud Drywall?
Drywall sheets meet at joints. Joint compound, often called mud, fills the joint and covers the tape that bridges it. The tape reinforces the seam and helps keep the joint compound in place as the wall responds to ordinary movement. Fastener heads, outside corners, inside corners, and damaged edges need their own finishing steps as well.
The goal is not to leave a raised strip of compound exactly on top of the joint. Instead, each coat feathers outward, creating a gradual transition from the joint to the surrounding board. After drying, the finish is inspected and lightly sanded where needed. A primer coat then helps reveal defects before the final paint coats.
Taping and mudding is a sequence, not one heavy application. Compound shrinks as it dries, and thick deposits can take longer to dry, crack, or leave ridges. Several controlled coats are usually easier to flatten than one thick coat. Follow the compound and tape maker's directions, and allow the material to dry or set as specified before covering it.
What Materials and PPE Should You Gather?
Collect what you need before mixing compound or spreading it on a joint. Working with a clean pan and tools makes it easier to keep grit and dried bits out of the finish.
Material checklist
- Joint compound: Select a product suitable for the stage of work and compatible with the tape. Premixed compound is ready to use after proper stirring; setting-type compound is mixed with water and hardens within a stated working period. Read its label for mixing, application, and drying directions.
- Joint tape: Paper tape and self-adhesive fiberglass mesh are common options. Choose according to the compound instructions, joint type, and your experience. Paper tape is bedded in compound; mesh is generally installed on the board before compound is applied, but the product directions control.
- Taping knives: A narrow knife helps place compound and embed tape; wider knives help spread later coats. A small putty knife can be useful around tight details, but it is not a substitute for a wide finishing knife on broad seams.
- Mud pan or compound tray: Use a clean container that lets you load the knife without dragging its corners through dried compound.
- Corner tools or corner bead: Use materials appropriate to inside and outside corners. Outside corners need a durable, straight edge; corner bead installation depends on the bead type.
- Sanding materials: Use a sanding sponge or drywall sanding tool suited to the finish and the compound directions. Have a work light for checking the surface at a shallow angle.
- Mixing and cleaning supplies: Keep clean water, a mixing tool suitable for the compound, and a separate bucket or container for tool cleanup nearby.
- Protection for the room: Cover floors and nearby items before sanding. A protective drop cloth can help shield a work area from splashes and debris; secure it so it does not create a trip hazard.
PPE and dust control checklist
- Eye protection: Wear eye protection when mixing, applying overhead, or sanding compound.
- Respiratory protection: Sanding can create airborne dust. Choose respiratory protection appropriate to the task and the product and workplace requirements. A respirator is not a substitute for reducing dust, ventilation, or proper fit and use.
- Work clothing and gloves: Wear clothing that can get dusty and gloves when useful for the task. Keep compound away from eyes and skin, and follow the product label.
- Ventilation and containment: Keep dust from migrating into occupied areas. Close or isolate the work area when practical, protect returns and nearby surfaces as appropriate, and use dust-control methods compatible with the equipment and the job.
- Safe access: Use a stable work platform for high seams and ceilings. Do not overreach from a ladder or balance a pan where it can fall.
Do not assume every compound has identical ingredients, dust characteristics, or cleanup directions. Review its label and safety information before use. For work under an employer's safety program, follow the applicable site procedures and required PPE. Keep children and others out of the work area while sanding and cleaning.
How Do You Choose Drywall Tape and Joint Compound?
Choose tape and compound as a compatible system rather than by appearance alone. Check product instructions for whether a compound is suitable for bedding tape, filling, finishing, or a particular tape type. If directions are unclear, ask the supplier or manufacturer before combining products.
Paper tape
Paper tape is placed over a wet bed of compound and pressed into it with a knife. The bed must be continuous enough to bond the tape, but it should not be so thick that the tape floats or the joint becomes a mound. Paper tape can be creased for inside corners. It takes practice to remove extra compound without pulling the tape away from the board.
Self-adhesive fiberglass mesh
Mesh tape sticks to the board before compound is applied. It can be convenient for some joints and repairs, but the compound instructions matter: some mesh systems specify setting-type compound or other products rather than a particular premixed finish compound. Do not assume any mud works with any mesh. Follow the tape manufacturer's guidance, especially for seams that may be more likely to move or crack.
Premixed and setting-type compound
Premixed compound comes ready to use after stirring. It is useful for controlled finishing coats and has no short chemical working window once opened, though it must still be protected from drying and contamination. Setting-type compound is mixed for use and hardens in a specified time. Its set time is not necessarily the same as full drying time, and setting does not mean the surface is ready for a subsequent coat without inspection.
Products also differ in workability, sanding behavior, and intended use. A quick-setting product may help with selected stages, but it leaves less time to work and clean up. A finishing compound may be easier to spread or sand, but it is not automatically appropriate for bedding every tape. Read the product directions and plan each coat around its working and drying characteristics.
Match the material to the joint
Butt joints, tapered factory joints, inside corners, outside corners, and patches do not all present the same geometry. A tapered edge gives room to feather compound without building as much height. A butt joint has no recess and needs a wider, gradual blend to disguise the transition. Corners need a straight crease or protective edge as well as a smooth finish. Think about the location before selecting the application method.
How Do You Prepare the Drywall Before Taping?
Preparation prevents small installation problems from becoming visible ridges or weak bonds. Finishers can only create a reliable surface if the board is firmly supported, edges meet sensibly, and dust and loose material are removed.
- Check that the board is secure. Press gently near seams and fasteners. Loose or flexing board can cause a finished joint to move. Correct installation issues before applying tape; do not use compound to hold a loose sheet in place.
- Inspect the joint. Look for gaps, broken paper, crushed edges, protruding fasteners, and abrupt changes in plane. Address unusually wide gaps or damaged areas with an appropriate repair method rather than burying them under a thick mound.
- Set fasteners below the surface without breaking the face paper. A fastener that stands proud can catch a knife. A fastener driven too deeply can damage the paper and reduce its holding ability. Add or correct fastening as appropriate to the board installation, then cover the heads in coats.
- Remove loose dust and debris. Brush or wipe away loose material without spreading dirt into the joint. Keep tools and mixing water clean.
- Check the room and surface conditions. Follow compound directions for temperature, humidity, ventilation, and drying. A cold, damp, or poorly ventilated space can delay drying. Do not rush a coat because the surface feels dry at one small spot.
- Protect surfaces. Put down floor protection and cover adjacent finishes before mixing. Keep the route through the room clear so you do not track compound or dust elsewhere.
Use a work light before the first coat to notice uneven board edges and high fasteners. A straightedge can help identify a pronounced change, but the board should be corrected when installation problems are significant. The idea is to start with a stable, reasonably flush substrate, not to solve every construction defect with mud.
How to Tape and Mud Drywall: Step-by-Step
These steps describe a common paper-tape approach for flat joints. Product-specific directions and the tape type may change the sequence. Practice on a less prominent seam if you are new to the process, and keep each coat thin enough to control.
Step 1: Mix or prepare the compound
Open premixed compound and stir it until its consistency is uniform, following the label. If the manufacturer allows adding water, make small adjustments rather than thinning it excessively. A mixture that is too loose can slump, while a very stiff mix can be hard to spread and may not bed tape evenly.
For setting-type compound, measure and mix as directed. Do not add more water after it begins setting unless the instructions explicitly allow it. Prepare only an amount you can use within its working time. Keep unused material and the container clean; bits of hardened compound can leave scratches in later coats.
Step 2: Apply a bed coat to the joint
Load a manageable amount onto a knife and apply compound along the seam. Aim for a consistent bed under the full length of the tape. Spread it slightly wider than the tape so the edges can be feathered, but avoid piling it up. Work in sections that you can tape before the compound skins or dries.
On a long wall seam, use controlled strokes and refill the knife as needed. Keep the blade at an angle that moves compound into low spots. Excess compound should be removed rather than left as a thick ridge. If you see a gap that the knife cannot bridge without a heavy fill, pause and determine whether the joint needs another repair step.
Step 3: Embed paper tape
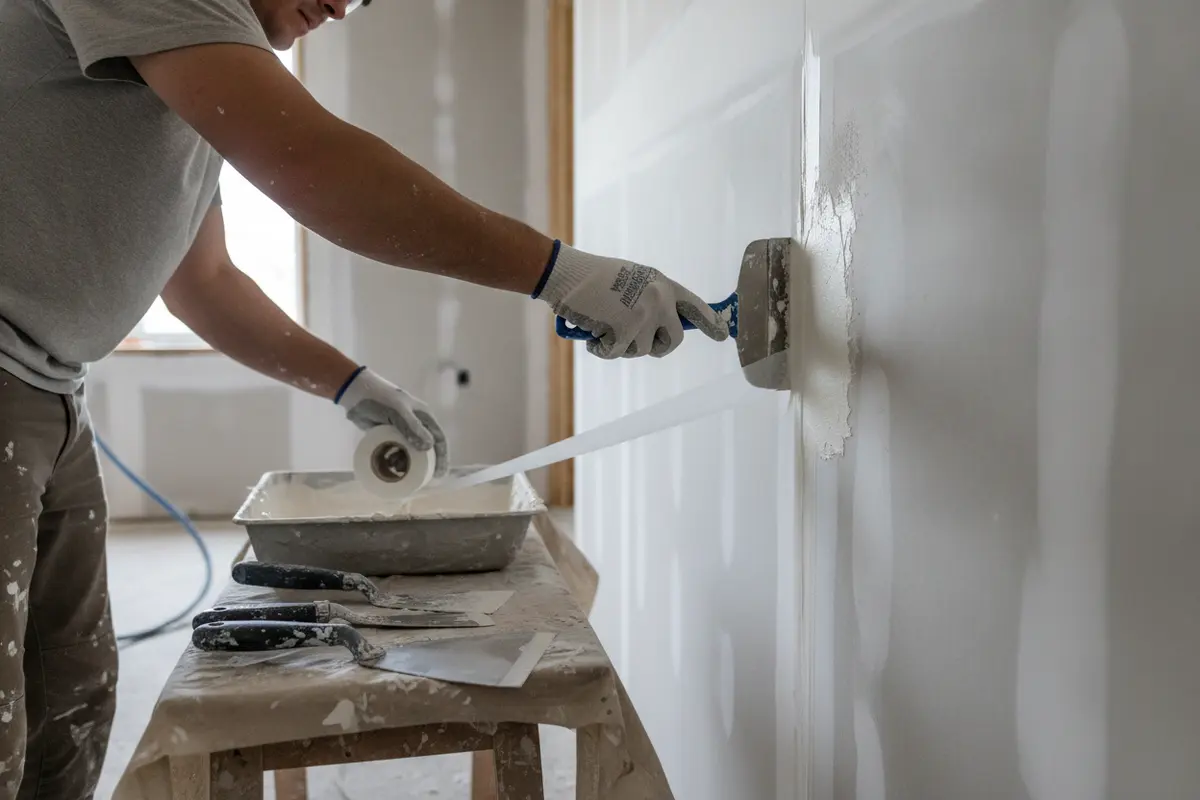
Center the tape over the seam while the bed coat is wet. Press the tape into the compound with a knife, working from the middle toward the ends or using another steady sequence that pushes out trapped air. Hold the blade at a shallow angle and use enough pressure to embed the tape, not so much that all compound is squeezed out from beneath it.
Look for bubbles, wrinkles, dry sections, and tape that wanders off the joint. Smooth the tape while the compound is workable. A small amount of compound should remain under it across the seam. If the tape lifts or a bubble remains, correct it now by gently lifting and rebedding that area or cutting out a damaged section and repairing it as appropriate. Covering a bubble with another coat rarely fixes the bond.
At an inside corner, crease paper tape along its center and press it into compound on both sides. Keep the crease aligned with the corner and avoid twisting the tape. Apply pressure carefully so the tape contacts both planes without squeezing the bed completely dry. Allow the corner to dry before building out one side and then the other if that approach gives you better control.
Step 4: Remove excess compound and let the tape coat dry
Make a light pass over the tape to remove extra mud and flatten the edges. The tape should lie smooth, with no prominent ridge at either edge. Avoid scraping so hard that the tape is exposed or the bed is wiped out. Clean the knife periodically so dried material does not score the surface.
Let the coat dry or set according to the product directions and room conditions. A change in color or a dry feel can be useful clues for some products, but do not rely on one sign alone. Thick areas and corners may take longer. Do not trap damp compound under a new coat, and do not force-dry it in a way the manufacturer warns against.
Step 5: Apply the first fill coat
Once the tape coat is ready for recoating, apply a coat that fills the shallow depression around the tape and extends beyond it. Use a wider knife than for embedding if available. Apply enough material to smooth low areas, then draw the blade along the joint to remove excess. The objective is a modest, even build, not a polished final surface in one pass.
On a tapered joint, keep the center relatively flat and feather the edges across the recess. On a butt joint, spread the coat much wider so the center does not appear as a narrow hump. A butt seam often takes more width to blend because the board edges are not recessed. Stand back and check the joint from different angles as you work.
Step 6: Cover fasteners and corner details
Apply compound over screw or nail heads in thin passes, drawing the knife across each head and removing excess. Check that the fastener is covered without leaving a distinct mound. A second pass may be needed after drying because compound can shrink. Keep the surrounding board clean where possible.
For outside corners, install the chosen corner bead according to its instructions and confirm that it is straight before finishing. Apply compound to blend the bead edges into the wall. Do not build a wide, uneven lump on one side. Let one side firm up if needed before working the other, especially if the knife tends to drag the first side out of shape.
Step 7: Apply a wider finish coat
After the fill coat dries, inspect it under a work light. Scrape off isolated ridges with a clean knife, then apply a wider, thinner finishing coat. Extend it beyond the previous coat and feather both sides. A wider knife can help, but technique and a clean blade matter more than using the largest tool available.
Keep the edge of the knife moving smoothly. Slightly overlap passes so they do not leave separate ridges. If the compound pulls or tears, check whether the previous coat is dry, whether the blade has dried material on it, and whether the mix is suitable for this coat. Adding more compound to a torn, contaminated surface without correcting the cause can compound the problem.
Step 8: Finish corners in controlled passes
Inside corners can be finished by coating one plane at a time, allowing it to dry, then coating the other. This reduces the chance of dragging a knife across the opposite wet surface. Keep the corner line straight and remove excess without cutting into the tape. If you use a corner tool, follow its operating instructions and check that it does not leave a hollow or heavy bead.
For outside corners, apply thin coats on each side of the bead and blend outward. Check the corner from above and below for a straight line. A broad, even transition hides the bead edge better than a narrow ridge. Avoid bumping the corner while the compound is soft.
Step 9: Inspect and decide whether another coat is needed
When the finish coat is dry, shine a work light across the surface at a shallow angle. Look for ridges, pinholes, shallow depressions, tape edges, blisters, and abrupt transitions. View the wall from normal standing positions too; the purpose is a sound, visually smooth surface under the intended finish, not endless sanding for defects that are not present.
Fill low spots with a thin application and let it dry. Scrape or sand high spots cautiously. If tape is exposed, loose, or damaged, repair the area rather than simply hiding it with another coat. It is often more effective to correct a small defect now than to apply another full coat over the entire seam.
Step 10: Sand lightly and control dust
Sand only after the compound is dry or set as directed. Use a light touch. The goal is to remove knife edges and small surface imperfections, not to sand through the tape or damage the board's face paper. A sanding sponge can help with localized areas; a pole sander may be useful on broad wall surfaces when used carefully.
Use the dust-control measures planned before sanding. Keep people out of the immediate area, protect adjacent rooms and surfaces, and use equipment or collection methods designed for the work. Do not aim a fan in a way that spreads dust through the building. Wear appropriate eye and respiratory protection, clean with methods suitable to the material and location, and follow workplace requirements. Wipe or vacuum dust as appropriate before priming; do not leave a layer that can interfere with coating adhesion.
How Do You Finish Butt Joints, Tapered Joints, and Corners?
Understanding the shape of the joint helps determine how far to spread compound. The same narrow pass that looks acceptable on a recessed seam may leave an obvious hump on a butt joint.
Tapered factory joints
Where factory-tapered edges meet correctly, the shallow recess gives room for tape and compound. Center the tape, fill the recess without overloading it, and widen subsequent coats so their edges fade into the board. A straightedge or side lighting can help reveal whether the center is too high or the edges remain sharp.
Butt joints
A butt joint is formed where non-tapered board ends meet. Since the surface does not provide the same recess, a thick narrow mound is easy to see after painting. Keep coats thin and feather them farther out on both sides. Take time to compare the seam with the neighboring plane. If the joint is not flat, more width may improve the blend, but repeated heavy coats can make it worse.
Inside corners
Inside corners require tape to bridge the angle and compound on both adjoining surfaces. Fold paper tape neatly on its crease, align it, and press it into an even bed. Small sections and clean strokes can make the corner easier to control. Let the first side firm up before applying compound to the second side if that helps prevent damage. Inspect that the corner remains straight and that neither side has a sharp raised edge.
Outside corners
Outside corners are exposed to bumps, so the bead and its attachment need to be suitable for the job. Follow the bead directions for fastening or adhesion, then cover and feather its edges. Do not assume compound alone can repair a bent or loose bead. Check plumb and straightness before finishing because a wavy corner can be difficult to disguise later.
How to Tape and Mud Drywall at Openings and Intersections
A wall is more than long, uninterrupted seams. Joints meet at ceilings, inside corners, door and window openings, soffits, and patches. These transitions call for a little planning because several compound edges can converge in one small area. If every seam is built to full thickness at the same point, the result may be a bulky intersection that catches side light.
Before starting, map where the joints run and note which edges are tapered, which are butt ends, and where a corner bead or trim will cover an edge. Keep tape centered through the intersection. Do not cut away reinforcing tape merely to make the work feel simpler; follow an appropriate joint-finishing sequence so the reinforcing coverage remains continuous where required. At a door or window, the board layout and framing support matter as much as the finish coat. A seam placed at a vulnerable opening corner can be more prone to movement than a seam supported along its length, so resolve layout or support concerns before relying on surface mud.
At an inside corner where a horizontal seam arrives, keep the folded tape aligned and avoid stacking a thick wad of compound at the endpoint. Spread the material out gradually on each plane. It may be easier to finish the main field first, let it dry, and then refine the intersection with a narrow knife. Check from both sides: a corner that looks smooth from one direction can still have a ridge on the adjoining wall.
For a window or door return, confirm the edge is straight and protected with the correct trim or bead system before applying broad finish coats. Work the wall face and return in separate controlled passes if that helps avoid dragging material off the corner. Wipe compound from surfaces that will receive another material or remain exposed. Do not fill moving gaps around frames with drywall compound when a different joint treatment is called for.
When a repair patch sits within a larger wall, stagger or feather the new finish beyond the patch perimeter rather than stopping at a sharp outline. The transition should become gradually less noticeable as it approaches intact board. If multiple joints converge near a patch, correct each structural or backing issue first, then finish one area at a time. This sequencing helps keep wet edges manageable and makes it easier to inspect which pass created a ridge.
How Should You Plan the Work Across a Room?
Good sequencing reduces repeated setup and helps avoid walking into fresh compound. Before mixing anything, identify all seams, fasteners, corners, repairs, and high areas. Make a rough map of the room, and mark which surfaces need a first coat, a fill coat, or only a final touch-up. This can be a simple pencil sketch or a removable note placed away from wet compound. The purpose is to keep track of work, not to create an elaborate project log.
Start with a route that gives you stable access and lets you move without brushing against finished joints. Many finishers work from one wall to the next and complete similar tasks together, such as bedding tape on flat seams, addressing corners, then covering fasteners. Your route should also account for ceilings and high areas: use suitable access equipment, keep the floor clear, and avoid carrying an overloaded pan up or down a ladder. Where the room is occupied, determine how occupants will stay out of the work area during application and sanding.
Separate the work into coat cycles rather than trying to finish each small seam from beginning to end immediately. The first pass might embed tape throughout the room; the next visit can fill joints and cover fasteners once the first coat is ready; later visits can widen and refine the finish. This is efficient because compound must dry or set between coats anyway. It also means you should label or note which sections are ready, especially if different products or room conditions cause different drying rates.
Keep a clean zone for unopened tape, clean water, tools, and material preparation, and a separate dirty zone for used knives, rinse water, and debris. A clean layout helps prevent dried pieces from getting into the next pan. Keep container lids on when material is not being used. Do not put compound scraped from the wall back into the original bucket, because it may contain dust or set fragments.
Plan for drying time as part of the schedule. A calendar interval is not proof that a coat is ready; thickness, air movement, temperature, humidity, and the product all matter. If one area remains damp, shift to another ready section rather than applying the next coat there. Do not use a tight deadline as a reason to cover damp material. A schedule that includes inspection and correction is more dependable than one that assumes every coat will dry at the same rate.
Before leaving at the end of a work period, clean tools according to their instructions, close compound containers, remove tripping hazards, and secure the work zone. Tell other people which surfaces are wet and where materials or sanding equipment are stored. After sanding, collect dust before moving protection or tools into a clean room. A little order between visits makes the next coat easier to apply and reduces avoidable contamination.
How Do You Choose and Use a Drywall Taping Knife?
A knife is not just a way to spread mud; its width and condition influence how much material is left behind. A smaller blade gives control when placing a bed coat or working around a fastener. A wider blade reaches farther across a seam and can soften the transition between compound and board. You do not need a large collection to start, but using a narrow tool for every finish pass makes it harder to feather broadly and can leave repeated ridges.
Inspect the blade before use. A clean, straight edge should not have dried compound, burrs, or a bent corner that cuts a groove. If the blade has a hard lump on it, clean it instead of trying to scrape the lump through wet mud. A small imperfection may leave a long scratch that requires another coat. Keep the pan and the back of the knife clean as well, because compound that dries on either surface can fall into fresh material.
Load only an amount you can control. Too much compound on a flexible wide knife can bow the blade and leave a heavy center. Too little material may make the knife chatter and skip across the surface. Try a short pass on a less visible section to understand how the tool responds to the mix. Adjust the angle and pressure gradually rather than changing several things at once.
For a long seam, overlap adjacent passes slightly and keep a consistent pace. If a pass ends with a ridge, do not automatically press harder on the next stroke; wipe the blade, reload as needed, and draw the edge over the ridge with a controlled motion. Different hands and tools produce different working styles, so the useful test is the surface left behind: smooth, thin, and broad enough to blend. For inside corners, a dedicated corner tool may help, but a hand knife can offer more control in tight spaces. Check both planes after using a specialty tool.
Clean the blade when compound starts to dry along its edge, when debris appears, or when you move to a fine finish pass. Clean tools make it easier to read the surface. They also reduce the temptation to hide a scratch with more compound before understanding what caused it. When choosing supplies, match tool size to the type of seams and repairs you have rather than assuming the widest knife is automatically best for every task.
How Do You Adjust Your Technique for Ceilings?
Ceiling work adds overhead reach, gravity, and awkward viewing angles. Set up safe access before carrying compound or tools overhead. Use a stable platform suited to the work, keep both feet secure, and move the platform instead of stretching sideways. Arrange the pan where it can be reached without balancing it precariously. If the ceiling height or access makes controlled work difficult, pause and use an appropriate method or get experienced help.
Apply manageable loads and keep the compound from becoming so loose that it sags. Follow the product directions rather than changing the mix solely because overhead work feels different. Use shorter sections if that makes it possible to embed tape before the compound skins. Watch for drips, and clean them while they are manageable, without wiping the bedding compound out from under the tape.
It can be harder to judge a ceiling seam while standing directly below it. Move your light and viewing position, and inspect the joint after the coat dries. A work light at a shallow angle reveals ridges, but the final judgment should also account for how the ceiling will be lit in normal use. Recessed lights, windows, and fixtures can cast shadows across a surface, so check from more than one direction. The answer is not to build a deep layer to hide every shadow; instead, identify whether the issue is a ridge, a low spot, an uneven board plane, or a lighting effect.
Protect the room below from compound and sanding dust. Cover fixtures and items that should not collect debris, while following applicable electrical and safety precautions. Keep pathways and exits clear, and make sure another person is not walking under the work while material is being applied. Overhead sanding deserves the same dust-control planning as wall sanding, with additional attention to falling debris and eye protection.
How Do You Inspect Each Coat Before Continuing?
Inspection is a separate step, not something to do only after the final sanding. Before recoating, look at the joint from directly in front and at an angle. Use your fingertips lightly to detect a sharp ridge, but do not rub soft compound or disturb a coat that is not ready. A clean knife can gently scrape away a small high edge after drying. If the surface is uneven, locate the cause before adding material: a low center, high board edge, thick tape bed, or knife ridge needs a different correction.
Check the length of the seam, not just the area closest to you. A joint can appear flat for most of its run and then rise at a fastener or corner. Sight along the wall and move the light. Mark a defect lightly outside the area to be coated, or remember its position, so you can make a focused correction instead of applying another coat everywhere. Never mark wet compound with a tool in a way that creates a groove.
For tape, inspect bond and coverage. Look for bubbles, lifted ends, wrinkles, exposed edges, or dry areas that suggest the tape was not embedded properly. These are not simply cosmetic ridges. If tape is loose, fix the bond using a suitable repair method before covering the area. For fasteners, check whether a head remains proud or whether the face paper is damaged. A pronounced fastener problem should be corrected at the board, not disguised with a large compound mound.
After a coat dries, compare it with the adjacent wall plane. Use a straightedge cautiously where useful, but do not assume a tool can replace a visual inspection. The finish should transition gradually, without abrupt shoulders. In a high-visibility location, look from the position where occupants normally see the wall. On a wall planned for a strong sheen or close side lighting, be especially attentive to ridges because the final coating may make surface variations more apparent.
Keep an inspection note that identifies whether each area needs scraping, a thin fill, another feather coat, or a repair. That distinction saves work. A shallow pinhole may need a small fill; a broad ridge may need careful scraping or sanding; a loose bubble requires repair; a widespread low surface may call for a broader finishing pass. Recoat only when the previous layer is ready, and check again after every correction has dried.
How to Tape and Mud Drywall When a Seam Has a Defect
Not every visible issue is a normal dip that can be handled with a finishing pass. Diagnose the condition before deciding what to do. A clean shallow depression in sound compound is different from a loose tape bubble, a moving joint, a broken board edge, or a fastener that has missed framing. Using the same response for all of them can make the repair wider and more difficult.
Small pinholes and shallow tool marks
Once the surrounding coat is dry, a pinhole or shallow mark can often be filled with a small amount of suitable compound. Press it into the void, then remove excess with a clean knife so a raised patch does not remain. Let the spot dry and inspect again under angled light. A second thin application may be preferable to packing a deep spot with material in one pass. If the mark reappears after sanding, check whether it is a surface void or a deeper defect before continuing.
Knife ridges and high edges
A narrow ridge left by the edge of a knife is usually a high spot. If it is dry and sound, carefully scrape or sand it, using light pressure and checking often. Avoid cutting into the tape or face paper. When a long seam has a ridge, remove the raised edge first; adding compound beside it without reducing the height can create a wider mound. Then apply a thin feather coat only if the surface still needs blending.
Blisters and loose tape
A blister may mean air or insufficient compound remains beneath the tape. Do not assume that another finishing layer will hold it down. Inspect the area and use a suitable repair method, which may involve removing the affected section and rebedding or replacing tape. Keep the repair edges sound and follow product directions. After it is dry, feather the repaired area outward in controlled coats. A patch that is too small may leave an obvious outline; one that is needlessly broad wastes time and creates additional sanding.
Cracks and recurring joint movement
A crack that returns after filling deserves a cause check. Look for movement at the joint, an unsupported or loose board edge, a damaged corner, or another underlying condition. Compound is a finish material, not a structural fastener. Correct the support or installation problem before refinishing. If the crack is associated with broader building movement, water damage, or damage beyond a simple finish repair, seek qualified guidance instead of repeatedly covering it.
Damaged board paper
Scuffed or torn face paper can absorb moisture differently and may lift when coated. Remove only loose material and use a repair approach suitable for the damage and compatible with the finishing system. Do not aggressively peel intact paper or bury a large torn area under thick mud. If the substrate is still soft, wet, or deteriorating, identify and resolve that condition first. A sound finished joint depends on a stable surface beneath it.
Fasteners that show again
If a screw head reappears through the finish, examine whether it was set correctly and whether the board is secure. A fastener that is loose, proud, or no longer holding should be addressed at the board level, with appropriate additional fastening where suitable. A shallow, sound fastener depression can be recoated after the area is stable. Avoid placing a large mound over a moving head; the mark may return through the finish.
How Should You Handle a Small Drywall Patch Before Finishing?
A patch has a perimeter, a center, and a transition zone. Treating only the visible center can leave a ring where the repair meets the existing wall. First, make sure the patch is supported and secure, its edges are appropriate for the chosen repair method, and there is no loose board or debris. For a cut-out or hole that needs backing, use a patching method suited to its size and location before finishing. Do not expect tape and joint compound alone to hold an unsupported piece of board in place.
Once the patch is stable, prepare the edges. Remove loose fragments without enlarging the opening unnecessarily. If the paper facing is torn, address it according to a compatible repair system. Check that the new surface is reasonably flush with the surrounding wall. A patch that sits proud cannot be made invisible simply by feathering a tiny ring of mud around it; the transition may need to extend farther, or the patch itself may need adjustment.
Apply reinforcing tape where the patch system requires it. Center the tape over the joint and embed it without leaving trapped air. At corners of a patch, avoid bunching tape or creating overlapping layers that make a thick knot. Different repair systems have different instructions, so use the specified tape and compound pairing. Let the first layer dry or set as directed before widening the finish.
For the fill and finish coats, work beyond the tape and feather outward. A small knife can place compound, while a broader knife or trowel can blend the outer transition. The exact width depends on the patch size, board plane, and lighting. Step back after each coat and compare the patch with the surrounding wall. If the center is low, fill it; if the perimeter is high, remove the high edge carefully. Avoid applying a thick mound over the whole repair just to hide the outline.
Sand lightly only after the material is ready, keeping the sanding pad flat and the surrounding wall protected. Clean away dust and inspect from several angles. If the patch is still visible after a coat dries, identify whether the cause is a ridge, a low center, a sharp perimeter, a different surface texture, or lighting. Correct that specific issue, then prime according to the coating instructions. This process is distinct from repairing an active leak, structural damage, or a hole that needs more than a simple patch; those conditions should be resolved before cosmetic finishing.
What Does a Practical Coat-by-Coat Plan Look Like?
A written sequence can make a large wall or room easier to manage. It also helps a first-time finisher understand why each pass exists. Consider a common taped flat seam as an example. On the first visit, secure and inspect the board, prepare the joint, apply the bedding compound, and embed tape. Once that coat is ready, the next pass covers the tape with a modest fill. After that coat dries, a wider finish coat blends the edges. A final correction pass addresses isolated low spots or ridges after inspection. The actual number of passes depends on the product, joint geometry, repair quality, and desired appearance.
Use a simple task log with columns for location, material used, coat applied, condition observed, and next action. For example, a note might say: east wall, upper tapered joint, tape bed complete, dry before fill coat; west wall, butt seam, first fill applied, feather wider; hallway corner, bead straight but one edge needs another light coat. This gives a clear handoff if more than one person is working and reduces the risk of forgetting a section. Do not write product claims or drying times from memory; note the product directions and observed conditions.
Keep separate information for products with different working behavior. If a setting-type compound is used for a repair and a premixed compound is used for a later finish, track which area received which material. Confirm the recoat instructions for each. Setting time describes hardening behavior; it does not automatically tell you when a deep application is dry enough for the next operation. The label remains the guide.
Before a subsequent coat, the sequence is: confirm the previous coat is ready; remove dust or loose grit; scrape isolated high ridges if appropriate; check tape and fastener conditions; select the next knife width; apply a controlled layer; feather beyond the prior coat; then inspect and clean tools. This brief pause avoids applying a new layer over a defect that should have been corrected first.
When a coat is not ready, do not force the schedule. Move to another section, prepare tools for the next task, or continue with a different phase that does not disturb the damp area. A patient cycle is usually easier than sanding a soft coat or trying to cover a wet fill. Track room conditions when they vary, and do not judge a concealed or deep spot only by the surface color.
How Do You Compare Paper Tape and Mesh for a Repair?
Neither tape type is a universal choice for every joint. Paper tape is commonly embedded in a wet compound bed and can be folded for inside corners. Mesh is self-adhesive and can be convenient for some patch layouts, but it relies on a compatible compound system and the manufacturer's instructions. Evaluate the actual repair, not just which roll is easiest to handle.
| Question | Paper tape | Self-adhesive mesh tape |
|---|---|---|
| How is it placed? | Centered over a wet bed of compound and embedded with a knife. | Usually pressed onto the prepared board before compound is applied. |
| What should be checked? | Continuous bedding, crease alignment in corners, and no bubbles or dry sections. | Adhesion to a clean surface and compatibility with the compound specified by the tape maker. |
| Where may it help? | Long seams and inside corners when the finisher can embed and smooth it correctly. | Some flat repairs where the product directions permit its use and the substrate is sound. |
| What is a common risk? | Squeezing out too much bedding compound or leaving a wrinkle or air pocket. | Assuming any premixed compound is suitable, or using it where the instructions call for another system. |
The table is a starting point, not a substitute for product instructions. Confirm whether the tape is intended for the joint and compound you have. For a recurring crack, moving joint, damaged framing, or complex repair, tape selection alone will not address the underlying condition. Correct that first or seek experienced guidance.
How Many Coats Does Drywall Joint Compound Need?
There is no single coat count for every joint, product, board condition, or desired finish. A common sequence is a bed coat with tape, a fill coat, and one or more finishing coats. Fasteners and corners may need separate applications. Some systems or repair situations use a different number of passes. The deciding factors are tape coverage, surface flatness, product directions, and the quality of the final inspection.
Do not add a coat merely because a number says to. Conversely, do not stop when tape edges or depressions remain visible. Apply the amount needed to create a gradual blend without burying the wall in unnecessary compound. More material means more drying time and more sanding if it leaves ridges. A thin additional skim can be easier to correct than a single thick application.
When a product is described as setting-type, distinguish its set time from its drying and recoating instructions. A firm surface may still retain moisture, especially in deep fills or poor conditions. Follow the label and check that the surface is ready before proceeding.
How Long Should Joint Compound Dry Between Coats?
Drying time varies with compound type, coat thickness, temperature, humidity, airflow, and the surface beneath it. Use the product instructions rather than assuming that a coat will dry overnight or within a fixed number of hours. A thin coat in favorable conditions may dry sooner than a deep fill in a cool or humid room, but local conditions can differ even across one wall.
Applying another coat too soon can trap moisture, soften or disturb the previous layer, and make it harder to achieve a predictable finish. Waiting longer than necessary does not generally harm a dry surface, but keep it clean and protect it from damage. Do not use excessive heat or direct high-speed airflow unless the product instructions allow it; rapid or uneven drying can create problems.
How Do You Sand Drywall Without Making a Dust Problem?
Plan dust control before the first sanding pass. Sanding is not a cleanup strategy for excess compound; good knife work reduces how much sanding is needed. Start with the least aggressive approach that will remove the defect. Use shallow, controlled strokes and check frequently with side lighting so you stop when the ridge is gone.
Protect the room, isolate the work zone where practical, and use dust collection or other controls suited to the task. Keep air movement from carrying dust into other spaces. Choose eye and respiratory protection based on the product, task, and applicable safety requirements. If you are working on a jobsite, follow the employer's hazard assessment and respiratory-protection procedures. Do not dry-sweep fine dust if that will send it back into the air; use an appropriate cleanup method and dispose of debris in accordance with local requirements.
When sanding by hand, keep the pad flat so it does not cut grooves into the joint. Avoid sanding aggressively across tape or exposed board paper. If the finish is low, fill it; grinding away the surrounding board is not a good way to flatten it. Recheck the surface after cleanup, because dust can hide pinholes and scratches.
How Do You Know When the Wall Is Ready for Primer?
The joints should be dry, firmly bonded, and blended without obvious ridges, holes, loose tape, or abrupt edges. Run a clean hand lightly across the seam to feel for a sharp transition, then inspect from several angles under ordinary room lighting and with a work light. A primer coat is a useful next step for preparing drywall and can make missed imperfections easier to see, but it is not a substitute for correcting a loose or poorly finished joint.
Remove sanding dust using a method appropriate to the surface and product directions. Do not prime over damp compound, loose dust, or an unrepaired bubble. Follow the primer manufacturer's directions for surface preparation, application, and drying. If the wall will receive a particular sheen or strong side lighting, take extra care with surface consistency because those conditions can make imperfections more noticeable.
What Common Drywall Taping Mistakes Should You Avoid?
- Leaving too much compound under tape: A heavy bed can make tape float, leave a raised seam, and increase drying time. Apply an even bed and remove excess while preserving contact beneath the tape.
- Squeezing out all the compound: Too much pressure can leave sections of tape without a proper bed. Embed firmly but do not scrape the joint dry.
- Ignoring bubbles or wrinkles: Trapped air and lifted tape are defects to correct, not details to hide under finish coats. Fix them while the material is workable or repair them after drying.
- Using the wrong tape and compound combination: Products have specific compatibility instructions. Check the label instead of relying on a rule of thumb.
- Applying a thick coat to save time: Thick compound can shrink, take longer to dry, and be harder to flatten. Several thin coats generally offer more control.
- Failing to clean the knife: Dried crumbs scrape grooves into wet compound. Keep the blade clean and the pan free of hardened pieces.
- Working over loose board or protruding fasteners: Compound cannot stabilize a moving sheet or reliably conceal a high screw. Correct the substrate before finishing.
- Using a narrow blend on a butt joint: A narrow ridge is more visible on flat board ends. Feather farther outward and inspect across the full width.
- Recoating before the product is ready: A surface that feels firm may not be fully dry. Follow the specified drying and recoat instructions.
- Over-sanding: Aggressive sanding can expose tape, damage paper, or create depressions. Use light passes and fill low spots rather than grinding the wall down.
- Skipping dust controls: Fine sanding dust can travel beyond the work area. Protect occupants, isolate the area where possible, use appropriate controls and PPE, and clean carefully.
- Rushing the final inspection: A seam can look smooth from directly in front but show ridges in angled light. Check from multiple directions before priming.
When Should You Repair a Joint Instead of Adding More Mud?
More compound is not the right solution for every defect. If tape is loose, blistered, torn, or no longer bonded, remove or repair the affected area using a suitable method. If a board edge is broken, the joint moves, or the gap is unusually large, address the underlying condition before finishing. A bent corner bead should be corrected or replaced as appropriate rather than buried under a thick coat.
For a small shallow pinhole or low spot, a light skim may be enough. For a persistent crack, investigate whether movement, a damaged joint, or another cause is present. Repeatedly coating a crack without correcting its cause can lead to the same defect returning. If the repair involves water damage, suspected hazardous materials, structural movement, or work outside your experience, stop and get qualified guidance before proceeding.
How Can You Keep the Work Area Organized?
Separate clean and dirty tools. Keep the compound container closed when not in use, remove dried material from the knife before it contaminates a fresh coat, and avoid putting dirty rinse water back into usable compound. Store tape where it will remain clean and dry. Set up a stable location for the pan so you are not reaching or stepping around clutter.
Plan tool movement from top to bottom and from one section to the next. For a multi-room job, label or track which surfaces are ready for the next coat rather than relying on memory. Keep the floor protected, but make sure coverings lie flat and do not block exits. The work area should remain safe for other people who may need to pass through.
After taping and finishing, cleanup is easier if compound has not been allowed to harden on tools. Follow product directions for cleaning and disposal. Do not pour compound or slurry into drains unless the product instructions and local rules specifically permit it. Remove dust with appropriate methods before removing floor protection, and fold coverings inward to contain debris.
How Do You Plan the Transition from Drywall Finishing to Painting?
Before moving to primer, confirm that every coat is dry, the seams and fasteners are finished, sanding is complete, and dust has been removed. Use a primer intended for the surface and follow its preparation instructions. Keep a record of any areas that needed touch-ups, and inspect those again after the primer dries. If primer exposes a ridge or pinhole, correct it, allow the patch to dry, sand lightly, and prepare the surface again as directed.
Painting tools belong to the next phase, not the taping process, but planning for them can prevent a rushed handoff. For example, you can compare a roller cover for later coating work once the wall is properly primed. Do not use a paint roller to conceal an unfinished joint; paint and primer reveal rather than replace good surface preparation.
Likewise, measure and lay out the work before cutting board or fitting repairs. A tape measure can help with ordinary job measurements, but the critical finishing decisions still come from checking the board, joint, and product instructions. Keep any product choice specific to the task rather than assuming one tool or compound will suit every wall.
How Do You Make a Final Walk-Through Before Priming?
A deliberate walk-through catches small problems while they are still easy to fix. Begin at one side of the room and inspect each wall in a consistent direction. Check the field of every seam, its ends, intersections, corners, and fastener rows. Then look at the wall from the normal doorway or seating position. This two-part check combines close inspection with the view people will actually have in the room.
Use a portable work light at a shallow angle to locate ridges, hollows, scratches, and abrupt transitions. Move the light rather than relying on one fixed angle; a defect can disappear when the beam points directly at it. Avoid interpreting every shadow as a compound defect. Compare what you see with the board plane, the edge of the seam, and the surrounding surface. If necessary, use a straightedge gently to check a suspected high spot, but do not press hard enough to damage the finish.
Touch the surface lightly with a clean hand only when the compound is dry. Your fingers can detect an edge that your eyes miss, but dust on your hand can dirty the wall and pressure can mark soft material. Look for pinholes, visible tape, loose edges, exposed fasteners, and bubbles. Inspect the room's corners vertically and check whether each corner line remains straight. On an outside corner, confirm the bead is not loose or bent before assuming that a thin coat will hide it.
Sort findings into four practical categories: ready as is, scrape or sand a small high spot, apply a thin fill or feather coat, or repair an underlying problem. Make focused corrections rather than coating every seam again. Let any correction dry, sand lightly if needed, remove dust, and repeat the inspection in that spot. A final checklist might record each wall, ceiling, corner, opening, and patch, with a box for dry, bonded, blended, dust-free, and ready for primer.
After the walk-through, follow the primer directions for the exact surface and room conditions. Primer is part of the finishing system, not a diagnostic guarantee or a substitute for good joint work. If the primer reveals a small missed defect, correct it and prepare the spot as directed. Once the surface is sound, clean, and ready, proceed with the coating plan rather than continuing to sand a satisfactory joint without a reason.
How Do You Know Whether to DIY or Ask for Help?
A small, sound seam or straightforward patch may be manageable for a careful homeowner or first-time finisher who can follow product directions, work safely, and allow enough time for drying and correction. The learning curve is real: embedding tape without bubbles, keeping a butt joint flat, and feathering a broad transition all take practice. Start with a small, low-visibility area if the project permits, and assess the result after it dries rather than deciding while the compound is wet.
A larger room, many long seams, high ceilings, complicated openings, extensive damage, or a tight schedule can make the work more demanding. Working overhead or on stairs increases access challenges. Dust containment may also be important if the building is occupied or contains sensitive equipment and furnishings. Consider the time to protect the room, apply multiple coats, wait for drying, inspect, sand, clean, and prepare for primer, not only the minutes spent spreading compound.
Get qualified guidance when the board moves, damage suggests a structural or moisture issue, a crack keeps returning, or the work may involve materials you should not disturb. Also pause when you cannot identify a safe access method or suitable dust controls. Compound can make a surface look covered, but it does not resolve an unstable substrate, an active leak, or an unsafe work setup.
Before deciding, make a realistic list of the required tools and steps. Compare that list with the size and visibility of the job, your experience, and the amount of time you can leave the area undisturbed. For simple work, careful preparation and patient thin coats may be enough. For a complex finish or a problem whose cause is uncertain, asking an experienced professional to assess the condition can prevent repeated cosmetic repairs.
Call Integrity Supply about supplies for your project at +18669180300
Frequently Asked Questions
Can you tape drywall without joint compound?
For conventional paper tape, the tape is embedded in a bed of joint compound. Some self-adhesive mesh tapes attach to the board first, but they still require the compound system specified by the tape manufacturer. Check both products' instructions before beginning.
Should you wet paper drywall tape before applying it?
Do not wet tape unless its product instructions call for it. Paper tape is commonly embedded in wet compound. Unnecessary water can change handling and bonding conditions, while the correct preparation depends on the specific tape and compound directions.
Can you put a second coat over joint compound that is not fully dry?
Follow the compound's drying and recoating instructions. A surface that feels firm may still be damp, particularly in a deep fill or a humid room. Applying a new coat too early can interfere with a predictable finish, so allow the specified conditions to be met.
How wide should you feather a drywall joint?
There is no single width for every seam. Tapered factory joints can be blended over a narrower area than flat butt joints, which often need a wider, gradual transition. Let the joint shape, coat thickness, and inspection under normal and angled light guide the blend.
Do you need to sand between every coat?
Not necessarily. Remove obvious ridges or debris when needed, but avoid unnecessary sanding that damages tape or board paper. Many finishers scrape small high spots with a clean knife and sand lightly after the final coat. The product directions and the condition of the surface determine the appropriate sequence.
How do you handle drywall dust safely?
Reduce sanding by applying controlled coats, isolate and protect the work area, use suitable dust-control methods, and wear eye and respiratory protection appropriate to the task and applicable requirements. Clean with a method that does not unnecessarily put dust back into the air. Follow product safety information and any workplace procedures.
Can you use joint compound to fill a large gap between drywall sheets?
A large gap may need a repair or backing approach before ordinary tape and finishing coats. Do not bridge a gap with a thick mass of compound and assume it will remain sound. Follow the board and compound manufacturer's repair guidance, and correct loose or damaged edges first.
Can you apply joint compound in one coat?
A one-coat approach is not a reliable default for taped joints. Tape needs an appropriate bedding layer, and later coats build coverage and blend the seam. Some small repairs or products may have specific procedures, so follow the applicable instructions and inspect the result rather than assuming one pass will create a flat, bonded finish.
What is the difference between compound setting and drying?
Setting describes the hardening action of a setting-type product; drying involves moisture leaving the material. The two are not interchangeable, and set time does not automatically mean a deep fill is dry or ready for another coat. Use the product label for the required wait and recoat conditions.
Why does a drywall seam show after painting?
A seam may show because it is raised, too narrow, unevenly feathered, poorly bonded, or not prepared consistently with the surrounding surface. Side lighting and coating conditions can also make small variations easier to see. Inspect the wall before painting and correct the actual cause rather than applying extra paint over an unfinished joint.
Can you use mesh tape on an inside corner?
Tape systems vary, so check the manufacturer's directions for the exact tape and joint. Paper tape is commonly folded to reinforce an inside corner. Do not force a flat mesh product into a corner unless its instructions say it is suitable and specify the compatible compound.
What should you do if a finished seam cracks again?
Look for movement, loose board, a damaged edge, or another underlying cause. Remove or repair loose finishing material as needed and address the substrate before applying new tape and compound. If the cause is not clear or the crack is part of broader building damage, get qualified guidance rather than repeatedly coating it.
Need Help Choosing Drywall and Painting Supplies?
Choose tape, compound, knives, protection, and sanding supplies for the specific joint and product system. Check package directions, plan for drying time, and use dust controls before work begins.
Careful preparation, compatible materials, thin coats, and a patient final inspection help create a sound surface that is ready for primer and paint.