

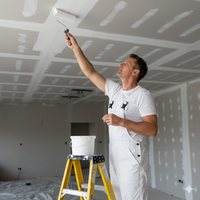





















Choosing masking paper is not just a matter of grabbing the widest roll on the shelf. The right masking paper width, dispenser, tape, and protection plan depend on the edge you need to cover. The material nearby, the kind of coating you are applying, and how the work area is arranged. A thoughtful setup can make masking more orderly and help reduce exposed surfaces, wasted paper, and interruptions while you paint.
What masking paper does, and what it does not do
Masking paper is a temporary covering used with suitable tape to shield selected areas during painting. Painters commonly use it to cover trim, window edges, fixtures, hardware, cabinets, and other surfaces that should not receive paint. It can also form a boundary between a work area and a nearby surface. In spray work, paper may be combined with plastic sheeting or drop cloths to cover larger areas, depending on the job.
Paper is only one part of a masking system. The tape makes the edge attachment; the paper covers the surface. And the painter still has to plan how the material overlaps, where the paint is directed, and how the masking is removed. A strip of paper does not guarantee that a surface is protected. Gaps, loose corners, weak adhesion, a poor overlap, or paint traveling around an exposed edge can defeat a careful-looking setup.
Masking is also not a substitute for preparing the surface or controlling the work area. Remove dust and loose debris where tape must adhere, check that the surface can tolerate the chosen tape, and follow the coating and equipment directions. Do not assume every paper, tape, dispenser, or masking accessory works with every paint, finish, substrate, or spray setup. Verify product labeling and test a small, inconspicuous area when surface sensitivity is uncertain.
Masking paper is useful for controlled coverage and defined edges. It is not a structural barrier, a drop cloth for every spill, or a guarantee against all overspray. Large or irregular surfaces may need another covering method, and floors often need a more durable protection plan than a narrow strip of paper. Think of the paper as one component in a planned sequence rather than a complete solution by itself.
The useful question is not simply whether paper belongs on a job. It is where paper is the convenient layer, how it will stay attached, and what other coverage the task calls for. A careful brush painter may use paper mainly to establish a crisp boundary and catch incidental contact. A crew spraying a room has to consider a wider area, access routes, airflow, and material movement. Both jobs can use masking paper, but the layout and extent of protection should not be identical.
What width of masking paper should you choose?
Width determines how much area one pass can cover and how easy it is to handle. A narrow roll is easier to position along a trim edge or around a small fixture. Wider paper can cover more area per pass, which may reduce the number of seams on a broad surface. But a wider sheet can be harder to control alone. May catch air or sag if it is not supported, and can become awkward around corners or in tight spaces.
Start by measuring the area to be covered rather than selecting a width by habit. Include the amount needed to reach beyond the immediate edge, overlap an adjoining sheet, and secure the paper without stretching it. When masking a long run, consider how the width will sit in relation to the surface and the direction of work. A paper edge that ends exactly at the area of concern leaves little room for movement, so plan a stable overlap and attachment point.
Think in terms of the entire path of the coating. The part that must stay clean may extend beyond the visible border, particularly if the tool moves, a roller approaches at an angle, or spray is involved. Estimate the protection area before you unroll the paper. Then add enough allowance to make the sheet manageable and connect it reliably to adjacent protection. Extra width is useful only when it can be positioned and secured properly.
Use narrow paper for edges and confined details
Narrow widths can be convenient for trim, small windows, narrow ledges, hardware, and short sections where a larger sheet would need excessive folding. They are usually easier to place accurately around changes in shape. If the area needs more coverage, attach a second run with a deliberate overlap rather than leaving a narrow slit between pieces. Press the tape edge down as appropriate for the surface and product directions.
A narrow strip may be insufficient when paint is being applied at an angle or when the work involves spray. The visible target is not always the full area that needs protection. Consider the direction of the spray, the painter's position, nearby openings, and whether the covering extends far enough beyond the masked edge. Use a wider piece or another covering material when the task calls for broader shielding.
Narrow paper can also help when one edge needs close control and the rest of the area will be covered separately. For example, a painter might attach a narrow strip along the trim and then extend coverage with another material farther across the nearby surface. This separates the precision task from the broad-coverage task. It can make a difficult corner easier to inspect because the edge strip can be placed first, without managing a large loose sheet at the same time.
When working around a small bracket, pipe, or fixture, avoid wrapping paper so tightly that it presses against a surface that must remain exposed or move. Cut manageable pieces, fold them where appropriate, and inspect the hidden side of the object. If a shape has several protrusions, a single cutout may leave a gap once the covering shifts. Multiple small pieces with controlled overlaps can be easier to check than one complicated piece.
Use medium widths for general-purpose masking
Medium-width paper is often a practical compromise for ordinary trim runs and manageable sections of wall, cabinetry, or fixtures. It can give enough coverage without making every piece difficult to position. It is useful where a painter wants to move steadily along a surface but still needs to turn corners and work around obstacles.
Do not treat a familiar width as universally suitable. A medium roll may cover the edge but not the surrounding area exposed to the paint path. For spraying, consider how far paint may travel beyond the immediate line and how the masking will be held in place. For brush or roller work, look at the risk of a loaded tool contacting the paper or the edge lifting during repeated passes.
A practical way to test a medium width is to hold a short, unfastened section in place and imagine the work movement. Can you attach the edge without reaching awkwardly? Does the sheet reach the likely contact or exposure area? Can you make a seam that remains away from the most exposed direction? If the answer is no, the width may be inconvenient even if it appears to cover enough when held flat.
For room-by-room work, medium paper can be a convenient repeatable choice for similar openings and trim sections, but do not let that convenience replace a quick survey. A room with a deep sill, nearby furniture, or a narrow passage may require a different layout from a clear wall. Adjust the plan for each section rather than forcing a standard piece to fit by folding it unpredictably.
Use wider paper when broad coverage is needed
Wider paper can be efficient for covering a larger area, such as a substantial section next to trim or a broad window assembly. Fewer runs can mean fewer joints to plan. That benefit matters only if the sheet remains controlled and attached. A wide sheet that droops, wrinkles, or pulls loose can take longer to correct than two narrower, well-secured pieces.
Before unrolling a broad sheet, make sure you have enough room to position it and that the starting edge can be secured. On a long run, work in manageable lengths if that gives you better control. Avoid pulling hard enough to distort the paper or stress the tape. If one person cannot place the sheet without dragging it across a delicate surface, ask for help or use narrower sections.
Check how a wide sheet behaves in the actual space. A roll may be simple to handle at waist height on an open wall, yet awkward when the painter reaches above a doorway or between fixed equipment. A broad sheet can also fold over itself while it is being placed. The practical width is the one that can be fed, supported, attached, and inspected without creating more handling risk than it removes.
For large coverage, consider whether paper is the right material for the full span. It may be more manageable to use paper for a clean perimeter and a separate suitable covering for the larger field. Avoid relying on an unsupported sheet to bridge a long distance or cover a surface exposed to movement. The joint between materials then becomes part of the inspection: make sure the overlap is deliberate and the covering does not open as work continues.
Plan overlaps and corners before cutting
When two pieces meet. Overlap them enough to avoid a gap and place the joint so that it is less exposed to the direction of paint travel when practical. Do not rely on a perfectly butted seam if a small shift could open it. On corners, form a neat fold or use separate pieces that overlap; inspect the point where the materials meet, because corners are common places for openings.
Cut each section with enough extra length to position it without pulling the attached edge away. If a run is too long to handle comfortably, divide it into sections and overlap them. Keep the paper flat where possible, and smooth out folds that could create an unintended opening. The best width is the one that gives appropriate coverage and can be installed securely for the conditions, not necessarily the widest option.
Make a quick sketch for a complicated opening before cutting. Mark the boundary to paint, the surfaces to cover, the direction the tool will approach from, and the places where one sheet meets another. The sketch need not be to scale. Its purpose is to reveal whether the chosen widths create narrow slivers, awkward seams, or a corner that cannot be attached without stretching the paper.
At an inside corner, the two planes may not meet in a perfectly clean, square line. Do not assume a folded sheet will seal every irregularity. Use the shape of the actual surface to decide whether to make a fold, apply adjoining pieces, or add a small patch. At an outside corner, make sure the material wraps far enough to remain attached on both sides. Inspect from both sides because a neat front view can hide an open edge behind the corner.
Match the masking plan to the paint method
The application method changes what needs protection. A brush or roller may create drips, splashes, or accidental contact. Spraying can expose a broader area to airborne paint and may send material beyond the immediate work edge. The masking plan should reflect the actual tool, coating, direction of application, room layout, and manufacturer's directions, not a generic assumption that one paper width handles every job.
Before choosing the paper layout, identify what kind of mistake is most likely. Is the concern an occasional brush touch, a roller cover bumping an adjacent surface, a drip falling from a tool, or spray reaching a much broader area? Then locate the likely path of that problem. A narrow strip may be entirely reasonable for one risk and inadequate for another. This task-based check avoids both under-covering and unhelpful excess.
Brush and roller work
For brush and roller work, focus on contact points, drips, and the path of the loaded tool. Mask along the edge that must remain clean, and cover surfaces likely to receive a touch or splash. Keep the paper secured so it does not shift when a brush or roller approaches the boundary. Where a roller cover may bump a ledge or trim, allow enough protection beyond the edge to account for ordinary movement.
Paper may work alongside a roller cover and other painting tools, but choose each item for the surface and coating involved. Integrity Supply's product listing for a roller cover is one example of a painting tool to consider as part of a broader project supply list; the product page, not the masking plan, determines its specific details. Paper does not prevent a tool from transferring paint if it is overloaded or handled carelessly.
With a brush, examine the distance between the paint line and the paper. A brush can flex, and a painter may adjust the angle when reaching into a corner. Leave enough room that the bristles do not keep catching the edge of the masking. If the tape line is the finished boundary, set it carefully and avoid flooding the edge with coating. The paper catches incidental contact; it does not replace controlled brush technique.
With a roller, the risk can change along the same wall. A roller may track close to a baseboard at the lower section, while an extension pole changes the painter's control overhead. Look at the movement path, including where the roller starts and stops. A sheet that is secure when untouched might be nudged repeatedly by a tool handle or sleeve. Position the covering so routine movement will not peel its attachment.
For a small repair or touch-up, extensive paper coverage may be unnecessary, but a small task still benefits from a deliberate edge. Place a modest piece where it catches the likely contact and make sure its corners lie flat. Tiny scraps can be difficult to hold and may curl; a piece large enough to grasp and inspect may be easier to control. Remove loose scraps from the floor so they do not stick to wet paint or create a slipping hazard.
Spray application
For spray work, think beyond the line being painted. Identify adjacent surfaces that may be exposed to overspray, including floors, windows, doors, fixtures, and items across the room. Cover larger surfaces with appropriate masking materials and use paper for edges or sections that suit its size and handling characteristics. Tape joints and corners deliberately, then inspect the whole perimeter before spraying.
Spray equipment, coating, pressure, distance, ventilation, and jobsite conditions all affect how the work should be conducted. Follow equipment and coating instructions and applicable safety requirements. Do not assume that a piece of paper will contain paint under all conditions or that any tape will stay attached to any substrate. If the job has unusual surfaces, high-value finishes, or complex geometry, plan a test and ask a knowledgeable supplier or the product manufacturer about material suitability.
Where paint could travel around an edge, increase coverage or change the barrier arrangement rather than expecting a narrow strip to do more than it can. Lay out a clean path for the sprayer and hose, and keep the covering from becoming a trip or snag hazard. After setup, look from different positions in the room. A gap that is hard to see straight on may be obvious from the direction the paint will be applied.
Start the spray assessment by marking the work zone and identifying surfaces that can be moved out of it. Moving a chair or small cabinet may be more reliable than wrapping every detail around it. For items that must remain, plan how the covering will stay in place and where its seams will fall. Consider the vertical and horizontal surfaces together: protecting a wall edge does not automatically protect a sill, floor, ceiling fixture, or object below it.
Think about airflow and the work sequence without making assumptions about a universal overspray distance. Site conditions and application methods differ. Follow the coating and equipment guidance, and use a conservative protection layout when the consequences of exposed paint would be difficult to correct. If the job changes direction or the sprayer will be used from another position, walk the perimeter again before continuing.
For an extended spray task, paper can be disturbed by hoses, movement, or repeated access. Arrange the work so that the operator does not have to step over or drag equipment across loose edges. If a masking section is repeatedly contacted, relocate the route or reinforce the arrangement using appropriate materials. Do not solve every movement problem by adding more tape to a surface that may not tolerate it; reassess both the path and the product instructions.
When a mixed protection system makes sense
Some jobs need paper for a precise edge, a broader sheet or film for a large nearby surface, and a drop cloth for the floor. That does not mean every project needs every material. Combine coverings when one item cannot reasonably protect the full area, when each material performs a different role, or when the work method exposes several planes. Make the transitions between materials easy to inspect and secure without creating trip hazards.
For example, a window opening may call for careful paper along the trim, a separate cover over the glass, and floor protection below the sill. The paper establishes an edge; the broader covering protects the main surface; and the floor material handles foot traffic and drips. Those roles are not interchangeable. Choose the material by the exposure and follow each product's directions rather than assuming that a single roll can serve as trim protection. A floor runner, and a full-room barrier.
At a cabinet or built-in unit, start by distinguishing faces, edges, hardware, and moving components. A cover across a large face may be easy to apply, but drawers, hinges, handles, and openings still require thoughtful treatment. Decide whether doors or removable components can be taken out safely, and avoid obstructing anything that must remain operable. A layered plan can provide a clean border without wrapping every part in a single oversized sheet.
When dissimilar materials meet, check that the overlap will not slide or curl as the job proceeds. Tape intended for one substrate may not be appropriate on another. The edge attachment and the covering are separate choices: a paper width may be right while the selected tape is not. If compatibility is uncertain, verify product instructions and test a small, inconspicuous location when appropriate.
When should you use a masking paper dispenser?
A masking-paper dispenser can combine a paper roll and tape in a handheld format, helping a painter apply the materials together. Some setups make it easier to unroll, cut, and position paper in one sequence. Other painters prefer to apply tape first and attach paper afterward, especially where a detail or sensitive surface needs more careful placement. The right approach depends on the task, the dispenser design, user preference, and product instructions.
Before choosing a dispenser, check what roll width it accepts, how the roll is loaded. How the tape is held, and whether the cutting mechanism suits the way you work. Do not assume a dispenser accommodates every roll or tape size. Compare the tool's stated range with the paper and tape you plan to use. If details are unclear, confirm them with the manufacturer or seller before buying.
Also think about how the tool will be used at the actual work height and in the actual work area. A handheld device can reduce separate handling, but it still has to be supported and directed. A long combination of paper and tape may be harder to steer around a narrow window than short pieces applied by hand. For an overhead run, consider whether the loaded dispenser is comfortable to hold without overreaching. Fit, balance, feed, and access matter as much as the promise of faster application.
When a dispenser can help
- Long, repeated runs: A dispenser may help keep paper and tape together as you move along a straight edge.
- Multiple rooms or openings: A consistent setup can reduce the need to stop and assemble each short piece by hand.
- Working with a partner: One person can help guide or hold the paper while another controls the tool, if the arrangement is safe and manageable.
- Frequent masking tasks: A tool that fits the roll and tape used regularly may make preparation more repeatable.
- Predictable straight sections: A dispenser may be easier to control when the run has room for a steady feed and few abrupt changes.
- Repeated preparation: When a crew uses the same compatible materials, a familiar loading and cutting routine can make handoffs clearer.
Even in these situations, use the dispenser as a handling aid rather than as a substitute for planning. It cannot decide how wide the paper should be, whether the surface is suitable for the tape, or how much surrounding area needs protection. The user must still guide the roll, make deliberate overlaps, and inspect the finished edge. A fast pass that leaves a loose corner is not a successful shortcut.
When applying the materials separately may be better
Separate application can give more control around delicate trim, tight corners, irregular shapes, or surfaces where tape placement needs close attention. It may also be easier when the dispenser is too large for a confined location or when the tape and paper widths do not suit the tool. Some projects are simply too small to justify setting up a dispenser.
Take a moment to practice on a low-risk area before using a new dispenser on finished work. Load the roll as directed, check the cutting edge, and confirm that the paper feeds without tearing or pulling the tape unevenly. Keep fingers clear of blades and cutting parts. Store the tool safely and do not use it if a component is damaged or unstable.
Separate application can also help when the boundary needs to be established before the cover is attached. A painter may first align tape with a defined edge, inspect its placement from several angles, and then add paper in short sections. This process takes another handling step but makes it easier to correct the edge before a large sheet is attached. It may be worthwhile where the final appearance depends on a precise boundary or the surface is unfamiliar.
If the dispenser repeatedly tears paper, feeds tape unevenly, or requires awkward force, stop and check the loading and fit. Do not compensate by pulling harder or holding the paper near a blade. Confirm that the roll and tape match the tool's stated capacity and that no part is damaged. If the setup is incompatible, apply the materials separately or use a suitable tool rather than risking an uncontrolled sheet.
Set up and use a dispenser methodically
- Confirm fit. Check the roll width, core, and tape capacity against the dispenser information. Do not modify the tool to force a fit.
- Inspect the tool. Look for damage, loose parts, or an exposed cutting edge that could interfere with safe handling.
- Load according to directions. Keep hands clear of the cutter and feed path. Secure the roll so it turns smoothly.
- Test the feed. On a clear, low-risk section or away from a finished surface, verify that paper and tape advance as expected.
- Start with a manageable run. Attach the beginning securely, then guide the dispenser without twisting or stretching the paper.
- Stop before corners. End the run where you can control the transition, then make the corner or short return separately if that is more precise.
- Cut safely. Follow the tool instructions, keep fingers away from the cutting edge, and support the material so it does not snap back.
- Inspect the result. Check alignment, adhesion, seams, and paper condition before extending the method to the rest of the room.
If several people use the same dispenser, show them how it is loaded and where the cutting hazard is. A consistent method can reduce confusion, but each user should still make sure the material is appropriate for the surface and task. Put the tool down in a stable place when not in use; do not leave a blade or cutter where someone can brush against it.
Protect floors, furniture, and nearby surfaces
A good masking plan begins with a quick survey. Identify the surfaces that will be painted, the surfaces that must remain clean, and the route between them. Look at floors, baseboards, window glass, hardware, adjacent walls, furniture, and anything that could be brushed against while moving tools. For a multi-room or multi-crew job, note which areas are already prepared so that protection is not removed or disturbed before painting is complete.
Paper works well for some defined coverage, but broad floor protection may call for a different material or a combination of materials. Integrity Supply lists a drop cloth among its painting-related products; consult the product listing for its own specifications and determine whether it suits the surface and task. Do not treat a particular drop cloth or paper as interchangeable with every protective covering. Consider whether it needs to resist movement, absorb drips, or cover a specific area, and follow its labeling.
Move furniture out of the work zone where possible. If it cannot be moved, cover it fully and keep the covering from shifting. Protect outlets, switches, and fixtures in accordance with safe work practices; never let a covering create an electrical hazard or obscure a condition that must remain visible. Keep walkways clear and do not tape down a covering in a way that creates a raised edge likely to catch a foot.
For windows and doors, account for hinges, handles, tracks, and areas that need to remain usable. Avoid covering a moving part in a way that will make it difficult to open or could damage a finish during removal. If you are working in an occupied home or business, keep a clear route for occupants and clearly communicate which spaces are being worked on.
Walk the area before unrolling anything and make a simple protection map. Note the work boundary, fixed items, furniture that can move, floor routes, and the position of doors. Identify surfaces that will be touched repeatedly, because an open doorway or frequently used counter may be disturbed more than a quiet corner. This first walk-through helps distinguish what needs a durable covering from what only needs a neat edge.
Move removable items before masking if doing so is safe and practical. This can reduce the number of shapes to cover and leave a clearer path for painting. For heavy or attached objects, do not attempt a move that could injure someone or damage property. Cover what must remain in place, keeping the material clear of controls, ventilation openings, or components that have to remain accessible. Product directions and the conditions of the site should guide decisions around equipment and fixtures.
When covering furniture, secure the covering so it does not slide when a tool or person brushes it. Avoid pulling it tight in a way that puts stress on an attachment point or risks damaging a finish. Check the floor underneath the furniture as well as the top and sides. A covering can look complete from one angle while leaving feet, lower rails, or the floor around the item exposed.
Floors deserve their own assessment. Consider whether people will walk across the protection, whether wet paint or debris could be tracked, and whether a sheet might slide. Do not assume a thin paper strip is suitable for a broad, high-traffic area. Choose a covering appropriate to the job and follow its instructions. Keep edges as flat and predictable as possible, and inspect them again after tools, ladders, or hoses have been moved through the room.
For stairs, thresholds, and transitions between rooms, think about both coverage and movement. A covering that protects a tread but curls at its leading edge may create a hazard. Plan a secure transition, keep the path usable, and avoid leaving loose scraps where someone may step. If access must remain open, clearly coordinate who enters the area and when, especially while surfaces are wet or tools are in use.
At windows and doors, differentiate the frame from the glass and the hardware. Tape or paper should not make an essential latch inaccessible or obstruct a track that needs to remain clear. Do not cover a component if doing so would create a hazard or violate product directions. If the opening will be used during the job, plan how to maintain access without repeatedly peeling and reattaching masking material.
Set up masking paper in a reliable sequence
Working in a consistent sequence helps reveal gaps before paint is applied. Adjust these steps to the surface, product directions, and job conditions. The sequence also makes it easier to notice when the plan needs to change: preparation is not finished until the material is secure. The route is clear, and the coverage matches the actual tool and work direction.
- Review the work area. Identify the paint boundary, nearby surfaces, traffic routes, and any fragile or sensitive finishes. Decide which areas need paper and where broader protection is needed.
- Read the product information. Check the paper, tape, dispenser, coating, and equipment directions. Confirm any limits on surfaces or conditions instead of assuming compatibility.
- Prepare the surface. Make sure the area where tape will attach is clean and dry as appropriate for the surface and product instructions. Remove loose dust and debris without damaging the finish.
- Measure the coverage. Estimate the length and width for each section, allowing for overlap and a secure edge. Cut manageable pieces rather than struggling with an unwieldy sheet.
- Apply tape carefully. Place tape along the intended boundary without stretching it. Press the edge in a manner appropriate for the surface and tape directions. If you are unsure about a finish, test first.
- Attach the paper. Keep the sheet aligned, support it as you unroll, and avoid pulling it so tightly that it distorts or lifts the tape. Add additional sections with a clear overlap.
- Cover adjacent areas. Extend protection to surfaces exposed to the work method, especially around corners, openings, and the direction of spray. Use suitable larger coverings where paper alone is not adequate.
- Inspect the boundary. Check the full perimeter, seams, folds, and corners. Look for gaps, loose edges, wrinkles, and sections that could move when tools or people pass.
- Keep the path safe. Arrange hoses, tools, and coverings so they do not create avoidable trip, snag, or access problems. Keep exits and essential routes available.
- Recheck before painting. Confirm that surfaces are protected and the masking remains secure after setup and before opening or using the coating.
Do not rush the inspection simply because the paper looks straight from one position. Walk the area and view it from the expected application direction. Check beneath ledges and around corners. If the paper will be exposed to movement, airflow, or equipment hoses, consider how it may shift during work and make a correction before beginning.
For a long straight run, divide the work into sections that one person can control comfortably. Start each section from a reliable attachment point, keep the paper supported, and avoid allowing the free end to drag. At the join, check that the overlap remains closed when the paper hangs naturally. If the sheet springs away or pulls on the tape, stop and reposition it rather than relying on additional tension.
For a complex room, work in a sequence that preserves access. One possible order is to move items, cover the floor and large objects, establish detailed edges, then connect the wider protective areas. The exact order depends on the project; the important point is to avoid stepping on or disturbing completed sections unnecessarily. Mark or communicate areas that are ready so another person does not remove or shift their protection by mistake.
Use a deliberate inspection pattern: follow the perimeter once at normal standing height, then look closely at corners, seams, and low edges. View the protected area from the direction of application and from the opposite side. Check behind doors, below ledges, and around fixed objects. A second person can sometimes spot a gap that the installer overlooks, especially on a large or irregular job. Correct defects before painting.
During work, recheck the masking after any event that could disturb it: moving a ladder. Repositioning a hose, changing the application direction, opening a door, or moving a covered object. The original setup may no longer match the work conditions. If an edge comes loose or a seam opens, pause, contain the problem, and repair the coverage appropriately before continuing. Do not paint past an area that needs attention and assume it can be fixed later.
How to estimate paper before starting
Estimate by section instead of guessing one total roll length. Measure the straight runs, then add the returns around corners and openings. Count the number of pieces you expect to join and allow for overlaps. A simple list might separate window edges, door trim, baseboards, fixtures, and broad nearby surfaces. This inventory helps identify whether one roll width can handle the detail work or whether a second width would make the layout easier.
Do not treat a measured surface as the exact amount of paper needed. Each piece needs enough material to be held and attached, and joins use some length. Irregular geometry can require offcuts. At the same time, avoid cutting every piece far longer than necessary; excess paper can drag, fold, or create a trip hazard. Cut one test piece for a repeated feature, check its fit, and then use it as a guide for similar sections while still inspecting each one.
Keep usable offcuts only when they can be applied safely and cleanly. A small piece can be useful for a patch around a corner. But an offcut with paint, dust, a torn edge, or uncertain adhesion may be a poor choice. Store any material intended for later use away from moisture, dirt, and foot traffic. When in doubt, cut a fresh piece rather than creating an unreliable patch at a critical edge.
Choose paper, tape, and companion supplies as a system
Paper width is only one selection decision. Tape has to suit the surface and the intended removal, while any dispenser has to accept the roll and tape. Broader coverings should match the area and the movement expected. Think through how each item connects to the next: paper attaches to tape, adjacent sheets overlap, and the perimeter meets the surface. A mismatch at any connection can weaken the overall arrangement.
Check the stated purpose and limitations of each product. Surface sensitivity, the condition of an existing finish, exposure time, coating type, and work conditions can all matter. Product names or familiar appearances do not prove compatibility. If instructions do not resolve a question, ask the manufacturer or supplier with specific details about the substrate and task. Avoid turning a single successful use into a universal claim about all materials.
Supply planning can also include the tools and coatings used in the project. Integrity Supply's catalog spans painting, spraying, safety, hardware, and construction-related products, but an individual listing determines the specifications of that item. For example, a roller cover listing is relevant to a painting supply checklist; it does not establish a compatibility recommendation for a particular masking paper or paint. Check each product's own information before combining it with another item.
Build a small list for the actual job: paper widths, tape selected for the surface. An optional compatible dispenser, wider coverings, application tools, and safety items called for by the coating or worksite. Include cleanup materials and a plan for used coverings. For a crew, check whether enough of each item is available before the work area is opened. Running short midway can lead to improvised seams or an unprotected surface.
When planning for repeated work, keep notes about what was used and what needed adjustment. Record the surface type, application method, paper width, tape product, and any handling issue. Avoid recording only that a particular roll "worked"; note the conditions and limits. A setup that suited a clean, dry wall on one task may not be suitable on a delicate finish, a different coating, or a different exposure period.
Remove masking paper without damaging the finish
Removal is part of the masking plan, not an afterthought. The appropriate timing and technique depend on the tape, coating, surface, and product directions. There is no single removal schedule that is right for every paint or substrate. Follow the instructions for the products in use, and do not wait until paper becomes difficult to remove if the directions call for earlier removal.
Begin at an accessible end and pull slowly, keeping the material under control. Avoid yanking the paper away from the surface. If paint has bridged from the painted area onto the masking, use care at the boundary so removal does not tear the new finish. A suitable cutting tool may be needed to separate a paint bridge. But use it cautiously and only in a way that will not score the substrate or finished coating. Keep blades away from people and store them safely.
Watch for tape lifting paint or leaving residue. If either happens, stop and reassess rather than pulling harder. The problem may involve the surface condition, coating, adhesive, application, or removal timing. Test first when practical, and consult the relevant product instructions. Do not assume that a stronger pull or a different angle will be safe on every finish.
Gather the used paper and tape as you go so debris does not track through the work area. Dispose of materials in line with the coating and local waste instructions. If the paper is wet with paint or another product, follow that product's handling directions. Remove floor coverings carefully to avoid spilling debris or slipping on a loose sheet.
Plan the removal direction before beginning. If a long strip can be lifted from one end without dragging it across a newly painted area, use a controlled pull and support the free paper. If the sheet is large, have a second person help manage it so it does not fold onto wet work or brush against clean surfaces. Keep the material folded inward when practical to contain residue, but follow applicable handling directions for the coating involved.
Remove in sections when a continuous pull would be unwieldy. Shorter lengths are easier to control around corners and openings. Pause if the tape resists, the surface begins to lift, or the paper tears unexpectedly. Determine whether a paint bridge, a fold, or another issue is contributing. A careful pause is better than continuing with force and damaging a finish that masking was meant to protect.
Once the main paper is removed, inspect the protected surface and the painted boundary in good light. Look for transfer, residue, or places where coating may have slipped beneath the edge. Do not scrape or clean an unfamiliar finish aggressively. Use only a method compatible with the surface and coating, and follow their directions. If there is damage, document what happened and identify whether the tape, surface condition, timing, or setup may have played a role before repeating the same method.
Removal also provides useful feedback for the next job. Note whether the width was manageable, where the seams opened, whether a dispenser helped, and whether the material was easy to collect. If removal was difficult, do not assume the solution is always a different tape or earlier removal; verify product instructions and examine the circumstances. The goal is a repeatable, product-appropriate process, not an unsupported rule based on one experience.
Work safely while masking and painting
Masking can involve ladders, cutting tools, coatings, spray equipment, and materials spread across a walking surface. Use equipment as intended, keep work areas orderly, and follow applicable product and jobsite safety instructions. Wear protective equipment appropriate to the task and the coating. Do not treat paper as personal protective equipment or as a substitute for ventilation, respiratory protection, or other precautions required by the product and work conditions.
When working overhead, position yourself and any ladder or platform according to its instructions and safe-work practices. Do not overreach to apply a long strip. Move the ladder as needed, and have another person assist with long sheets when that makes the task safer. Keep blades pointed away from the body, use a stable cutting surface, and avoid cutting while the paper is under tension near your hand.
For spray work, follow the sprayer and coating instructions, maintain appropriate ventilation, and use the protective measures called for by the product and job. Keep masking materials away from heat sources or other hazards identified by the coating or equipment manufacturer. Do not block exits, alarms, or access to emergency equipment. Make sure paper and drop cloths do not obstruct a safe route through the site.
Read labels and safety information before work begins. If the material, substrate, or conditions are unfamiliar, pause and get product-specific guidance. A paper roll can look simple, but the coating, adhesive, and finished surface determine whether a given masking method is appropriate.
Manage blades and cutters deliberately. Use a stable surface for cutting and keep the free hand away from the cutting line. Do not cut toward the body or reach into a dispenser's feed path. Retract or cover blades and store tools when not in use. If a cutter is dull, damaged, or unstable, follow its product instructions instead of forcing it through paper or making an improvised repair.
Keep floor protection compatible with safe movement. Wrinkles, loose edges, scraps, and unsecured hoses can cause trips or slips. Check transitions and walkways after laying coverings, and again after equipment or furniture moves. Do not block exits or required access to emergency equipment. In an occupied building, tell people where work is underway and maintain a clear route that does not pass through an unsafe area.
Do not seal or cover equipment, vents, switches, or other items without confirming that the action is appropriate. Masking should not create an electrical or ventilation hazard. Follow product directions and applicable workplace rules, and ask a qualified person when the safe treatment of a fixture is uncertain. Keep children, pets, and people who are not involved in the work away from tools and uncured coatings.
For spray application, take the equipment and coating instructions seriously rather than assuming that masking materials reduce exposure. Use the ventilation and protective measures required for the actual product and setting. Do not position paper or other coverings near a hazard identified in the product information. If conditions change, such as ventilation being interrupted or an unexpected surface appearing, stop and reassess before continuing.
Common masking-paper mistakes to avoid
- Choosing width only by price or habit. A narrow roll may leave too much exposed area, while an unwieldy wide sheet may be difficult to secure. Match width to the surface, coverage, and handling conditions.
- Ignoring the paint method. A plan that may be adequate for careful brushwork might not cover the broader exposure associated with spraying. Consider how the tool will be used.
- Leaving seams and corners unchecked. Small gaps can undermine an otherwise complete cover. Inspect each joint and turn before painting.
- Assuming all tape suits every surface. Adhesion and removal can vary by tape, finish, and conditions. Check directions and test an inconspicuous spot if uncertain.
- Stretching paper or tape. Tension can make materials shift or lift. Position them without pulling harder than needed.
- Covering too little beyond the edge. Think about tool movement and the paint path, not just the exact line between two surfaces.
- Forgetting traffic and equipment. Hoses, ladders, and people can drag or dislodge paper. Plan routes and recheck the masking during work.
- Removing everything without checking the coating. Follow the directions for the tape and paint, and work carefully at the edge to reduce the chance of damage.
- Using masking to solve an unrelated problem. Paper cannot correct poor ventilation, an unstable ladder, an unsuitable coating, or unsafe equipment practices.
Some other errors are less obvious because the materials initially look neat. A sheet can hang flat but be attached only at a few points. A corner can look covered from the front while remaining open behind the edge. A roll can fit a dispenser but feed at an angle. An overlap can appear wide enough until the sheet shifts during a ladder move. Check how the setup behaves, not just how it looks immediately after application.
Another common mistake is to keep adding tape without diagnosing why a section will not stay in place. The substrate may be dusty, damp, textured, or otherwise unsuitable for the selected adhesive. The paper may be pulling under tension; or the material may be exposed to repeated contact. More tape is not automatically the right fix, particularly on a sensitive finish. Revisit the surface, product directions, and sheet layout, then select a corrective method that is appropriate.
Do not rely on a remembered setup without checking the details. A previous job may have used a different tape, coating, surface condition, or exposure period. Even when the room looks similar, a newly painted or delicate surface can change the decision. Verify the materials each time, particularly when the cost of a mistake is high or when the work method has changed.
Build a practical masking supply list
Before heading to the work area, list the materials by function. This helps prevent an incomplete plan in which the painter has paper but no suitable tape, or covers the trim but overlooks the floor. The list should reflect the actual project, the surface, and the application method.
- Masking paper: Select one or more widths that match the edges and surfaces to cover.
- Tape: Choose tape based on the substrate, coating, and product directions. Confirm that the dispenser can accept the intended tape if using one.
- Dispenser or cutting tool: Use a dispenser only when its roll and tape capacities match the materials and the tool can be handled safely.
- Broader coverings: Consider drop cloths or other appropriate coverings for floors, furniture, and large surfaces.
- Application tools: Include brushes, rollers, or spray equipment suitable for the job, with their required accessories.
- Safety equipment: Follow the coating, equipment, and worksite requirements for protective gear, ventilation, and safe access.
- Cleanup supplies: Plan how to collect used masking materials and manage paint-contaminated waste under applicable directions.
Professional painters may need to standardize the setup across a crew, but a standard should still allow for differences among projects. Record the paper widths and tape types that work for a particular recurring surface only after confirming the materials and process. For a new finish or unfamiliar coating, revisit the instructions rather than assuming a past setup automatically applies.
A useful supply list can be organized by work zone. For each room or section, identify the boundary, paper width, tape, broader coverings, application tool, and any special access issue. Add the quantity only after measuring the runs and accounting for joins. This approach makes it easier to see when a particular room needs different materials instead of discovering the difference after work starts.
For a contractor coordinating several crews, make the list readable and practical. Include the product names or identifying information needed to confirm compatibility. Not just descriptions like "blue tape" or "wide paper." Keep the list tied to a known surface and work method. A material that was appropriate for a durable painted trim may not be appropriate for a newly finished cabinet or another substrate.
Keep extra materials accessible without placing them in the work path. Rolls can be damaged by moisture, dirt, paint, or rough handling, so store them according to their product information and protect them from contamination. Keep cutting tools separate from paper rolls when that reduces the chance of accidental damage or injury. Return unused supplies to a clean, designated location after the task.
Include time for setup and removal in the project plan. Masking that is rushed because it was omitted from the schedule is more likely to be incomplete or unsafe. The plan should account for inspection, touch-ups to the masking, and careful collection of used material. A realistic schedule also makes it easier to stop when an unfamiliar surface or product needs additional guidance.
How to improve masking efficiency on a jobsite
Efficiency comes from reducing avoidable rework, not simply applying paper as quickly as possible. A few minutes spent planning can help a crew avoid walking back for missing widths, reopening a covered area, or stopping to repair a loose seam. Arrange the materials near the work without blocking a walkway. Group the masking steps by room or surface when that supports a clear sequence.
For larger projects, divide the work area into manageable zones. Decide who is responsible for masking each zone and who checks it before painting. Make sure each person understands which edges are paint boundaries and which surfaces must remain uncovered for access or operation. Use a brief handoff when another crew member begins work so that masking is not moved without being noticed.
Keep spare paper and tape accessible, but avoid leaving rolls where paint, moisture, dust, or foot traffic can damage them. A dispenser should be ready to use, loaded according to its directions, and stored in a predictable place. If a paper width repeatedly creates awkward waste or difficult handling, note that experience and adjust the next purchase for the relevant type of job. Do not convert one project's preference into a universal rule.
Inspect masking at natural pauses, such as a room change or before restarting after a break. Fix a loose edge promptly. If the work process changes, for example, the painter changes tools or begins working from a different direction, reconsider whether the existing coverage is still adequate. An efficient plan is one that stays practical as the job evolves.
Reduce unnecessary handling by laying out a route before the first piece is placed. Keep rolls and tools near enough to reach without crossing protected areas, but not in a place where they obstruct people or equipment. If the job involves several openings, group similar tasks only when moving between them will not disturb finished masking. An organized sequence limits backtracking and reduces the chance that someone steps on a loose edge.
Use a simple visual check rather than relying only on memory. A crew lead can mark a zone as ready after inspecting edges, seams, floor coverage, and access. That mark should mean the area was checked under the current work plan, not that it is guaranteed against every possible paint path. If the application method changes, repeat the check. Clear handoffs are especially useful when one person masks and another applies the coating.
Track recurring difficulties. If the same opening repeatedly requires multiple patches, consider whether a different width or sequence would be easier. If a dispenser works well on straight runs but not around corners, reserve it for the sections where it helps and use hand application elsewhere. Efficiency can come from combining methods intelligently instead of insisting on one tool for the entire project.
Waste reduction should not come at the cost of adequate protection. Reuse only clean, intact material when the product and situation allow it, and never place contaminated or damaged paper where it might transfer paint or leave a gap. A small amount of planned offcut use can be practical, while a patchwork of unsuitable scraps may increase the risk of rework. Evaluate the whole setup, including the time required to secure and inspect each seam.
After completing a job, make a brief note of what changed from the plan. Did the surface require more careful tape placement? Did a wide sheet become difficult to steer? Did foot traffic disturb the floor cover? These observations can improve the next estimate and supply list. Keep them specific to the conditions and avoid presenting them as universal product rules.
When to ask for product-specific guidance
Ask a supplier or manufacturer when the paper's width range, dispenser fit, tape suitability, or use on a particular surface is unclear. Have the relevant details available: the substrate, whether it is painted or unfinished, the coating being applied, the application method, and the conditions expected during use. Specific information makes it easier to identify what needs to be checked without assuming universal compatibility.
For a contractor buying for multiple crews, a useful conversation can start with the recurring work: typical trim or window dimensions. Whether painters spray or roll, the kinds of surfaces that need protection, and how the team prefers to apply paper. Then confirm actual product specifications and manufacturer guidance. Integrity Supply serves painting and jobsite supply needs, and its catalog includes painting tools and protective products. Product-level details should always be confirmed on the relevant listing or with the supplier.
DIY users can use the same approach. Bring a description or photo of the surface and explain what coating and tool will be used. If the surface is valuable, delicate, newly finished, or unfamiliar, do not experiment across a broad area. Test carefully in an inconspicuous spot where appropriate, and follow the product directions before continuing.
When comparing possible setups, describe the problem rather than requesting a generic "best" roll. Explain the width and length of the boundary, whether the area is horizontal or vertical. How the paint will be applied, what lies nearby, and whether the surface is sensitive. Ask what product specifications need to be checked, what tool fit is required, and whether the manufacturer gives restrictions. This keeps the advice tied to the job instead of an unsupported universal recommendation.
For a new dispenser, confirm how it accommodates the roll and tape and what cutting or safety features are provided. For tape, ask about the intended surface and removal directions, not merely whether it sticks. For paper, confirm the dimensions and intended application from its product information. A useful answer should identify what is known and what still needs testing on the actual surface.
Consider getting guidance before ordering supplies for an unusual or high-consequence project. Examples include delicate finishes, irregular assemblies, a large spray area, or a job where access must stay open. Product-specific details may change which combination is appropriate. The goal is not to delay every ordinary task, but to avoid guessing when the material or conditions are unfamiliar.
Integrity Supply is a long-established retail and wholesale source for painting, safety, hardware, and construction supplies. Its catalog spans roughly 70,000 products from 300 manufacturers, and not every item is stocked in-house. When discussing a supply need. Describe the project and verify the current product details and availability through the relevant listing or directly with the supplier rather than assuming every item has identical fit or use.
Need paper, tape, or companion supplies for a painting job? Browse the Painting collection, or call Integrity Supply at 866-918-0300 for product-specific guidance.
Frequently asked questions
What width of masking paper should I use?
Choose a width based on the surface dimensions, the coverage needed beyond the paint edge, the application method, and how easily you can position and secure the sheet. Narrow paper can suit small edges and confined spaces; wider paper can cover more area per run but may be harder to control. Measure the work and plan overlaps rather than relying on one width for every job.
Is a masking-paper dispenser necessary?
No. A dispenser may help with repeated or longer runs by feeding paper and tape together, but separate application can offer more control around small details or sensitive surfaces. Check that the dispenser accepts the chosen roll and tape, and use it according to its instructions. The task and the user's ability to handle the tool safely should guide the choice.
Can masking paper protect every surface during spray painting?
No covering method should be assumed to protect every surface under all spray conditions. Plan coverage for the direction and scope of the work. Protect larger nearby areas with materials suited to the task, secure seams and corners, and follow coating and equipment guidance. The right paper, tape, and broader covering depend on the product, substrate, and jobsite conditions.
Can I use the same tape on trim, glass, and walls?
Do not assume one tape is appropriate for every material or finish. Adhesion and removal can depend on the tape, substrate, coating, and conditions. Read the tape directions and test an inconspicuous area when you are unsure, especially on delicate or recently finished surfaces.
When should masking paper be removed?
Follow the directions for the tape and coating in use. Removal timing can vary, so there is no single schedule that applies to every job. Pull slowly and carefully, and take extra care where paint may have bridged the boundary. If the paper or tape begins to lift the finish, stop and reassess rather than pulling harder.
How much should two pieces of masking paper overlap?
There is no universal overlap measurement for every roll and surface. Join the sheets so a small shift will not reveal a gap, and place the seam with the expected paint path in mind where practical. Check that the overlap remains closed when the paper hangs naturally and after nearby tools or coverings are moved.
Should I use paper for floor protection?
It depends on the size of the area, the type of work, foot traffic, and the covering's stated use. A narrow strip may help protect an edge but may not be an appropriate broad floor covering. Choose materials intended for the exposure, follow their directions, and make sure they do not slide, curl, or obstruct a safe walkway.
Can I reuse leftover masking paper?
Use leftover material only if it is clean, intact, and suitable for the next task. Torn, dusty, damp, paint-contaminated, or distorted paper may be difficult to attach and can leave gaps. Do not reuse a scrap simply to avoid cutting a fresh piece if doing so makes the protection unreliable.
What should I do if tape lifts the surface?
Stop pulling and avoid applying more force. Check the tape and coating directions and consider the surface condition, application, and removal timing. If the finish is delicate or damage is occurring, seek product-specific guidance before continuing. Test an inconspicuous area when appropriate before using the same combination again.
Measure the area, choose manageable paper widths, confirm that your tape and dispenser suit the materials, and inspect every edge before painting. A clear protection plan makes masking easier to manage and helps you approach the job with the right supplies on hand.