

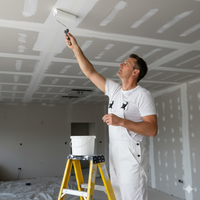






















When comparing joint compound vs spackle, start with the repair, not the product name: use joint compound for drywall seams and broad finishing work, and use spackle for small holes and dents that need a localized patch. Both can fill surface defects, but their workability, drying behavior, shrinkage, and finishing demands differ. The right choice depends on the size and shape of the repair, the condition of the wall, and the finish you need.
Call Integrity Supply at 866-918-0300 for help with repair supplies
Joint compound vs spackle: what is the difference?
Joint compound is made for joining and finishing gypsum drywall. It is used with paper or mesh tape over panel seams, and it can cover fastener depressions and be feathered across a wider area. Products may be ready-mixed or powdered for mixing with water. Formulas vary, so the package directions determine how to mix, apply, dry, and sand a particular compound.
Spackle is commonly chosen for small holes, shallow dents, and minor dings in a wall. It is often packaged ready to use and intended for localized repairs rather than taping long drywall seams. Some spackle formulas dry quickly; others allow more working time. The label is the authority for a product’s intended substrate, maximum depth, and finishing instructions.
People sometimes use the names loosely, and formulations are not identical across brands. Do not assume that every tub labeled “joint compound” or “spackle” has the same drying time, sandability, shrinkage, or repair-depth limit. Check whether the product is intended for interior drywall, what surface preparation it requires, whether it must be applied in coats, and when it can be sanded or painted.
The practical distinction is about the job the material is expected to perform. A drywall seam needs reinforcement, coverage, and a gradual transition across a long area. A small nail hole needs a small quantity of filler that can be pressed into a shallow defect. The names point toward typical uses, but the product instructions and the condition of the wall decide whether a specific material is suitable.
| Repair need | Usually the better starting point | Why | What to plan for |
|---|---|---|---|
| Small nail hole or shallow ding | Spackle | Designed for localized patching and often convenient for a small amount of material | Follow depth and drying guidance; a deeper divot may need another coat |
| Drywall panel seam | Joint compound with drywall tape | Compound beds and covers tape and can be feathered across the joint | Several thin coats and careful blending may be needed |
| Broad shallow repair or skim area | Joint compound | Its workability supports spreading and feathering over a wider area | Allow drying time and plan for blending and dust control |
| Deep hole or damaged drywall | Neither product alone is automatically enough | The board may need backing, a patch, or a repair kit before finishing | Stabilize the opening and use a compatible repair system |
| Loose or cracked taped seam | Repair the seam with suitable tape and compound | New filler over loose tape does not restore a stable joint | Remove unsound material and identify movement or moisture first |
How does patch size affect the choice?
Size is a useful first filter, but it is not the only one. A pinhole left by a small nail is different from a wide opening, a loose tape seam, or a dent that exposes damaged paper. Inspect the full defect, including soft edges, cracks, and surrounding paint, before opening a container. A hole’s depth, shape, stability, and location may matter as much as its width.
Small holes, dents, and shallow scratches
For a small, shallow defect, spackle is often convenient. Remove loose material, press a small amount into the opening, and draw the edge smooth with a putty knife or another suitable tool. A thin application is easier to control than a mound that must be sanded back. If the patch sinks as it dries or remains visibly low, apply another thin coat after the product allows it.
On a very small repair, the surrounding paint texture can matter as much as the filler. A smooth patch in a textured wall may stand out even when it is level. Match the surrounding surface as closely as possible, and check the repair from different angles after it dries. Avoid spreading material farther than needed, but feather the edges enough that they do not form a sharp ridge.
Small does not always mean simple. Several pinholes clustered together may form one broader damaged area, and a small hole with crumbling edges may not hold filler. A tiny puncture in sound drywall can usually be filled locally; a hole with a crushed center or torn paper may need a little more preparation. Treat the damaged perimeter, not just the visible opening, as part of the repair.
For a shallow scratch, first decide whether it is only in the paint film or cuts into the wall surface. Filler is useful when the scratch creates a depression, but it is not necessary to bury sound paint simply to cover a surface mark. If filling is appropriate, draw the tool along the scratch, scrape away excess, and let the material dry fully before deciding whether a second pass is needed. A thin repair usually blends more easily than a raised strip.
Seams, tape, and wider areas
For seams between drywall panels, joint compound is the normal material because the work includes embedding and covering tape, then building and blending the joint. A long seam is not just a large hole. It needs a continuous, stable reinforcement and a smooth transition so the joint does not show as a raised strip after painting. Spackle alone is not a substitute for the tape-and-compound system specified for a drywall joint.
Joint compound can also be spread across a wider shallow repair or a broad skim area. Use a wide knife where appropriate and extend each coat beyond the previous edge. The purpose is to reduce the height change gradually, not to leave a thick ridge at the repair boundary. Wider work requires more surface preparation and patience than filling one small ding.
When deciding whether a dent is “wide,” consider how far the surface must be feathered to disappear. A shallow depression several inches across can be harder to blend than a narrow, deeper hole, because a narrow mound may create a visible hump. A wider knife and a sequence of thin applications can help make the change in plane gradual. This is one reason a product that is manageable for a spot repair may not be the most comfortable choice for a broad finishing task.
Large or deep damage
A large opening, crushed drywall, or damaged corner may need a patch or replacement section before finishing compound is applied. Filling a void with a thick mass of ordinary patching material can lead to a weak or uneven repair, and the product instructions may limit how deeply it can be used. Determine whether the board is firm and whether the opening needs support. If there is recurring moisture, movement, or a leak, address that cause before hiding the mark with filler.
For a deep repair, select a system whose directions cover the opening size and substrate. The steps might include cutting back loose board, adding backing, fitting a drywall patch, taping joints, and applying finishing coats. The materials and sequence depend on the damage and product directions. Do not treat “spackle” and “joint compound” as interchangeable solutions for every hole.
Also look at the shape of the damage. A clean, small hole with firm edges behaves differently from a jagged opening with torn paper and broken gypsum. A hole near a corner or edge may need a repair method that restores support and a straight profile, rather than a surface filler alone. If the area is soft, damp, or repeatedly cracking, pause cosmetic work and identify the underlying issue. New layers cannot make unstable material sound.
Which material is easier to work with?
Spackle is often chosen for convenience on small repairs: take out a small quantity, fill the defect, and put the container away according to its storage directions. That does not mean every spackle is automatically easier to sand or more forgiving. A fast-setting product can give you less time to smooth it, and an overfilled patch still takes work to level. Ease depends on the formula, tool, repair geometry, and the user’s experience.
Joint compound is suited to spreading over broader areas and feathering seams. That wider working area gives you room to blend, but it also means you must control the knife angle, pressure, and amount of material. Too little pressure can leave a heavy edge; too much can scrape away material or expose tape. If you have not worked with the product before, practice on a scrap piece of drywall and follow the container’s instructions.
Ready-mixed and powder products also handle differently. Ready-mixed compound avoids measuring and mixing, though it may need stirring if the label says so. Powdered compound must be mixed as directed and has a limited usable period once prepared, depending on its type. Do not add water or combine products unless the manufacturer’s instructions allow it. Clean tools promptly using the method specified on the label.
Tool size affects control. A narrow putty knife lets you work within a small dent without covering a large part of the wall. A wider taping knife can make a seam’s transition more gradual, but it needs a larger clear area to move through. If a tool is awkward to hold or its edge is damaged, it can leave lines that are difficult to correct later. Keep the blade clean and inspect its edge before starting.
Workability also includes how long the material stays workable after application. A slower product may allow more adjustment, while a fast-setting or fast-drying formula rewards careful preparation and small batches. Do not mix more powder than you can apply within the product’s usable period. For a first attempt, prepare the work area, tools, tape, and dust protection before opening or mixing material so the working time is spent on the repair rather than setup.
How do drying time and shrinkage compare?
Drying time is product-specific. Some compounds harden through a chemical setting process; others dry as moisture leaves the material. A label may distinguish set time from the time needed before sanding or painting. Those are not always the same milestone. Temperature, humidity, coat thickness, airflow, and the surface can affect drying, so a printed time is a guide for stated conditions, not a reason to coat or paint a visibly damp patch.
Some spackle products are formulated for quick small repairs, while conventional joint compound used in multiple coats may need longer between applications. The name alone does not tell you how soon a repair is ready. Read the product information, apply layers within the stated thickness, and wait until the material is dry or set as instructed before sanding or recoating. A fan or heat source should not be used in a way that violates product directions or dries the surface unevenly.
Shrinkage is another reason thin coats matter. As moisture leaves a material, a filled spot can settle slightly. If the patch is too deep for one application, a low spot may appear after drying. Build the repair in layers when required rather than trying to fill the entire depth at once. Joint compound used over a seam is also applied in successive coats, each feathered to blend the joint. The right number of coats depends on the repair and instructions; do not assume one pass will leave every surface ready for paint.
If a patch cracks, pulls away, or repeatedly sinks, investigate the cause instead of adding layers indefinitely. Loose substrate, excess depth, movement, poor surface preparation, or applying another layer too soon can undermine the result. Remove material that is no longer sound and follow a suitable repair method for the underlying condition.
Set time is not the same as finishing readiness
A compound can feel firm while still needing more time before sanding or receiving another coat. Conversely, a product designed to set chemically may become firm according to its instructions without relying only on evaporation. Read the directions for the specific milestone you need: mixing, usable time, setting, recoating, sanding, or painting. These terms describe different stages. A fast set does not automatically mean the surface is ready for every finishing step.
Use the product’s stated conditions as a planning aid, then inspect the repair. Thick material, a cool room, limited airflow, or humid conditions can affect drying for products that rely on moisture loss. Avoid sealing in damp material beneath paint or another coat. If a job has a schedule, plan around the longest relevant step rather than assuming every patch can be completed and painted in one visit.
Why does a patch sink?
A shallow low spot after drying may simply mean the material settled or the first coat did not fill the full depression. In that case, a compatible additional thin coat may be appropriate once the label permits it. A repeated or worsening depression calls for a closer inspection. The opening may be deeper than the material is intended to fill in one pass, the substrate may be loose, or the wall may be moving.
Do not solve every low spot by spreading a thick layer over it. That can create a wide hump, extend drying time, and make sanding harder. Check the plane with a clean knife or straightedge without gouging the material. Add only enough material to correct the low area, feather the boundary, and reassess after drying. When the manufacturer specifies layers or a depth limit, follow those limits instead of relying on appearance alone.
How should you prepare and apply each material?
A neat finish begins before filler touches the wall. Protect nearby surfaces, remove loose fragments, and make sure the area is suitable for the chosen product. Keep dust and debris out of the repair. If the wall has peeling paint, powdery residue, or damaged paper, determine whether those layers need careful removal or another treatment first. Do not cover an unstable surface and expect the patch to stay sound.
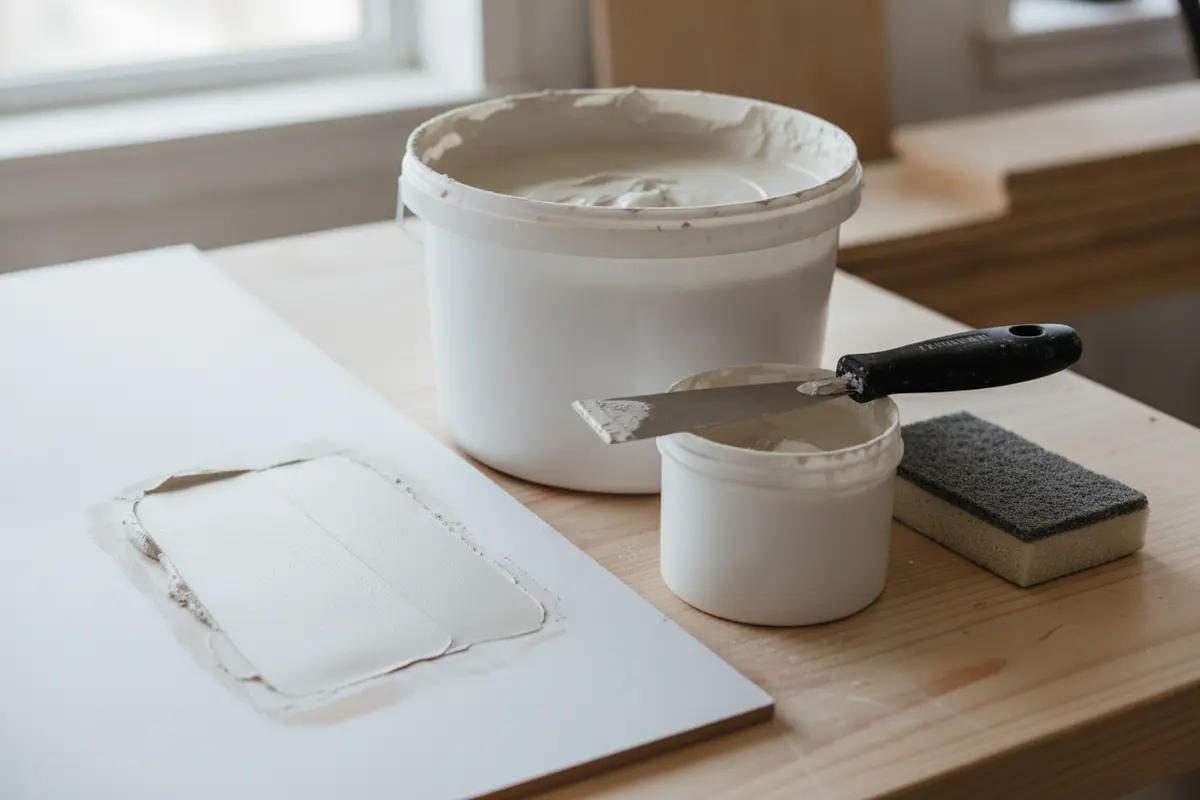
Set out the material, a clean tool, a way to protect the floor, and any tape or patch components before starting. Work in good light so ridges and voids are easier to see. Keep the container closed when you are not taking material from it, and avoid returning contaminated material to the container. Follow the label for temperature, ventilation, cleanup, and storage. A little preparation reduces the temptation to rush a coat because a tool or supply is missing.
Steps for a small spackle repair
- Inspect the spot. Confirm it is a shallow, stable defect rather than a hole that needs backing or a drywall patch. Remove loose paint or gypsum without enlarging the damage unnecessarily.
- Prepare the surface. Follow the product label for cleaning and any primer or preparation requirements. Let the area dry if cleaning introduces moisture.
- Load a small amount. Use a clean putty knife or tool appropriate to the repair. Press material into the defect, then draw the blade across it to remove excess.
- Let it dry as directed. Do not judge readiness from the surface alone if the manufacturer gives specific drying or recoat guidance.
- Check and refine. If the patch has settled or is still low, apply a second thin coat when allowed. Once ready, sand lightly only as directed, then remove dust before finishing.
- Blend and paint. Use a compatible primer when the product or paint system calls for it. Reproduce nearby texture if needed, then apply the finish coating after the repair is ready.
Steps for a taped drywall seam
- Check the joint. Make sure the panels are secure and the seam is appropriate for taping. Remove loose material and address damaged edges before finishing.
- Apply a bedding coat. Spread joint compound along the seam in the amount and width needed to embed the chosen drywall tape. Follow tape and compound directions; paper and mesh products may have different installation requirements.
- Embed the tape. Center it over the joint and press it into the wet compound, working out excess without leaving dry gaps or wrinkles. Avoid scraping so hard that the tape loses its bedding.
- Cover the tape. After the first layer is ready for the next step, apply a broader coat. Feather the edges and keep the center smooth enough to avoid unnecessary buildup.
- Build and blend. Apply additional thin coats as needed, extending the feathered area to make the transition less visible. Allow each coat to dry or set according to its instructions.
- Sand and inspect. When the final coat is ready, sand carefully to remove ridges without cutting through tape or surrounding paper. Use appropriate dust protection and contain dust as much as practical.
- Prepare for paint. Remove sanding dust and prime or seal the repair when appropriate for the compound and paint system. Inspect under the lighting that will be used in the room; side lighting can reveal ridges that are hard to see straight on.
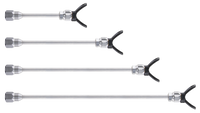
Use the right size tool for the job and keep its edge clean. A narrow knife is useful for a small spot; wider knives are commonly used to feather a seam. For related surface-preparation work, a paint spatula is one item to compare for suitable scraping or handling tasks, but choose a tool based on its actual intended use and the repair at hand. Protect the floor and nearby furnishings with an appropriate drop cloth before sanding or finishing work. You can also review the Painting collection for related prep and finishing supplies; confirm each item's intended use on its product page and label.
How do you handle common repair types?
Filling a nail or screw hole
First determine whether the fastener is still in place and whether it is set correctly. A protruding fastener can telegraph through a patch, while a loose one can move and cause the finish to fail. Do not simply bury a moving fastener. If it is a small, stable hole left after removal, clear loose fragments and use a small amount of a product labeled for that repair. Scrape the surface flush rather than leaving a mound.
For a fastener depression in drywall that is part of new construction or a larger finishing job, joint compound is commonly used as part of the drywall finishing process. The spot may take more than one thin pass because material can settle. Keep the fill localized at first, then make the final coat just wide enough to blend. After it dries, examine it from the side and under the room’s normal light. A shadow can reveal a ridge that is not obvious when viewed straight on.
Repairing a small dent or gouge
Look at the edge of the dent before filling it. If paint is loose, remove only the unsound portion and avoid tearing sound drywall paper. A shallow depression with a firm base can often be filled locally. A gouge with broken gypsum may need more than a surface skim, particularly if the material around it moves when lightly touched. The filler should bond to a sound surface, not to flakes that will detach later.
For a broad, shallow dent, place a small amount on the knife and pull across the low area. Use pressure to remove excess from the high edges, then widen the feather gradually. Avoid trying to make the first coat perfect. The first coat fills and establishes the repair; a later, thinner pass can correct minor lows after the material is ready. Keep the patch boundary soft rather than creating a rectangular outline.
Repairing a torn drywall paper face
Torn paper needs careful handling because loose fibers and exposed paper can complicate finishing. Do not keep picking at sound paper or cover loose layers without preparing them. Remove material that is clearly detached and follow the chosen repair product’s directions for preparation and sealing if needed. The appropriate sequence can depend on how much paper is damaged and which product system is being used.
Once the substrate is stable and prepared, apply the compatible compound in controlled coats. If the damage is extensive, a patching system or more involved repair may be appropriate. The aim is to avoid trapping loose paper beneath a heavy layer, where it may bubble or pull away. Let each stage reach the condition specified by the manufacturer before building over it.
Repairing a crack or a seam that has opened
A line that looks like a crack may be a surface scratch, a moving joint, a failed tape seam, or a sign of another condition. Inspect whether the line follows a panel joint, whether the tape is loose, whether the crack changes with pressure, and whether there is staining or moisture. Cosmetic filler over a joint that continues to move is likely to crack again. Address the cause and choose a repair sequence appropriate for a stable drywall joint.
Where tape is loose or damaged, remove unsound portions and rebuild the joint with compatible tape and compound according to product directions. Do not put spackle over the crack as a shortcut when the joint needs reinforcement. A narrow repair may still require feathering well beyond the damaged line so the finished seam does not stand proud. If the seam has recurring movement or the wall is otherwise unstable, a cosmetic patch cannot correct that structural issue.
Repairing a corner or an edge
Edges and outside corners receive more contact than a flat wall, so a dent there may involve a corner bead or a broken edge rather than a simple surface divot. Determine whether the underlying corner component is straight and secure. If it is bent or loose, spreading filler over it will not restore a clean, durable profile. The repair may require replacing or securing the damaged component before applying finishing coats.
For a sound corner with a small surface defect, use a product and method intended for that finishing task. Keep the edge straight, apply thin material, and check both faces of the corner. A knife held at an inconsistent angle can round the profile or leave a ridge on one side. Let the repair dry as directed and sand gently without wearing through the surrounding surface.
What finishing steps help the repair disappear?
Filling the hole is only one part of a finished repair. Sanding too aggressively can expose tape, damage drywall paper, or create a hollow around the patch. Sand only when the material is ready and use controlled strokes. For a small patch, stop when the area is level and the edge blends; do not keep sanding simply to make the entire wall feel perfectly smooth if the surrounding surface has texture.
Remove dust before priming or painting. A patch may absorb paint differently from the surrounding painted wall, so a primer or sealer can help create a more consistent base when the product and coating instructions recommend it. A fresh patch can still show because of sheen, color, texture, or lighting. For a uniform appearance, the finish may need to extend beyond the repair, or the wall may need repainting more broadly. Consider a sample or inconspicuous test area if you are unsure how the existing paint will blend.
Match texture before the final paint coat, not after. The goal is to reproduce the nearby pattern and scale, whether the wall is smooth or textured. Use a compatible texture method and allow it to dry as directed. A patch that is technically filled but has a different surface profile can remain noticeable even when its color matches.
How to inspect a patch before painting
Look at the repair straight on and from an angle. Normal room light shows the general appearance; light grazing across the wall can expose ridges and shallow depressions. Run a clean hand lightly over the area only when the material is fully ready, taking care not to damage the surface. If you find a ridge, correct it with careful sanding or a thin feather coat as appropriate. If you find a low spot, add material only after confirming the surface is sound and ready for another layer.
Do not use paint to conceal a surface that is still uneven. Paint can change the color and sheen, but it does not flatten a ridge or fill a depression. Complete the surface work first, remove dust, and follow the paint and primer instructions. If the original wall has texture or a distinct finish, make a small test to see whether the repair needs texture matching or broader repainting to blend.
Why does a smooth repair still show?
A patch can be flat and still be visible because its texture, sheen, color, or absorption differs from the surrounding wall. New paint applied only to the patch may dry with a different sheen or create a noticeable boundary. A textured wall adds another variable: even a close color match may not hide a smooth spot. Think of leveling, texture matching, priming, and paint blending as separate steps rather than expecting filler to solve all four.
For a small repair, matching the original paint may be enough, but the result depends on the age and condition of the existing coating and the way it was applied. If a test shows a clear edge, extending the paint farther or repainting the wall may produce a more uniform appearance. Do not add extra filler to solve a paint-color or sheen mismatch; first identify which part of the finish is different.
How do the options compare for time, effort, and finish?
There is no universal winner because each material fits a different task. A small spot often rewards convenience and a small quantity of ready-to-use filler. A seam calls for a coordinated process involving tape, compound, drying, additional coats, and finishing. A wide area can demand more blending regardless of which product is used. The comparisons below are planning considerations, not fixed product specifications.
| Factor | Spackle for a small patch | Joint compound for drywall finishing | Practical check |
|---|---|---|---|
| Typical scope | Small holes, dents, and localized surface defects when allowed by the label | Taped seams, fastener finishing, and broader drywall finishing tasks | Match the intended use and maximum repair depth on the package |
| Amount needed | Often a small amount for one spot | May be more practical for a series of seams or a larger finishing area | Estimate the whole job rather than choosing by container size alone |
| Working approach | Press into a defect and scrape off excess | Spread, embed tape where appropriate, build coats, and feather edges | Choose tools and method for the shape of the repair |
| Drying plan | Formula-specific; some are marketed for quick repairs | Varies by formula and coat; multiple stages may be needed | Separate set, recoat, sanding, and paint readiness |
| Large or deep damage | Not automatically suitable as a thick fill | May be part of the finish after a patch or support is installed | Stabilize the board and follow a suitable repair system |
| Final appearance | Needs smooth blending and texture matching as needed | Needs feathered coats, controlled sanding, and surface preparation | Inspect from different angles before priming and painting |
Think about total labor, not just the time needed to apply the first coat. A small patch may be applied quickly but still require drying, a second application, sanding, dust removal, and paint preparation. A seam may need multiple coats and longer intervals, but the compound is designed for that finishing sequence. For either option, skipping a required drying or preparation step can turn a fast start into a repair that needs to be redone.
Think about waste as well. Opening a large container for one tiny hole may be unnecessary if a suitable small package is available, while working through many seams with a small patch container can be inefficient. Do not select a product only because the container looks convenient. Confirm it is appropriate for the work and can be stored or disposed of as directed after the job.
What common mistakes should you avoid?
- Using the product name as the only selection rule. Check the intended use, depth, drying instructions, substrate, and compatibility on the package.
- Filling a large hole with one thick coat. Deep damage may need a patch or support, and many products call for multiple thin layers.
- Skipping tape on a seam that needs it. Joint compound alone does not replace the reinforcing role of drywall tape in a taped joint.
- Painting before the repair is ready. Trapped moisture or unfinished compound can affect the appearance and durability of the finish.
- Leaving a raised perimeter. Feather the material outward and inspect from more than one angle.
- Sanding without dust precautions. Drywall sanding creates dust. Protect the work area and use suitable protective measures; follow product and tool guidance.
- Ignoring the cause of recurring damage. Moisture, movement, or a loose panel needs attention before cosmetic filling.
- Applying material over a dirty or unstable surface. Dust, loose paint, and crumbling edges can interfere with a sound repair.
- Mixing or modifying a product by guesswork. Use only the preparation method and additions the manufacturer permits.
- Expecting a color match from filler. Filler repairs the surface; primer, texture, and paint determine the final appearance.
How can you plan a repair across a room or jobsite?
A single hole is a small task. A room with many fastener marks, a few damaged corners, and several taped seams is a sequence of different tasks. Walk the area before starting and group the repairs by type. Mark small holes, broader dents, damaged paper, and seams separately. This prevents the common mistake of treating every mark as if it were the same size, depth, and material problem.
Make a simple repair list. Note the location, approximate dimensions, whether the drywall feels firm, and whether the area has texture or paint that must be matched. You do not need elaborate measurements for every small spot, but recording which repairs require tape or a patch helps with planning. If several workers are involved, agree on the product system and sequence so one person does not apply a different material over another person’s unfinished coat.
Plan work around drying and access. A crew may be able to prepare several spots in one pass, then return for the next coat after the specified interval. Keep the area protected while material dries. Avoid scheduling sanding or painting based only on a desired finish time; the compound, environment, repair depth, and product directions govern the actual sequence. Allow enough time for inspection and corrections.
For a job involving a large number of small patches, use a consistent method: inspect, remove loose material, apply a suitable filler, scrape flush, let dry, and check each patch before moving to finish work. Consistency makes it easier to spot an outlier, such as a hole that settled or a spot that still moves. A broader seam or damaged section should be handled as its own repair instead of being rushed through the small-hole process.
Contractors coordinating several rooms can also reduce interruptions by staging compatible tools and surface protection where they are needed. A paint spatula may be relevant for appropriate scraping or handling tasks, while a durable drop cloth can help protect nearby surfaces during preparation and finishing. Review the product’s intended use before choosing any tool or covering, and keep dusty work separated from clean materials and finished coatings.
Joint compound vs spackle: how do you choose?
Use this short decision process before starting:
- Is it a panel seam? Choose a drywall taping and finishing method with joint compound and appropriate tape.
- Is it a small, shallow hole or dent? Spackle is often a practical choice if its label allows that repair.
- Is it broad, deep, or unstable? Work out whether you need a patch, backing, or a multi-step repair system rather than either filler alone.
- Does the package cover the substrate and depth? If not, pick a product intended for the job.
- Does the repair need reinforcement? A seam or recurring crack may need tape and a stable joint, not just surface filler.
- Can you wait for the required drying and finishing steps? Choose a product and repair plan that fit the available time without skipping directions.
- What finish must match? Account for wall texture, lighting, primer, and paint, not only the repair material.
For a contractor coordinating more than one room or crew, plan materials around the whole sequence: patch, tape, coat, dry, sand, clean, prime, and paint. A quick spot repair and a taped seam can use different products and tools even when both are on the same wall. Keeping the tasks distinct helps prevent a small patching tub from becoming a substitute for the materials needed to finish drywall joints properly.
How should you evaluate the wall before buying material?
Before selecting a filler, spend a minute identifying what the wall is made of and what has happened to it. This article focuses on interior gypsum drywall, but some walls have plaster, masonry, wood, or a mixture of materials. A product intended for drywall may not be the right option for another substrate. Check the label for the surface it supports, and do not assume that a familiar repair product works identically on every wall.
Look for more than the opening itself. Is the surface firmly attached? Is paint lifting around the spot? Does the wall feel damp, soft, or crumbly? Does the damage sit at a joint, corner, fastener, or area that receives repeated contact? Is there a stain that suggests water? These observations can change the repair plan. Filling a defect without answering them can conceal a problem instead of repairing it.
Gently test only what is safe and appropriate. You can look closely and lightly touch an area, but do not press hard enough to enlarge damage or puncture a wall. If you suspect hidden wiring, plumbing, or another hazard, stop before cutting or driving fasteners. A cosmetic repair guide cannot identify concealed building conditions. Use a qualified professional when the damage or its cause is beyond a simple surface repair.
Decide whether the goal is a quick functional patch or a finish that must disappear under close inspection. A utility room, storage space, or surface scheduled for broader renovation may have a different finish expectation than a prominent wall under strong light. The material choice still needs to be appropriate, but the required level of feathering, texture matching, and repainting depends on the desired appearance and existing surface.
Make a short inspection checklist
- Substrate: Confirm whether the repair is on drywall and that the product label covers it.
- Stability: Identify loose board, moving fasteners, peeling paint, or detached tape.
- Extent: Note the opening’s width, depth, and the amount of surrounding damage.
- Cause: Look for signs of moisture, repeated impact, or movement that must be corrected first.
- Finish: Note the wall’s texture, sheen, lighting, and repainting needs.
- Process: Check whether the job needs tape, backing, multiple coats, or specific preparation.
This simple inspection can prevent choosing a container based only on what is already in the garage. If the damage clearly exceeds the product’s stated limits, use an appropriate repair system instead. If a product label is unclear, choose one with directions that address the substrate and repair, or seek informed guidance before applying it.
How do package labels help you compare products?
Two products in the same broad category can behave differently. The package and any accompanying product instructions are more useful than a generic promise that one type is “stronger,” “faster,” or “easier.” Compare the directions using the exact task you need to do. Look for the intended surface, application depth, coat limits, mixing instructions, drying or setting guidance, sanding instructions, cleanup, and storage requirements.
Use the term on the front of the package as a first clue, not a substitute for the detailed directions. “Fast drying” does not tell you whether the material is sandable after a particular number of minutes in your room. “Lightweight” does not automatically mean it can fill any depth in one coat. “All purpose” does not remove the need to check whether a product is appropriate for a particular tape, board, or repair. Claims are meaningful only in the context of the manufacturer’s instructions.
When comparing products side by side, write down the parts that affect your actual work rather than trying to rank labels in the abstract. For example, a person filling one nail hole may care most about a small package and uncomplicated cleanup. A finisher working along a long joint may care more about working time, spreading behavior, tape compatibility, and recoat steps. The same product feature can be helpful for one use and irrelevant for another.
Questions to answer from the instructions
- What surface is named? Verify that the substrate matches the wall and any existing coating.
- What repair is listed? Confirm whether the directions cover spot filling, seam finishing, or another application.
- Is there a depth or thickness limit? Respect it; a deep void may call for backing or a patch instead.
- How is the product prepared? Ready-mixed and powdered materials may have different handling and cleanup directions.
- How much working time is available? Make sure tools and the area are prepared before mixing a product with limited usable time.
- When can the next coat be applied? Distinguish setting, drying, sanding, recoating, and painting instructions.
- Does the product need a particular finishing step? Check sanding, priming, or texture recommendations.
- How should leftover material be stored or discarded? Follow the container directions instead of improvising.
These questions are especially useful when a repair is part of a larger job. If a crew is using more than one product, label containers and keep their directions available. Do not assume that a sequence appropriate for one compound applies to another. Where product systems specify compatible tape, primer, or finishing materials, use those instructions to guide the work.
What should you know about ready-mixed and powdered compound?
Ready-mixed compound is convenient because it arrives prepared for use, subject to any label directions such as stirring. It can suit planned drywall finishing or smaller repair work when its intended use matches the task. Keep it covered as directed and protect it from contamination. If the material has dried out, contains debris, or no longer has the consistency described by its instructions, do not assume that adding water will restore it safely or correctly.
Powdered compound must be mixed according to directions. That requires measuring and clean mixing equipment, but it can be practical when the work calls for a particular setting behavior or when the amount can be prepared in a controlled batch. The product type determines how much working time is available after mixing. Prepare a quantity that can be used within that period and clean tools as directed before material hardens on them.
Do not generalize about which format is always faster, stronger, or easier. A ready-mixed product avoids on-site measuring, while a powder product adds mixing and cleanup tasks. On the other hand, the application, size of the work area, drying conditions, and specified sequence may matter more than the format. Read the actual instructions for the product being considered, and compare its role in the entire repair rather than just the time it takes to open the container.
Mixing technique can affect workability. Use the container’s directions about water, mixing tools, and consistency. Adding extra water because material feels stiff, or combining leftovers from different products, can change how the material performs. If a batch begins to set or becomes difficult to spread, do not attempt to revive it against the manufacturer’s instructions. Discard or handle it as the label directs and prepare fresh material if the job requires it.
For either format, keep the lid and tools clean. Dried crumbs from a container edge can fall into fresh material and leave scratches or lumps when spread. Avoid returning material from a dirty knife to the supply. Plan cleanup before starting, especially when using a product that hardens on tools. Neat handling helps the compound go onto the wall smoothly and keeps later coats from carrying debris into the finish.
How can you keep a seam flat without overbuilding it?
A taped joint needs enough compound to embed and cover the tape, but adding more material than necessary makes the finished area harder to blend. The first coat creates the bed for the tape. Later coats widen and smooth the transition. The precise amount, knife width, and sequence depend on the system and the joint. The general goal is a stable tape bond and a gradual profile rather than a thick ridge centered on the seam.
Before applying the bedding coat, check that the drywall edges are secure and that the joint is prepared according to the tape instructions. Apply material continuously enough to support the tape. Place the tape over the joint and press it in a controlled manner, removing excess compound without squeezing out so much that the tape loses contact with its bedding. Wrinkles, bubbles, dry spaces, or exposed gaps need correction before the joint is covered.
After the bedding stage is ready for additional work, cover the tape with a measured coat. Keep the blade at a consistent angle and use smooth, overlapping passes. One edge of the knife can help remove excess while the other guides the coat. If the edge of the application is too abrupt, widen the next coat instead of adding a thick mound to the center. A clean blade makes it easier to avoid drag marks.
Building a joint often takes more than one finishing coat because each stage has a distinct purpose. The center must cover the tape, while the edges must blend into the plane of the wall. If a coat is not ready for another, wait rather than forcing the schedule. When the surface is ready, inspect for ridges and low places before adding material. Correct small defects locally and widen the feather only as much as needed to make the transition less visible.
Where the board edges are not level, no amount of surface filler can make the joint perfectly flush without creating a broad build-up. Examine the joint and choose a finish approach that blends the change in plane across enough width. Strong side light can make a slight profile variation visible. That does not always mean the seam is defective; it does mean the finish should be evaluated under the lighting and appearance expectations of the space.
Do not sand through tape in an effort to remove every high point. If sanding exposes tape or paper, stop and repair the surface according to the appropriate instructions. Over-sanding can turn a modest ridge into a larger damaged area. Use a wide tool to manage the profile during application so sanding is a refinement step, not the main method of shaping a heavily built joint.
How do you manage dust and keep the work area orderly?
Sanding joint compound or patching material can create fine dust. Protect nearby furnishings, floors, equipment, and supplies before sanding. Move clean tools and unopened materials away from the sanding area when practical. Use dust-control methods appropriate to the task and follow the instructions for any sanding tool or protective equipment. Do not assume that ordinary room cleanup alone is enough for every work setting.
Containment starts before the first coat. Cover the immediate work surface with a suitable drop cloth, and consider what is nearby, including vents, electronics, stored materials, and surfaces that should remain clean. Keep the walking path clear so people do not track dust or wet compound through the site. A designated place for used knives, sanding tools, and waste helps prevent fresh material from picking up debris.
When sanding, use controlled pressure and stop often to inspect. Aggressive sanding produces more dust and can damage the paper face or cut into tape. If a ridge is substantial, consider whether a thin feather coat would be more appropriate than removing a large amount of material. Dust control and careful technique work together: less unnecessary sanding means less dust to manage and less risk of harming the repair.
After sanding, remove dust from the repair and nearby surfaces using a method compatible with the product and next finish. Do not paint over a dusty surface. Keep dust out of open containers and wet coats. If the repair is one stage in a larger room project, coordinate sanding and coating so fresh paint or clean materials are not exposed to airborne residue unnecessarily.
Keep the area orderly between coats as well. Mark or remember which surfaces are still wet, and do not place tools where they can fall onto a finished wall. Store product in accordance with its label. At the end of the task, clean tools and handle leftover material as directed. A tidy work area makes it easier to inspect the final patch and reduces the chance of contamination or accidental damage.
When is a professional repair or broader fix a better choice?
Many small drywall dings are straightforward, but not every wall defect is a simple patch. Consider a more involved repair when the opening is large, the drywall is loose, the damage reaches a corner component, or the same crack returns after repair. Extensive water staining, damp material, mold concerns, or repeated moisture should be addressed at the source rather than covered. A patch can hide an indicator without fixing the condition that produced it.
It is also sensible to pause when you cannot identify the substrate, the product instructions do not cover the repair, or the wall may contain concealed utilities where cutting is being considered. A cosmetic filler does not resolve uncertainty about what lies behind a wall. If the repair requires opening the wall, restoring structural support, or handling a potential safety issue, use an appropriate qualified professional.
For a large surface or many visible seams, the finish standard may justify an experienced drywall finisher. Broad areas require consistent application, a controlled sequence, and careful inspection under the final lighting. A small touch-up may be forgiving; a long wall with strong side light is less so. Choosing help is not an admission that a patching product failed. It is a practical response to the scale, cause, or finish demands of the work.
Before escalating, document what you see: where the defect is, whether it changes over time, whether nearby material is damp, and what repair has already been attempted. This makes it easier to explain the problem and avoid repeating an unsuitable surface-only approach. Do not keep layering compound over a repair that moves, cracks, or remains soft. Stop and reassess when the evidence suggests the substrate or cause needs attention.
How do typical repair scenarios change the decision?
Consider a wall with three separate defects: a small nail hole from a removed picture hook, a shallow dent near a doorway, and a long line where two drywall panels meet. It may be tempting to use one open container for all three. A better approach is to classify each repair separately. The nail hole may suit a small quantity of spackle if the directions allow it. The dent may need broader feathering or another thin pass. The seam requires a tape-and-compound process if its reinforcement is loose or missing. One wall can call for more than one repair method.
This distinction helps avoid the false choice that one product must be the correct answer for an entire room. Select for the work at each location. If the products differ, keep their tools and directions straight, and allow each repair to reach the proper stage before the next finish step. For a coordinated room repaint, perform dusty repairs before final coating, and protect completed areas while other repairs are still being sanded.
Scenario: a handful of picture-hook holes before repainting
Start by removing the hooks and checking that each opening is small and surrounded by sound drywall. If a hook has pulled away paint or gypsum, clean only the loose edge. Use a patching product labeled for the surface and depth, and press in a small quantity. Scrape the patch nearly flush so it does not leave a raised dot that will show through the new paint. Let it dry according to the package guidance.
After it is ready, inspect each spot rather than assuming they all behaved the same. Some may have settled; others may already be level. Give only the low spots another thin pass. Sand lightly if allowed, remove dust, and prepare the surface for the repainting system. If the wall is textured, recreate the texture before paint. Since the whole wall will be painted, blending the coating may be simpler than matching a tiny patch of older paint, but the base still needs to be flat and clean.
Scenario: a seam is visible after the first paint coat
Do not immediately cover the visible line with spackle or another thick coat of paint. Determine whether the line is a shallow ridge, a low joint, visible tape, a crack, or a paint-sheen difference. View it from more than one angle and inspect the seam’s stability. A small surface imperfection can be corrected with finishing compound and careful feathering, while exposed or loose tape calls for a proper seam repair. A line that moves or returns may need its cause addressed.
If the joint is sound but uneven, remove dust and use a thin corrective coat as appropriate for the product. Extend it enough to soften the transition, rather than placing a narrow strip exactly over the line. Allow the coat to reach the instructed condition, then inspect again under the same light that revealed the problem. Do not repaint until the surface is ready. Repeating a paint coat over an unresolved profile may make the line more apparent rather than hiding it.
Scenario: a deep dent from an impact
Look for crushed gypsum and soft edges. If the board is broken through or the defect is too deep for a surface filler’s stated limits, a patch or supported repair may be necessary. Remove only material that is loose and follow a suitable method for restoring a stable surface. Once the opening is repaired structurally, finishing compound can blend the patch into the wall. The finishing material is not a substitute for the support that a broken board needs.
Work in stages and let each material do its assigned job. A repair system may involve a backing or patch, joint tape where specified, and multiple finishing coats. Use the directions for the actual patch components and compounds. When the final profile is smooth, complete dust removal, any recommended priming or sealing, texture matching, and painting. The time involved is longer than filling a small ding, but that sequence addresses the depth and stability of the damage.
Scenario: a small repair on a textured wall
The first decision is still whether the substrate and defect are suitable for a small patching product. Once the fill is level, consider the surrounding texture. A smooth circle in the middle of a textured wall can catch light differently and remain visible even if the patch is perfectly filled. Reproducing the texture may require a compatible method and a careful test. Avoid building up extra filler in an attempt to copy the texture; filler controls the plane, while the later surface treatment creates the texture.
Match the scale and density of the nearby pattern as closely as practical. It can help to practice on a scrap surface before applying texture to the wall. Let each step dry or set as directed, then inspect from the typical viewing distance and at an angle. Paint only after the texture is ready. If the existing pattern is complicated or the repair is in a prominent location, a larger finish area may need attention for the patch to blend.
Scenario: a crew is finishing new drywall
When the work is new drywall finishing rather than isolated touch-up, plan for joint compound, tape, and a series of coats suited to the joints and fasteners. A tub of spackle is not a replacement for the products specified for that system. Establish a repeatable sequence so seams, inside corners, outside corners, and fastener depressions are treated appropriately. Check that the board is secure and that all surfaces are prepared before beginning.
Coordinate application with drying and sanding windows. Keep compound clean, use tools suited to the width of the work, and avoid carrying dried bits into fresh coats. Inspect the wall as a whole as well as individual seams, because a transition can appear smooth up close but show when light crosses the surface. Before primer or paint, make sure the finished drywall is clean and ready under the chosen product instructions. The scale and finishing expectations of a whole room call for more planning than a single nail hole.
How can application technique reduce sanding?
Sanding is useful for refining a dry surface, but good knife work can reduce how much material must be removed. Load only the amount you can control. Place it at the repair, then draw the blade across the area with steady pressure. On a small hole, scrape excess off the surrounding surface. On a wider repair, angle the blade so one side guides the compound while the other feathers the edge. The exact grip is personal, but consistent pressure helps avoid abrupt ridges.
Clean the blade between passes. A small dried crumb or chunk on the edge can score a line through wet compound. If a drag mark appears, stop and clean the tool rather than repeatedly pulling the contaminated blade across the wall. Use a clean portion of the knife to remove extra material. Keep the repair’s edges deliberate: a feathered margin is gradual, not a thick perimeter that leaves an outline after sanding.
Do not overwork material as it begins to firm or set. Repeatedly scraping a surface that is no longer workable can tear it, create rough edges, or pull material from a place where it should remain. Observe the product’s working time and use a fresh pass or later coat when the directions indicate that the current coat is past its workable stage. This is particularly important with products whose usable time is limited after mixing.
Keep the knife nearly clean when moving from the center of a patch to its surrounding wall. Excess compound can accumulate at the edge of the tool and produce a ridge. For a seam, use a blade wide enough to feather the joint, but do not let the ends of a very wide tool bump into nearby trim or corners. Position yourself so you can make a smooth pass without stopping midway. If the area is awkward, divide the work into controlled sections with overlapping transitions.
As you gain control, aim for a surface that needs light finishing rather than aggressive sanding. Look at each pass from the side. If an edge is heavy while wet, remove it carefully before it dries. If the surface has a shallow low spot, it may be better to add a thin coat later than to push excess material across the entire patch. Small corrections made at the right stage reduce both dust and the chance of damaging the surrounding wall.
What should you do if the first repair does not look right?
Pause and diagnose before adding more material. A patch that looks poor can have several different causes: a ridge, a low center, rough sanding, a bubble, loose substrate, visible tape, dust under a coat, or a texture mismatch. Each calls for a different correction. More compound may help a low spot, but it will make a ridge worse. Sanding may reduce a minor high point, but it will not stabilize loose tape. Identifying the defect first prevents unnecessary work.
If the patch is raised
Check whether the excess is only a shallow ridge at the perimeter or a broader hump. If the material is fully ready for sanding and the product allows it, remove a small amount with light, controlled strokes. Keep the sanding area focused and protect the surrounding surface. If removing the ridge would expose tape or paper, stop and consider a wider feather coat to soften the profile rather than sanding deeper. Inspect under side light after each small correction.
If the patch is low
Confirm that the surface is stable, clean, and ready for another coat. Apply a thin layer of compatible material over the low area and feather the boundary. Avoid filling the low point with a thick glob. Let it dry or set as directed, then reassess. If the low area recurs or the wall flexes, investigate the substrate or support instead of repeating the same cosmetic step.
If the patch bubbles or separates
Do not cover a loose bubble with another layer and assume it will hold. The surface beneath may be contaminated, unstable, or improperly prepared, or the material may not be compatible with the substrate or application. Remove unsound material as appropriate, inspect the exposed area, and follow the product’s repair instructions. If the underlying paper or drywall is damaged, prepare it with the specified system before applying new compound.
If the patch remains visible after paint
Separate a surface-profile problem from a color, sheen, or texture problem. Use angled light to check for a ridge or dip. If the wall feels smooth but the patch has a different pattern, the texture needs attention. If the color or sheen alone differs, additional filler is not the answer. A test of the paint system or a broader repaint may be needed. Identify the specific difference before doing more work.
Keep notes on what was applied and when, especially if a repair will be revisited after a drying interval. Record the product type, number of coats, and any observed settling or cracking. This is useful on a multi-room job, where several patches may be at different stages. A simple record prevents sanding a coat that is not ready or applying a different product without checking compatibility.
How should you compare the full supply list?
A material choice is only one part of planning. For a small spot repair, the practical setup may include a suitable patching product, a clean narrow knife, surface protection, and a way to remove sanding dust. A seam repair adds compatible drywall tape and a compound intended for taping and finishing, along with a wider knife. A deep hole may require backing or a patch component before the finishing material. Build the supply list from the repair sequence rather than starting with a product name and assuming it covers every stage.
Check that the tools are suitable and in good condition. A bent knife edge can leave repeated grooves; a very small blade can make broad feathering difficult. Conversely, a very wide knife may be awkward around a small hole, trim, or an inside corner. You do not need to use every tool on every repair. Select only what the task requires, and make sure the work area has a safe place to set each tool between passes.
For multiple repairs, estimate how many are spot fills, how many are taped joints, and whether any need patching. The estimate can be rough, but separating categories helps avoid buying a single product based on the largest-looking hole. Keep package directions available as you plan; the stated coverage and application limits are more reliable than a guess based on the container label alone. If a product is not designed for the work, buying more of it does not make it suitable.
Protective supplies are part of the plan, not an afterthought. Dust containment, floor protection, and clean storage for finishing materials can help preserve the work area and the repair itself. Choose protective equipment appropriate to the task and follow the instructions provided with materials and tools. If the job involves unusual exposure or conditions, use proper guidance rather than assuming a basic patching workflow is enough.
Integrity Supply serves painters, contractors, maintenance teams, construction workers, and DIY customers with a broad range of painting, safety, hardware, and construction supplies. The catalog spans roughly 70,000 products from 300 manufacturers, and not every item is stocked in-house. For a drywall repair, focus the supply search on the actual need: patching compound for a small defect, joint-finishing materials and tape for seams, and suitable preparation or surface-protection items for the work area. Confirm product descriptions and instructions before choosing.
How do you choose between joint compound and spackle?
Use this short decision process before starting:
- Is it a panel seam? Choose a drywall taping and finishing method with joint compound and appropriate tape.
- Is it a small, shallow hole or dent? Spackle is often a practical choice if its label allows that repair.
- Is it broad, deep, or unstable? Work out whether you need a patch, backing, or a multi-step repair system rather than either filler alone.
- Does the package cover the substrate and depth? If not, pick a product intended for the job.
- Does the repair need reinforcement? A seam or recurring crack may need tape and a stable joint, not just surface filler.
- Can you wait for the required drying and finishing steps? Choose a product and repair plan that fit the available time without skipping directions.
- What finish must match? Account for wall texture, lighting, primer, and paint, not only the repair material.
For a contractor coordinating more than one room or crew, plan materials around the whole sequence: patch, tape, coat, dry, sand, clean, prime, and paint. A quick spot repair and a taped seam can use different products and tools even when both are on the same wall. Keeping the tasks distinct helps prevent a small patching tub from becoming a substitute for the materials needed to finish drywall joints properly.
How should you evaluate the wall before buying material?
Before selecting a filler, spend a minute identifying what the wall is made of and what has happened to it. This article focuses on interior gypsum drywall, but some walls have plaster, masonry, wood, or a mixture of materials. A product intended for drywall may not be the right option for another substrate. Check the label for the surface it supports, and do not assume that a familiar repair product works identically on every wall.
Look for more than the opening itself. Is the surface firmly attached? Is paint lifting around the spot? Does the wall feel damp, soft, or crumbly? Does the damage sit at a joint, corner, fastener, or area that receives repeated contact? Is there a stain that suggests water? These observations can change the repair plan. Filling a defect without answering them can conceal a problem instead of repairing it.
Gently test only what is safe and appropriate. You can look closely and lightly touch an area, but do not press hard enough to enlarge damage or puncture a wall. If you suspect hidden wiring, plumbing, or another hazard, stop before cutting or driving fasteners. A cosmetic repair guide cannot identify concealed building conditions. Use a qualified professional when the damage or its cause is beyond a simple surface repair.
Decide whether the goal is a quick functional patch or a finish that must disappear under close inspection. A utility room, storage space, or surface scheduled for broader renovation may have a different finish expectation than a prominent wall under strong light. The material choice still needs to be appropriate, but the required level of feathering, texture matching, and repainting depends on the desired appearance and existing surface.
Make a short inspection checklist
- Substrate: Confirm whether the repair is on drywall and that the product label covers it.
- Stability: Identify loose board, moving fasteners, peeling paint, or detached tape.
- Extent: Note the opening’s width, depth, and the amount of surrounding damage.
- Cause: Look for signs of moisture, repeated impact, or movement that must be corrected first.
- Finish: Note the wall’s texture, sheen, lighting, and repainting needs.
- Process: Check whether the job needs tape, backing, multiple coats, or specific preparation.
This simple inspection can prevent choosing a container based only on what is already in the garage. If the damage clearly exceeds the product’s stated limits, use an appropriate repair system instead. If a product label is unclear, choose one with directions that address the substrate and repair, or seek informed guidance before applying it.
How do package labels help you compare products?
Two products in the same broad category can behave differently. The package and any accompanying product instructions are more useful than a generic promise that one type is “stronger,” “faster,” or “easier.” Compare the directions using the exact task you need to do. Look for the intended surface, application depth, coat limits, mixing instructions, drying or setting guidance, sanding instructions, cleanup, and storage requirements.
Use the term on the front of the package as a first clue, not a substitute for the detailed directions. “Fast drying” does not tell you whether the material is sandable after a particular number of minutes in your room. “Lightweight” does not automatically mean it can fill any depth in one coat. “All purpose” does not remove the need to check whether a product is appropriate for a particular tape, board, or repair. Claims are meaningful only in the context of the manufacturer’s instructions.
When comparing products side by side, write down the parts that affect your actual work rather than trying to rank labels in the abstract. For example, a person filling one nail hole may care most about a small package and uncomplicated cleanup. A finisher working along a long joint may care more about working time, spreading behavior, tape compatibility, and recoat steps. The same product feature can be helpful for one use and irrelevant for another.
Questions to answer from the instructions
- What surface is named? Verify that the substrate matches the wall and any existing coating.
- What repair is listed? Confirm whether the directions cover spot filling, seam finishing, or another application.
- Is there a depth or thickness limit? Respect it; a deep void may call for backing or a patch instead.
- How is the product prepared? Ready-mixed and powdered materials may have different handling and cleanup directions.
- How much working time is available? Make sure tools and the area are prepared before mixing a product with limited usable time.
- When can the next coat be applied? Distinguish setting, drying, sanding, recoating, and painting instructions.
- Does the product need a particular finishing step? Check sanding, priming, or texture recommendations.
- How should leftover material be stored or discarded? Follow the container directions instead of improvising.
These questions are especially useful when a repair is part of a larger job. If a crew is using more than one product, label containers and keep their directions available. Do not assume that a sequence appropriate for one compound applies to another. Where product systems specify compatible tape, primer, or finishing materials, use those instructions to guide the work.
What should you know about ready-mixed and powdered compound?
Ready-mixed compound is convenient because it arrives prepared for use, subject to any label directions such as stirring. It can suit planned drywall finishing or smaller repair work when its intended use matches the task. Keep it covered as directed and protect it from contamination. If the material has dried out, contains debris, or no longer has the consistency described by its instructions, do not assume that adding water will restore it safely or correctly.
Powdered compound must be mixed according to directions. That requires measuring and clean mixing equipment, but it can be practical when the work calls for a particular setting behavior or when the amount can be prepared in a controlled batch. The product type determines how much working time is available after mixing. Prepare a quantity that can be used within that period and clean tools as directed before material hardens on them.
Do not generalize about which format is always faster, stronger, or easier. A ready-mixed product avoids on-site measuring, while a powder product adds mixing and cleanup tasks. On the other hand, the application, size of the work area, drying conditions, and specified sequence may matter more than the format. Read the actual instructions for the product being considered, and compare its role in the entire repair rather than just the time it takes to open the container.
Mixing technique can affect workability. Use the container’s directions about water, mixing tools, and consistency. Adding extra water because material feels stiff, or combining leftovers from different products, can change how the material performs. If a batch begins to set or becomes difficult to spread, do not attempt to revive it against the manufacturer’s instructions. Discard or handle it as the label directs and prepare fresh material if the job requires it.
For either format, keep the lid and tools clean. Dried crumbs from a container edge can fall into fresh material and leave scratches or lumps when spread. Avoid returning material from a dirty knife to the supply. Plan cleanup before starting, especially when using a product that hardens on tools. Neat handling helps the compound go onto the wall smoothly and keeps later coats from carrying debris into the finish.
How can you keep a seam flat without overbuilding it?
A taped joint needs enough compound to embed and cover the tape, but adding more material than necessary makes the finished area harder to blend. The first coat creates the bed for the tape. Later coats widen and smooth the transition. The precise amount, knife width, and sequence depend on the system and the joint. The general goal is a stable tape bond and a gradual profile rather than a thick ridge centered on the seam.
Before applying the bedding coat, check that the drywall edges are secure and that the joint is prepared according to the tape instructions. Apply material continuously enough to support the tape. Place the tape over the joint and press it in a controlled manner, removing excess compound without squeezing out so much that the tape loses contact with its bedding. Wrinkles, bubbles, dry spaces, or exposed gaps need correction before the joint is covered.
After the bedding stage is ready for additional work, cover the tape with a measured coat. Keep the blade at a consistent angle and use smooth, overlapping passes. One edge of the knife can help remove excess while the other guides the coat. If the edge of the application is too abrupt, widen the next coat instead of adding a thick mound to the center. A clean blade makes it easier to avoid drag marks.
Building a joint often takes more than one finishing coat because each stage has a distinct purpose. The center must cover the tape, while the edges must blend into the plane of the wall. If a coat is not ready for another, wait rather than forcing the schedule. When the surface is ready, inspect for ridges and low places before adding material. Correct small defects locally and widen the feather only as much as needed to make the transition less visible.
Where the board edges are not level, no amount of surface filler can make the joint perfectly flush without creating a broad build-up. Examine the joint and choose a finish approach that blends the change in plane across enough width. Strong side light can make a slight profile variation visible. That does not always mean the seam is defective; it does mean the finish should be evaluated under the lighting and appearance expectations of the space.
Do not sand through tape in an effort to remove every high point. If sanding exposes tape or paper, stop and repair the surface according to the appropriate instructions. Over-sanding can turn a modest ridge into a larger damaged area. Use a wide tool to manage the profile during application so sanding is a refinement step, not the main method of shaping a heavily built joint.
How do you manage dust and keep the work area orderly?
Sanding joint compound or patching material can create fine dust. Protect nearby furnishings, floors, equipment, and supplies before sanding. Move clean tools and unopened materials away from the sanding area when practical. Use dust-control methods appropriate to the task and follow the instructions for any sanding tool or protective equipment. Do not assume that ordinary room cleanup alone is enough for every work setting.
Containment starts before the first coat. Cover the immediate work surface with a suitable drop cloth, and consider what is nearby, including vents, electronics, stored materials, and surfaces that should remain clean. Keep the walking path clear so people do not track dust or wet compound through the site. A designated place for used knives, sanding tools, and waste helps prevent fresh material from picking up debris.
When sanding, use controlled pressure and stop often to inspect. Aggressive sanding produces more dust and can damage the paper face or cut into tape. If a ridge is substantial, consider whether a thin feather coat would be more appropriate than removing a large amount of material. Dust control and careful technique work together: less unnecessary sanding means less dust to manage and less risk of harming the repair.
After sanding, remove dust from the repair and nearby surfaces using a method compatible with the product and next finish. Do not paint over a dusty surface. Keep dust out of open containers and wet coats. If the repair is one stage in a larger room project, coordinate sanding and coating so fresh paint or clean materials are not exposed to airborne residue unnecessarily.
Keep the area orderly between coats as well. Mark or remember which surfaces are still wet, and do not place tools where they can fall onto a finished wall. Store product in accordance with its label. At the end of the task, clean tools and handle leftover material as directed. A tidy work area makes it easier to inspect the final patch and reduces the chance of contamination or accidental damage.
When is a professional repair or broader fix a better choice?
Many small drywall dings are straightforward, but not every wall defect is a simple patch. Consider a more involved repair when the opening is large, the drywall is loose, the damage reaches a corner component, or the same crack returns after repair. Extensive water staining, damp material, mold concerns, or repeated moisture should be addressed at the source rather than covered. A patch can hide an indicator without fixing the condition that produced it.
It is also sensible to pause when you cannot identify the substrate, the product instructions do not cover the repair, or the wall may contain concealed utilities where cutting is being considered. A cosmetic filler does not resolve uncertainty about what lies behind a wall. If the repair requires opening the wall, restoring structural support, or handling a potential safety issue, use an appropriate qualified professional.
For a large surface or many visible seams, the finish standard may justify an experienced drywall finisher. Broad areas require consistent application, a controlled sequence, and careful inspection under the final lighting. A small touch-up may be forgiving; a long wall with strong side light is less so. Choosing help is not an admission that a patching product failed. It is a practical response to the scale, cause, or finish demands of the work.
Before escalating, document what you see: where the defect is, whether it changes over time, whether nearby material is damp, and what repair has already been attempted. This makes it easier to explain the problem and avoid repeating an unsuitable surface-only approach. Do not keep layering compound over a repair that moves, cracks, or remains soft. Stop and reassess when the evidence suggests the substrate or cause needs attention.
Ready to plan the repair? Browse Integrity Supply's painting supplies for related preparation and finishing materials, or contact the sales team if you need help with an order.
Frequently asked questions
Can I use spackle instead of joint compound on drywall seams?
Do not assume that you can. Drywall seams typically need tape embedded and covered with joint compound or a product specifically labeled for that system. Spackle is commonly used for small localized holes and dents, not as a general substitute for taping compound. Follow the tape and compound manufacturers’ directions.
Can joint compound fill a small nail hole?
It may be possible when the product is suitable for the surface and repair, but it may be less convenient than using a small amount of spackle. Check the compound’s intended use and application instructions. For a tiny hole, avoid applying a larger volume than necessary and make sure the patch is level before painting.
Which one shrinks less?
There is no reliable answer based only on the words “spackle” and “joint compound.” Formulas and application limits vary. A repair that is too deep for one coat can settle even when the product is otherwise appropriate. Compare package guidance, use the material within its stated thickness, and build deeper repairs in layers or with a suitable patch.
Do I need to prime over joint compound or spackle?
Often, a repaired area needs preparation before paint, but the right approach depends on the product and paint system. Check the material and coating instructions. Priming can help the patch and surrounding surface accept paint more evenly; it does not correct a ridge, poor texture match, or an incompletely dried repair.
Can I sand either material?
Many common drywall compounds and patching products can be sanded when fully ready, but the timing and method vary. Read the label, use light pressure, and avoid sanding through paper or tape. Control dust and use suitable protection for the work.
How many coats should I apply?
There is no single coat count for every product and repair. A shallow spot might need one application, while a deeper depression or taped seam can require several thin layers. Follow the manufacturer’s thickness and recoat directions, and inspect after each stage. Add another coat only when the previous one is ready and the surface still needs correction.
Can I put spackle over paint?
Only if the product directions permit the surface and the paint is sound. Loose, peeling, glossy, dirty, or powdery coatings may need preparation before patching. Remove unsound material and follow the label for surface preparation. A patch applied over a weak paint layer can detach along with that layer.
Can I use joint compound for a large hole?
Joint compound may be used to finish a repair, but a large opening often needs a drywall patch or backing first. Check the product’s instructions and the repair system’s limits. A deep void filled with an unsuitable thick layer may not produce a stable, smooth result. Repair the board, then use compatible finishing materials.
Call Integrity Supply at 866-918-0300 to discuss repair supplies
For a small, stable ding, spackle is often the straightforward option; for taped seams and broader drywall finishing, joint compound is usually the better fit. Check the product directions, prepare the surface, and give each coat the time and finishing steps it needs for a smooth repair.