




















Learning how to resurface concrete starts with checking whether the slab is a sound candidate for a thin resurfacing layer. Resurfacer can refresh worn, rough, or lightly blemished concrete, but it does not correct movement, structural failure, or a continuing water problem. The product label controls the preparation, mix, application thickness, and cure for the material you choose.
Call Integrity Supply about project supplies
When is resurfacing concrete the right approach?
Resurfacing is a way to renew the exposed face of an existing slab with a cement-based overlay made for that purpose. It may suit concrete that is generally stable but has surface wear, minor shallow pits, or a dated appearance. A properly prepared slab gives the new material a chance to bond; the overlay itself is not a substitute for a sound base.
First separate surface problems from problems that reach deeper. A thin resurfacer is not a structural repair for a slab that is moving, heaving, settling, or breaking apart. It will not stop water from entering through a crack, fix a failed base, or make a poorly drained area drain correctly. Covering an active problem can hide it temporarily while the cause continues beneath the new layer.
- Possible candidate: a stable walkway, patio, or similar slab with surface wear that fits the product's permitted applications.
- Needs a closer assessment: areas with recurring dampness, scaling, many cracks, contamination, or patches of weak concrete.
- Not a simple resurfacing job: slabs with significant displacement, ongoing movement, extensive deep cracking, or serious deterioration. Consult a qualified concrete professional about repair or replacement options.
Look over the entire slab, not just the spot that looks worst. A finish coat makes the surface more uniform, so differences in slope, settlement, repairs, and texture may remain visible or become more noticeable. Check the edges, joints, low areas, steps, drains, and places where water collects. If the cause of damage is unclear, pause before buying materials or covering the concrete.
What should you inspect before you resurface concrete?
Start by noting the type and condition of the concrete, the area to be covered, and how people or vehicles use it. Confirm that the resurfacer is intended for the project: some formulas are for foot traffic, while others allow additional uses or have separate restrictions. Do not assume a product suitable for one slab is suitable for a driveway, pool deck, interior floor, or freeze-thaw exposure.
Check all product documentation before beginning. Read the label and current technical instructions for approved substrates, minimum and maximum application thickness, mixing ratio, tools, working time, temperature range, cure time, traffic limits, and any primer or bonding preparation. Confirm whether the product is compatible with existing coatings, previous repairs, sealers, or additives. If the instructions do not clearly address the slab's condition or use, ask the manufacturer or supplier before proceeding.
Inspect for concrete that sounds hollow, crumbles under firm scraping, has loose aggregate, or sheds a weak surface layer. Check whether cracks appear stable or show signs of movement. Look for oil, grease, paint, curing compounds, adhesive, sealers, and other residues that may prevent bonding. A new surface cannot compensate for weak concrete or a barrier between the slab and the overlay.
Map and measure the work area. Measure length and width, and account for irregular edges, steps, drains, posts, and other interruptions. Use the coverage information on the product package to estimate quantity at the intended thickness. Coverage varies with product and surface texture; a rough or pitted slab can consume more material than a smooth one. Keep the package's calculation as an estimate and plan the work so each batch can be placed within its stated working time.
For a simple rectangular slab, record the length and width and multiply them to get the approximate square footage. Break an L-shaped or obstructed area into smaller rectangles, then add those areas together. Do not subtract every small post or drain opening unless the product coverage calculation calls for it; the practical difference may be smaller than the extra material needed for texture and waste. Compare the measured area with the package coverage at the intended thickness, not a coverage figure listed for a thinner coat. If the estimate is close to the amount in one container, plan for the possibility that rough patches will use more. Buying or arranging an adequate supply before mixing helps avoid a mid-slab pause and a visible cold edge.
Before choosing a start point, note slopes and places that must remain flush with a doorway, threshold, drain, or adjacent paving. A thin overlay can change the elevation at an edge even when it does not solve a low spot. Use a straightedge or level to identify transitions and decide whether the product is suitable for them. If the existing surface sheds water toward a building or holds water in a depression, resolve that drainage concern before resurfacing instead of assuming the new coat will correct it.
What tools and materials do you need?
Gather tools and protective equipment before mixing. The exact list depends on the product and slab. A common preparation and application setup may include:
- Concrete resurfacer approved for the slab and intended use.
- Clean water measured according to the package instructions.
- A suitable mixing bucket and a drill with the recommended mixing paddle, if the directions call for mechanical mixing.
- A stiff broom, scraper, and compatible cleaning equipment for removing debris and contaminants.
- A pressure washer or other cleaning method only when appropriate for the slab and product instructions; allow the concrete to dry or reach the specified moisture condition.
- Concrete repair material approved for the cracks or defects being addressed.
- A squeegee, finishing tool, or other applicator specified by the resurfacer manufacturer.
- Measuring tools, a timer, and enough containers and tools to keep batches consistent.
- Protective gloves, eye protection, suitable work clothing, and other protective equipment required by the product label and safety information.
- Materials to protect drains, adjacent walls, landscaping, and surfaces that should not receive the overlay.
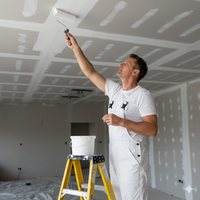
Use tools compatible with cement-based materials and the job size. A paint roller is not a universal concrete-resurfacer applicator. Use one only if the chosen product's directions specifically allow it, and use the specified roller type. Keep mixing and spreading tools clean. Dried residue on a tool can affect later batches or leave marks in a fresh finish.
Protect nearby items before washing or placing material. For example, a drop cloth for covering nearby surfaces can help protect an appropriate area from splashes, but secure it so it cannot blow onto the wet concrete. Keep wash water, cement residue, and loose material out of drains and landscaped areas. Use protection suited to the location and follow local disposal requirements.
How should you prepare the concrete before applying resurfacer?
Preparation is central to a durable result. The concrete must be sound, clean, and in the surface condition required by the selected resurfacer. Do not skip cleaning because the slab looks clean from a distance. Fine dust, an invisible sealer, oil, or loose concrete can interfere with adhesion even when the surface appears ready.
- Remove loose material. Sweep away dirt and leaves. Scrape off flaking coatings, loose patches, and weak concrete as appropriate. Do not simply cover material that is already separating from the slab.
- Remove contaminants. Clean oil, grease, paint, adhesive, and other residues using a method compatible with the concrete and resurfacer. Rinse away cleaning residues when the product instructions require it. A cleaner that leaves a film can create a new bonding problem.
- Clean the full surface. Use the product-approved cleaning method to remove dust and embedded dirt. If using pressure washing, choose a method that does not damage sound concrete or drive water beneath edges. Remove all loosened debris after cleaning.
- Let the slab reach the specified condition. Some products call for damp concrete without standing water; others specify a different moisture condition. Follow the exact instructions. Do not assume that visibly wet concrete is ready.
- Mask and protect. Cover surfaces that should remain clean and keep material out of drains, joints that must remain open, and moving components. Use masking material appropriate to the substrate; for example, painter's tape for protecting a suitable adjacent edge may be useful where the surface and application allow it. Test delicate or coated surfaces first and remove tape as directed.
- Confirm the work area is ready. Make sure the slab is clean, the repair work is complete and cured as required, tools are assembled, and weather conditions remain within the product range.
Surface preparation may require mechanical work for a coated, sealed, or very smooth slab. Do not choose a grinding or etching method by guesswork. The resurfacer instructions should state what surface profile is needed and how to prepare the substrate. Mechanical abrasion can create dust and may damage concrete if done improperly. Chemical cleaners or etchants can leave residues or create safety hazards if misused. If existing coatings or sealers cannot be identified or removed with confidence, get product-specific advice before applying an overlay.
After cleaning, inspect the slab again from a low angle and in good light. Look for glossy patches, dark oily spots, thin films, and areas that still shed dust when brushed. A clean-looking surface is not necessarily free of a bond-breaking coating. If you are unsure whether a patch is residue or exposed concrete, compare it with a known clean area and consult the product instructions or manufacturer. Do not proceed by applying a test coat over a questionable spot and hoping it holds. A small compatibility test can help with appearance or handling only when recommended; it does not turn a contaminated or weak substrate into a suitable one.
How do you repair cracks and shallow defects?
Make repairs before resurfacing, using materials compatible with the slab and overlay. The right approach depends on what caused the defect and whether it is active. A stable, shallow surface defect may be suitable for a patching product, while a moving crack or displaced section calls for a different assessment. Do not fill a crack with resurfacer unless the product instructions say that use is acceptable.
Remove loose edges and debris from a repair area as instructed by the repair-material manufacturer. Clean the area, apply the repair material in its specified thickness, and allow it to cure or prepare it for overlay as directed. Some patching materials require a particular bond preparation or may not be compatible with a resurfacer. Confirm compatibility rather than relying on the fact that both products contain cement.
Pay attention to joints. Expansion and control joints are part of the slab's movement plan and should not automatically be bridged or filled with a continuous overlay. Follow the resurfacer instructions on whether joints should be carried through the new finish, masked, or treated in another way. If a joint is damaged or its purpose is unclear, seek guidance before covering it.
Repairing the visible surface will not prevent a crack caused by movement from returning. If a crack changes over time, has vertical displacement, or is associated with settlement or water intrusion, pause and identify the underlying issue. Resurfacing over it could lead to a visible crack in the finished layer.
How to resurface concrete: what should you do before mixing?
Choose a work period when the forecast and actual site conditions fit the product requirements for application and curing. Direct sun, wind, hot concrete, low temperatures, rain, and rapid temperature changes can affect working time, finish, and strength development. Check the forecast for the full protection period, not just the hour you plan to spread the material. Follow the package's temperature limits and instructions for shielding the work.
Organize the job so you can work steadily from one edge to the next without interruption. Decide where each batch will go, how the edge between batches will be blended, and how people will leave the work area without stepping on fresh material. Have a second person help only if the size of the job and product working time make that useful. Assign clear roles, such as mixing and spreading, so the material is not left in a bucket while the crew decides what to do next.
Plan the batch size around the product's working time and the applicator's pace. A large batch is not automatically more efficient: material can begin to set before it is spread, especially in warm or windy conditions. Measure water and powder carefully for each batch. Inconsistent ratios can make the surface vary in texture, color, workability, and performance.
Prepare a small test area when the manufacturer recommends it or when the appearance and application are uncertain. A test can show how the material handles on the prepared slab and how the finish looks. It does not replace checking compatibility or following the full application directions, but it can reveal an issue before a large area is covered.
Make a simple sequence plan before the crew starts: where the first batch will be placed, which direction the work will progress, and where the final edge will land. On a narrow walkway, that may mean starting at the far end and working back toward an exit. On a broad patio, divide the area into sections that can be completed with a continuous edge, while keeping joints and changes in direction in view. If the slab has multiple access points, block the one that would tempt someone to cross the wet area. Agreeing on this sequence before opening material reduces rushed decisions once the working time has begun.
Prepare a staging area for powder, measured water, buckets, and cleanup supplies. Keep bags dry and off damp ground, but within easy reach of the mixing station. Set out only the amount needed for the planned first batch so that tools and packaging do not crowd the slab edge. Keep an unobstructed path for carrying the bucket and make sure cords or hoses cannot drag through the finish. These small arrangements matter most on an irregular surface, where the applicator must pay attention to corners and transitions while the mix remains workable.
How to resurface concrete: what are the application steps?
- Recheck the slab. Just before mixing, confirm that the concrete is clean and at the required moisture condition. Remove standing water, dust, leaves, and any debris that landed after preparation. Verify that joints and edges are protected as planned.
- Measure the ingredients. Use the specified amount of clean water and resurfacer powder. Do not add extra water to make the mix easier to spread unless the instructions explicitly permit it. Too much water can weaken the mix and affect finish and durability.
- Mix as directed. Add materials in the order and mix for the time stated by the manufacturer. Scrape the sides and bottom of the bucket if the instructions allow. Avoid whipping excess air into the mixture. Do not mix fresh material into a batch that has begun to set.
- Observe any rest or remix instruction. Some products require a short rest followed by remixing; others do not. Follow the chosen product's method rather than applying a rule from another resurfacer.
- Place a manageable amount. Pour or place the mix where it can be spread within its working time. Work in sections that fit the crew and conditions. Keep the leading edge manageable so one batch can be blended into the next without a cold, raised line.
- Spread at the required thickness. Use the specified squeegee or applicator and maintain the product's permitted layer thickness. Avoid leaving puddles or ridges. Do not use the finish coat to fill deep holes unless the manufacturer specifically permits that thickness and application.
- Blend each section. Work methodically and keep a wet edge where the product directions call for it. Use consistent pressure and passes. Follow the stated approach for edges, corners, drains, and transitions.
- Apply texture if required. Some applications call for a broom or other finish to provide a particular texture. Make finishing passes at the time and in the direction described by the product instructions. Do not add water to the surface to make finishing easier unless the manufacturer allows it.
- Continue with fresh, consistent batches. Repeat the measured mixing and spreading process. Keep batch proportions consistent and clean tools as needed. If a batch thickens or begins setting, do not try to restore it with added water unless the label specifically directs otherwise.
- Finish the work and protect it. Complete edges and joints as instructed. Remove or manage masking material at the recommended stage without dragging it across the new surface. Block access and begin the required curing protection.
Work at a steady pace and avoid overworking material that has started to set. Repeatedly troweling or brushing a surface after its workable period can change the finish and may weaken the surface. If the work is too large to finish within the product's working time, divide it into planned sections, use additional help, or select an appropriate product and method before starting.
How long should resurfaced concrete cure?
There is no single cure time that applies to every resurfacer or every site. Read the package and technical instructions for when to remove protection, allow foot traffic, move furniture, or permit vehicle traffic. A surface that feels dry to the touch is not necessarily ready for full use. Temperature, humidity, wind, direct sunlight, layer thickness, and the substrate can change the time required.
Keep people, pets, wheels, and equipment off the resurfaced area until the product permits that type of use. Prevent rain, running water, debris, and premature drying during the required protection period. Use the curing method specified by the manufacturer; do not cover or mist the surface unless the instructions call for it. If the forecast changes or the surface is exposed unexpectedly, consult the product guidance about next steps.
Do not judge readiness by a generic rule or by another product's label. A material may allow light foot traffic before it can handle wheeled loads, furniture, or vehicles. Reopen the area gradually according to the actual product instructions. Keep a note of the product, batch date, site conditions, and reopening times in case you need to trace a finish issue later.
| Project stage | What to check | Why it matters |
|---|---|---|
| Before work | Slab stability, water issues, contamination, and product suitability | Resurfacer cannot repair movement or bond reliably to a weak or contaminated base. |
| Preparation | Clean, sound concrete and the moisture condition required by the product | Good contact with the substrate is essential to the overlay's performance. |
| Mixing | Exact water ratio, mixing method, and batch size | Consistent batches help maintain workability and an even finish. |
| Application | Specified thickness, working time, edges, and joints | Following the method helps avoid ridges, weak areas, or covered movement joints. |
| Curing | Weather protection and separate limits for foot or vehicle traffic | Touch-dry does not necessarily mean ready for normal use. |
What common mistakes can spoil the result?
- Applying over weak or moving concrete: an overlay follows the condition of its base. Resolve the underlying problem before considering a cosmetic surface layer.
- Skipping contamination removal: dust, sealer, oil, or paint can interfere with bonding. Clean and prepare the full area using the specified method.
- Guessing at the moisture condition: follow the manufacturer's directions about dry, damp, or saturated-surface-dry concrete. Standing water is not a substitute for the required preparation.
- Changing the water ratio: extra water may seem to improve flow, but can affect the finished material. Measure each batch instead of adjusting by feel.
- Mixing too much at once: material can exceed its working time while waiting to be spread. Match batch size to your pace and the site conditions.
- Ignoring the joints: filling or bridging a joint without checking instructions can interfere with movement or create a visible crack line.
- Working in unsuitable weather: heat, wind, cold, or rain can alter placement and curing. Check the full forecast and product limits before starting.
- Opening the slab too early: a surface may appear set before it is ready for traffic. Follow the specific times for each kind of use.
When a problem appears during application, do not automatically add water, spread another layer, or improvise a repair. Stop if it is safe to do so, protect the area as directed, and consult the manufacturer or a concrete professional with the product name, batch details, slab condition, and site conditions in hand.
How can you plan the work area and avoid interruptions?
Good planning matters because resurfacer has a limited working time after mixing. Before opening a bag, walk the route from the mixing station to the slab and identify obstacles, changes in elevation, gates, steps, and places where a hose or cord could cross the work. Keep the path clear. Set the mixing area on a stable surface close enough to reduce carrying, but far enough from the slab that splashes cannot contaminate prepared concrete.
Decide how to divide the slab into workable sections. A straight, continuous run may allow a crew to move across the surface while maintaining a wet edge. An irregular patio or walkway with obstacles may need a different sequence. Marking a plan outside the slab can help the crew agree on where a batch begins and ends. Do not leave a section boundary in a conspicuous place without considering how the transition will look and how the manufacturer's method handles it.
Prepare the entire surface before the first batch. Complete cleaning, repairs, masking, and protection in advance. Put measured water, unopened material, a timer, and clean tools where they can be reached without stepping over wet work. Keep extra bags dry and protected. If several bags are required, check that they are the same compatible product and that all packaging is intact. Use product instructions to determine whether batches from different lots require any special planning.
Consider access to the site during the cure. Arrange another route for people, pets, deliveries, and equipment. Put visible barriers at every approach, not only at the main entrance. Tell anyone who might use the area when it will be closed and what the reopening instructions say. On shared or commercial property, coordinate access with the people responsible for the site so a passerby does not walk across a fresh finish.
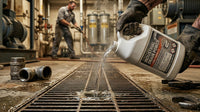
Think through water management before cleaning or mixing. Identify drains and low points, and protect them from cement slurry and washout. Do not rinse leftover material into a storm drain, sink, or landscaped area. Keep a suitable container ready for tool cleanup and follow the product safety information and local rules for handling residue. Do not wait until material hardens on tools to decide how to clean it.
How do you check the finish and handle a problem?
Inspect each section in good light while it is still within the product's finishing window. Look for missed areas, pooled material, pronounced ridges, and uneven coverage. Make only the adjustments permitted by the instructions and while the material remains workable. Avoid repeatedly working the same area; excessive finishing can create inconsistent texture or expose aggregate. At the edges and transitions, check that material has not bridged a joint or flowed onto a surface that should remain clear.
Small differences in color or texture can occur between sections or batches, especially if the proportions, substrate condition, or application timing differ. Mix each batch consistently, use the same application method, and keep a wet edge where required to reduce visible transitions. Do not add pigment, sand, or other ingredients unless the resurfacer manufacturer approves them. A finish additive from another product line may change performance or bonding.
If a batch starts to stiffen in the bucket, follow the label. Do not add water to revive it unless that specific instruction is allowed. If material is setting faster than expected, consider whether the batch is too large, the slab or air is too warm, or wind and sun are accelerating moisture loss. Stop and reassess the conditions before making another batch. Continuing with material outside its working time can make a poor area harder to correct.
If the new surface develops a ridge or a rough patch, do not try an unapproved repair while the rest is curing. Record where it happened and when, along with the product and batch information. Let the material reach the stage the manufacturer specifies before evaluating repair options. Some surface defects may be addressed after curing, but the correct method depends on the cause, depth, and resurfacer system.
Keep a simple job record: product name, lot or batch details, water amounts, approximate mixing times, application sequence, air and slab conditions if available, and when protection was removed. These notes help identify whether a problem came from the substrate, preparation, mixing, weather, or use before cure. They also make it easier to ask the supplier or manufacturer a precise question if the appearance or performance is not as expected.
What should you consider after the concrete has cured?
Once the product's instructions allow normal use, inspect the entire slab for consistent coverage, sound edges, and visible cracks or hollow areas. Note any spot that changes, flakes, or separates. A new defect may point to a surface-preparation issue, an underlying concrete problem, unsuitable site conditions, or use before the specified cure. Do not assume every blemish is cosmetic; determine whether it is changing or affecting the intended use.
Use the resurfacer's care instructions for cleaning and any later sealing. Not every resurfacer requires or permits a separate sealer, and a coating can alter slip resistance, appearance, or compatibility. Check before applying sealers, paints, deicers, or cleaning chemicals. If the surface will be exposed to demanding use or weather, confirm that the product is designed for those conditions and follow its maintenance guidance.
Resurfacing does not eliminate the need to manage water and movement around a slab. Keep drains clear, direct runoff as appropriate, and watch for recurring pooling or water entering through joints and cracks. If the same damage returns, investigate the cause rather than repeatedly applying a thin coat. Maintenance can preserve a sound finish, but it cannot compensate for a failing base or a persistent water problem.
Call Integrity Supply to discuss project supplies
How to resurface concrete: frequently asked questions
Can you resurface concrete with cracks?
Possibly, if the slab is stable and the cracks are suitable for the chosen repair and resurfacing system. Repair cracks with compatible materials and follow the manufacturer's directions for joints. Movement, displacement, or recurring cracks should be assessed rather than simply covered.
Can concrete resurfacer go over paint or sealer?
Do not assume it can. Paint and sealer may prevent a bond, and some products require a particular surface profile. Check the specific resurfacer instructions and determine whether the existing coating can be fully removed or otherwise prepared using an approved method.
Does concrete have to be dry before resurfacing?
It depends on the product. Some require a damp slab with no standing water, while others specify another moisture condition. Follow the chosen product's label and technical instructions rather than using a universal dry-or-wet rule.
Can resurfacer fix a low spot or uneven slab?
Only within the layer thickness and uses the manufacturer permits. A thin resurfacer is not automatically a leveling compound and should not be used to correct substantial changes in slope or elevation. Choose a suitable repair or leveling system if the project requires more material.
When can you walk or drive on resurfaced concrete?
Use the traffic times stated for the exact product and site conditions. Foot traffic and vehicle traffic may have different waiting periods. Do not rely on touch-dry appearance or the instructions for a different resurfacer.
A successful resurfacing job depends on a stable slab, careful preparation, compatible repairs, controlled mixing, and the right cure. Confirm every step against the instructions for the resurfacer you are using, and postpone the work if the concrete or weather is not ready.