

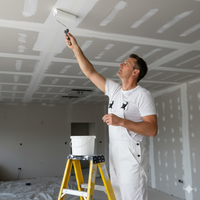


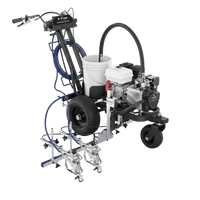











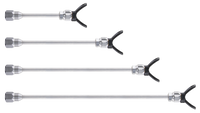







Getting a smooth, consistent paint finish with a spray gun sounds easy, but it takes more than just pointing and spraying. The way you set up your equipment plays a major role in how your final coat turns out. When settings are off, issues like patchy coverage, overspray, or drips can turn a simple job into a frustrating mess. Adjusting your spray gun the right way helps you avoid those problems and get paint where it's supposed to go—on the surface, not in the air or wasted on masking paper.
Whether you're working on a fresh exterior, furniture piece, or interior walls, spray gun settings affect how much material you're using and how long the job takes. Getting the adjustments right means less waste, quicker cleanups, and more predictable results every time. Instead of having to go over spots again or sanding down rough spray, you’ll save time and money just by dialing in the right numbers and understanding how your sprayer works.
Understanding Spray Gun Components
Before fine-tuning, it helps to know what the main parts of a paint sprayer gun do. Each part plays its role in creating good coverage and preventing paint issues. If one piece isn’t set up correctly or becomes clogged, everything else gets thrown off.
Here are the key components you’ll want to know:
- Nozzle: This controls the shape and width of your spray fan. Smaller nozzles are better for thinner materials like stains or clear coats. Wider nozzles work better for thick paints like latex. If you pick the wrong one, you might get overspray or patchy results.
- Needle: This works with the nozzle to control how much paint comes out. If the needle doesn’t seat properly, you could end up with leaks or splattering.
- Air Cap: The air cap determines how the air moves around the paint stream. That movement controls how fine or coarse your atomized paint ends up.
- Trigger and fluid knob: These control the amount of paint being released when you pull the trigger. Too much paint and you’ll get runs. Too little leads to uneven coverage.
All these pieces rely on each other. If one is clogged or damaged, the whole performance takes a hit. That’s why cleaning and checking your sprayer regularly makes a big difference. Even just a clog as small as a pinhead can create pattern issues or block the flow completely. Make it a habit to flush your system after each use and wipe down parts before storage.
Think of your sprayer like a car. You wouldn’t drive with a flat tire or a dirty air filter and expect peak performance. The same applies when spraying. Keeping parts clean and functioning saves you from unexpected problems while you're working.
Key Settings for Optimal Performance
Once you've checked everything is clean and working, the next step is locking in the right spray settings for the job. These settings don’t just depend on your sprayer. They also vary based on the surface and the type of paint you're using. Adjusting these dials helps keep your output steady and even, no matter the project.
Here are the three settings that need most of your attention:
1. Air Pressure
The right air pressure makes all the difference. Too low, and you’ll see spitting or blotchy strokes. Too high, and the paint mists too much, making it hard to control. Most paint sprayer guns handle different ranges, so start low, then bump it up in small jumps until you see a smooth, even fan.
2. Nozzle Size
You want a nozzle size that matches the paint you’re using. Thicker paints like latex need a larger nozzle to flow well. If you’re spraying thin stains or sealers, a smaller nozzle will produce a finer spray and be easier to control. Pick the wrong one, and you may clog up or waste paint.
3. Fluid Flow Rate
This setting adjusts how much paint you’re feeding through the system at once. Too much and the paint builds up, runs, or pools. Too little and you'd have to go over the same spot again and again. Dial it in slowly while testing the fan pattern on a piece of scrap.
It’s smart to keep a few test materials nearby when setting up. Spray on some cardboard or leftover wood to test your settings before jumping in on the real surface. Once you’ve dialed it in, it gives you the confidence to move forward without second-guessing.
Troubleshooting Common Paint Sprayer Problems
Even with the right setup, paint sprayers can act up. A few tweaks can usually fix the problem, but first, you need to know what to look for. If your spray pattern isn’t even or you’re seeing strange effects on the surface, it’s likely tied to a setting that needs adjusting.
Here are the most common signs that something’s off:
- Uneven coverage or "tails" at the edge of the spray fan
- Paint that spits or sputters during use
- Rough, textured finishes that should be smooth
- Overspray beyond the target surface
- Inconsistent flow or pulsing
To fix uneven spray patterns, try adjusting the air pressure and checking for a clogged nozzle. A low-pressure setting can make paint shoot out in thick blobs or form streaks. Raise the PSI in small steps and retest on scrap until you see a clean, full fan. If you've increased the pressure and it's still not right, the air cap could be blocked. Remove it and give it a good cleaning.
If your sprayer spits or sprays paint in bursts, check the fluid needle and the paint cup. Air can sneak into the lines through a loose seal or low paint level. Double-check your connections and make sure the paint is filled to the right level. If you're using thicker coatings, try thinning the paint or switching to a bigger nozzle.
Getting a rough or bumpy finish usually means you’re applying too much paint at once or spraying from too far away. Adjust the distance and fluid rate until the coat looks even and soft. Keep your wrist moving steadily and don’t stop in one spot too long.
Having some basic troubleshooting steps in your back pocket saves you time. Keep extra nozzles, wrenches, and a cleaning kit nearby so you can make small fixes without halting your project.
Best Practices for Consistent Results
Getting paint coverage right doesn't stop after adjusting a few dials. Building good habits into your workflow prevents problems before they start and helps you get through even big jobs faster.
Here are some everyday tips that can really make a difference:
- Spray on scrap first to test your settings
- Keep your distance between 8 to 12 inches from the surface
- Overlap each pass by half to avoid stripes or missed spots
- Move the sprayer at a steady speed to keep paint from building up or dripping
- Clean your gun thoroughly each time you’re done
- Save your favorite tips and nozzles in a labeled box
- Write down which settings worked best for each surface or paint type
- Always check paint container labels for pressure or tip size directions
Doing these steps the same way every time builds consistency. Some painters even label their toolboxes or inside the sprayer case with their favorite pressure settings for repeat jobs. That way, there’s no guessing when it’s time to spray again.
Over time, touchups, mistakes, and cleanup cost more than a few minutes spent getting settings dialed in. Most of the improvement in spray technique comes from good habits, simple tools, and sticking to what works.
Making Small Tweaks for Big Gains
Getting paint coverage just right doesn’t mean spending more money on equipment. It starts with knowing how your spray gun works, keeping parts in top shape, and adjusting it carefully to match your job. Whether you're painting block walls, cabinets, fencing, or siding, those small tweaks make all the difference in how the result turns out.
The more time you spend with your gear, the better feel you’ll have for how it should sound and look when it’s working right. With every pass, your skills improve. If something isn’t spraying quite how you like, don’t push through. Stop and make a small adjustment. A few seconds saved at the start can mean hours saved at the end.
A clean gun, the right settings, and a little patience go further than any quick fix. Put in the time to prep, adjust, and test—and the finish will speak for itself.
For top-tier performance and smooth finishes, explore our wide selection of Graco products. Discover how the right paint sprayer gun can make all the difference in your next project. At Integrity Supply, we help you find tools that match your job’s needs from start to finish.