

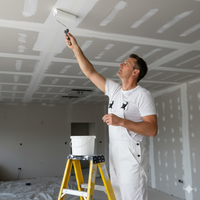


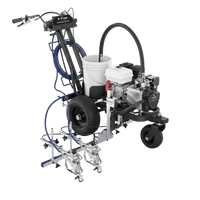


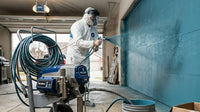














Professional painters often keep brushes, rollers, and sprayers available because each tool solves a different problem. An airless paint sprayer stands out when the job involves large surfaces, thick coatings, or uneven textures. But equipment selection should start with the basics. What is an airless paint sprayer? It is a pump-powered system that forces coating through a small opening at high pressure, breaking the material into fine droplets. Unlike compressed-air equipment, it does not rely on an air compressor to atomize paint. This article covers common applications, compatible materials, spray tips, pressure settings, cleaning steps, and important safety precautions.
Key Takeaways
- Choose equipment based on the job: Match the sprayer, tip, pressure, flow rate, and hose length to the coating, surface, and project size.
- Prepare for consistent coverage: Clean and mask the area, follow the product instructions, prime the system, and test the spray pattern before coating the finished surface.
- Treat safety and cleanup as essential steps: Wear the required protective gear, relieve pressure before adjustments, control overspray, and flush the equipment after every use.
What Is an Airless Paint Sprayer and How Does It Work?
An airless paint sprayer applies paint and other coatings with high fluid pressure instead of compressed air. A motor powers a pump, which draws material from a bucket or other container and pushes it through a high-pressure hose. The coating then travels through the spray gun and exits through a small tip. As the pressurized stream meets the surrounding air, it breaks into fine droplets and forms a fan-shaped spray pattern.
This process allows an airless sprayer to cover large surfaces quickly and handle many materials used by professional painters, contractors, maintenance teams, and DIY customers. Common applications include interior walls, ceilings, siding, fences, decks, primers, and protective coatings. The right setup depends on the product, surface, and project size, so always check the coating label and sprayer instructions before starting. The Wagner guide to airless spray painting explains the basic technology and pressure range behind these systems.
An airless sprayer includes several working parts: the pump, intake tube, hose, gun, filter, spray tip, tip guard, and pressure control. Each part affects the material flow and spray pattern. Learning what these components do makes it easier to prepare the equipment, identify problems, replace worn parts, and clean the system properly after use.
Spray paint with high pressure instead of compressed air
Unlike a conventional spray gun, an airless sprayer does not use a compressor to mix paint with air. Instead, an electric, pneumatic, or gas-powered motor drives a pump that pressurizes the coating. The material travels through the hose and leaves the spray tip at high pressure.
Some airless systems can pressurize material to approximately 250 bar, depending on the model and application, according to the Wagner explanation of airless technology. This force allows many sprayers to apply thicker products with little or no thinning.
High pressure also creates a serious safety hazard. Never point the spray gun at yourself or another person, and do not touch the spray stream. Even a small amount of contact can force coating through the skin.
Learn the pump, hose, gun, filter, tip, and pressure controls
The pump creates pressure, while the intake tube draws paint from the container. The high-pressure hose carries the material to the spray gun, where a trigger-operated valve controls the flow. The filter catches debris before it reaches the tip, helping prevent blockages and uneven spraying.
The spray tip controls the amount of material and the width of the fan. A tip guard surrounds the tip and adds protection, but it does not make the spray stream safe to touch. Pressure controls adjust the pump output for the coating and surface.
Graco’s introduction to airless paint spraying provides a helpful overview of these components. Learn where each part is located before setup, cleaning, or troubleshooting.
Draw paint from the container
Most airless sprayers draw paint directly from a bucket, which helps reduce refills during larger projects. The intake tube sits in the coating, and the pump pulls material into the system as it operates. This arrangement gives the sprayer a steady supply for walls, ceilings, siding, and other broad surfaces.
Prepare the material before placing the intake tube in the container. Stir the coating thoroughly, remove dried skin or debris, and follow the label’s instructions for mixing or thinning. Straining the paint may also help prevent lumps from reaching the filter and spray tip.
The pump must be primed before spraying. Priming removes air from the pump and intake line so paint can move consistently. If the system spits air or produces an irregular stream, stop spraying and follow the manufacturer’s priming instructions.
Pressurize paint with a piston or diaphragm pump
Airless sprayers generally use a piston pump or a diaphragm pump. A piston pump uses a moving rod to draw coating into a chamber and force it out under pressure. A diaphragm pump uses a flexible membrane that moves back and forth to pull in and push out material.
Both designs create the pressure needed to move paint through the hose and spray tip. The best choice depends on the equipment, coating, and project size. Smaller units may suit occasional residential work, while larger machines are designed for frequent use and heavier materials.
As this Wagner guide to airless spraying explains, the pump raises fluid pressure before the coating reaches the gun. Begin with the manufacturer’s recommended pressure and increase it only when necessary for an even pattern.
Atomize paint through a small spray tip
When you pull the trigger, a valve opens and pressurized paint moves through the spray tip. The coating leaves the tip as a concentrated stream, but the pressure difference between the material and surrounding air breaks it into fine droplets. This process is called atomization.
The tip controls both material flow and fan width. A smaller orifice applies less coating, while a larger orifice allows more material to pass through. The tip’s fan designation determines how broadly the droplets spread across the surface.
A clean, correctly sized tip should produce an even fan. Heavy edges, gaps, or spitting can indicate a clog, worn tip, low pressure, or material that needs preparation. Lock the gun before inspecting it, and never place a finger over the opening. The Occupational Safety and Health Administration’s guidance on spray operations reinforces the need for proper controls and protective equipment.
Match PSI, flow rate, tip size, and fan width
A consistent spray pattern depends on more than PSI. Match the sprayer’s pressure and flow rate to the coating’s thickness, the tip’s orifice size, and the fan width needed for the surface. Too much pressure can create overspray and wasted material. Too little pressure may cause tails, uneven coverage, or a rough finish.
Airless tip sizes are measured in thousandths of an inch. The first part of a tip code generally indicates the fan width, while the remaining numbers identify the orifice size. A wide fan can cover open walls efficiently, while a narrower fan offers more control around trim, corners, and smaller sections.
Check the coating label and equipment specifications before selecting a tip. KTA University’s guide to airless spray selection explains how tip size affects material flow and coverage. Test the pressure, tip, and fan pattern on cardboard or scrap material before spraying the finished surface.
What Advantages Does an Airless Paint Sprayer Offer?
An airless paint sprayer can help professional painters, contractors, maintenance teams, and serious DIYers apply coatings faster and more evenly. Unlike compressed-air equipment, an airless sprayer uses a pump to force paint through a small spray tip at high pressure. The tip breaks the coating into fine droplets and creates a controlled fan pattern.
This method works particularly well for large surfaces, textured substrates, and thicker materials. It can handle many paints, primers, stains, and specialty coatings, depending on the sprayer’s specifications. You still need to prepare the surface, protect nearby areas, and use the correct tip and pressure settings. However, the right equipment can reduce application time and deliver reliable coverage across residential, commercial, and maintenance projects.
Cover large surfaces faster
Airless sprayers are well suited to production work. After you prepare and mask the area, you can cover walls, ceilings, siding, fences, decks, and other broad surfaces much faster than with a brush or roller. According to Graco’s guide to airless paint spraying, an airless sprayer can paint surfaces up to 10 to 15 times faster than a brush and at least four times faster than a roller.
The speed comes from the sprayer’s steady material flow and wide fan pattern. Each pass covers more area, so you spend less time stopping to reload an applicator. This makes an airless sprayer a practical choice for vacant homes, new construction, commercial interiors, long runs of siding, and large maintenance projects.
Reload less often and maintain consistent output
A roller requires frequent trips to a tray, and a brush carries only a limited amount of paint. An airless sprayer draws coating directly from a bucket or container, allowing you to work longer before stopping to reload. That can make a noticeable difference when you are painting several rooms, a long fence, or multiple structures.
The pump also supplies a steady stream when the coating, pressure, filter, and spray tip work together properly. Wagner’s airless technology guide explains that airless systems can spray many coatings without thinning them, while the tip creates a controlled pattern. Consistent output helps limit uneven coverage caused by an overloaded roller or a brush that is running out of paint.
Coat textured and uneven surfaces evenly
Textured walls, stucco, masonry, popcorn ceilings, rough siding, and unfinished fences can be difficult to coat with a roller. The roller may pass over raised areas without reaching recessed sections, leaving thin spots behind. A brush can improve coverage in small areas, but brushing an entire textured surface takes significant time.
An airless sprayer distributes fine droplets across the substrate, helping paint reach grooves, edges, and irregular sections. Wagner’s guide to airless spraying notes that these systems can provide even coverage on textured surfaces and dark substrates. For consistent results, hold the gun perpendicular to the surface, maintain a steady distance, and overlap each pass as directed by the coating manufacturer.
Spray paints, primers, stains, and coatings
An airless sprayer can handle more than standard interior wall paint. Depending on the model, tip, and product instructions, you may use it for latex and acrylic paints, primers, sealers, stains, varnishes, lacquers, masonry coatings, and other finishes. This versatility is useful for contractors who handle different surfaces and project types.
Always confirm that the material is approved for your equipment before filling the system. Wagner’s airless spraying guide lists several water-based and solvent-based products that airless systems may apply. The product label and technical data sheet should guide material preparation, tip selection, thinning, ventilation, cleanup, and protective equipment requirements.
Apply thick materials with little or no thinning
Thick coatings can be difficult to spread with a brush or roller. Many airless sprayers can handle heavy latex paint, primers, and stains with little or no thinning. Keeping the material closer to its original consistency may help preserve its body and coverage while reducing the need to add water or solvent.
Graco’s airless spraying overview explains that airless sprayers can handle heavy latex paints, primers, and stains with minimal thinning. You may still need to strain the coating and select a tip with the right orifice size. If the pump struggles or the spray pattern develops tails, check the product instructions and equipment settings before adding thinner.
Create a smooth finish with proper technique
An airless sprayer can produce a smooth, even finish, but good technique remains essential. Hold the gun at a consistent distance from the surface and keep it perpendicular instead of swinging your wrist in an arc. Begin moving the gun before pulling the trigger, then release the trigger just before stopping at the end of each pass.
Overlap passes evenly to prevent stripes and thin edges. Excessive pressure can create unnecessary overspray, while insufficient pressure may leave heavy spots or a pattern with visible tails. This airless spraying demonstration shows how gun movement, pressure, and fan consistency affect the result. Test the spray pattern on cardboard or scrap material before coating the finished surface.
Prepare surfaces to work efficiently
Spraying is fast once the coating reaches the surface, but preparation takes time. Cover floors, windows, trim, fixtures, vehicles, plants, and nearby equipment before you start. Fine paint mist can travel farther than expected, particularly indoors or during windy outdoor work.
Repair cracks, remove loose paint, clean the substrate, and let damp areas dry. Organize masking materials and hoses so you can move steadily without stopping to reposition coverings. As Graco’s airless spraying guidance explains, masking is an important part of the process. Careful preparation reduces cleanup and helps you get the full time-saving benefit of an airless sprayer.
What Materials Can an Airless Paint Sprayer Use?
An airless paint sprayer can apply much more than standard wall paint. Depending on the machine, spray tip, pressure range, and pump strength, it may handle water-based and solvent-based products for residential, commercial, and industrial projects. Common materials include latex paint, acrylic coatings, primers, stains, sealers, masonry coatings, textured products, and protective finishes.
The important step is matching the sprayer to the coating. A handheld unit may work well with thinner decorative paints, while a contractor-grade machine is better suited to thick primers, elastomeric coatings, fillers, and other high-viscosity materials. Wagner’s guide to airless spray technology provides a useful overview of coating types and equipment requirements.
Always read the sprayer manual and coating label before you begin. Check the recommended tip size, pressure range, thinning instructions, and cleanup method. Using the wrong setup can cause clogs, poor coverage, excess overspray, or damage to the pump and seals.
Spray latex, acrylic, and interior wall paints
Latex and acrylic paints are among the most common materials used with airless sprayers. Painters use them on drywall, ceilings, siding, trim, doors, and other broad surfaces when they need consistent coverage across a large area.
Interior wall paint often sprays well through a medium-sized tip when the machine can handle its thickness. Strain the paint first if it contains dried particles or debris that could block the tip. Then test the spray pattern on cardboard or scrap material. Increase pressure gradually until the fan looks even, but avoid using more pressure than necessary. Excess pressure creates more overspray and can leave a rough finish.
Apply primers, sealers, fillers, and clear finishes
Airless sprayers can apply primers, sealers, fillers, and clear finishes, but these materials can vary widely in thickness. A thin sealer may work with a smaller tip, while a heavy primer or filler may need a larger tip and a more powerful pump.
Apply primer in steady, overlapping passes, especially over porous drywall, patched sections, bare wood, or previously coated surfaces. Clear finishes require a clean work area and controlled movement to prevent runs or uneven buildup. Check the product label for the recommended tip size, pressure setting, thinning limits, and drying time before spraying.
Coat wood with stains, varnishes, and other finishes
Airless sprayers can apply wood stains, varnishes, lacquers, oils, and similar finishing products. They are useful for fences, siding, decks, doors, cabinets, and other wood surfaces, especially when the project includes a large area or many hard-to-reach details.
Stains require careful pressure control because excess material can collect in corners, grooves, and end grain. Varnishes and clear finishes also show dust and debris easily, so prepare the area before spraying. Use the tip recommended for the product, keep the gun at a consistent distance, and follow the finish manufacturer’s requirements for ventilation, drying, and cleanup.
Apply elastomeric, masonry, and textured coatings
Thick elastomeric, masonry, roof, and textured coatings often require a contractor-grade airless sprayer. These products may bridge small cracks, resist weather, or create a specific surface texture, so they are usually heavier than standard interior paint.
A machine with a strong piston pump and a large enough tip can apply these coatings more effectively than a small handheld model. Before spraying, remove loose material, repair damaged areas, and make sure the surface is clean and dry. Follow the product instructions for tip size, pressure, application thickness, and back-rolling. Some textured coatings may also require a specialized gun, hopper, or accessory.
Spray fireproofing and corrosion-protection coatings
Specialty airless sprayers may apply fireproofing materials and corrosion-protection coatings in commercial, industrial, and construction settings. These products can protect steel, concrete, tanks, equipment, and structural components, but they often have strict application requirements.
Some protective coatings contain abrasive materials or a high percentage of solids. These properties can affect tip wear, pump performance, hose selection, and cleanup. Use equipment approved for the product, and confirm that the sprayer can handle its viscosity and chemical composition. For fireproofing projects, follow the coating system’s requirements for surface preparation, film thickness, curing, and inspection.
Choose between water-based and solvent-based materials
Airless sprayers may work with both water-based and solvent-based coatings, but the equipment and cleanup process can differ. Water-based paints and primers are commonly cleaned from the pump, hose, gun, and tip with water or an approved cleaning solution. Solvent-based products may require a specific solvent, stronger ventilation, and additional protective equipment.
Do not assume a sprayer is compatible with every coating simply because the material is liquid. Confirm that the pump seals, hose, gun, filters, and other wetted parts can withstand the product. Keep water-based and solvent-based materials separate, and clean the system thoroughly before switching between them. The EPA’s guidance on spray painting also highlights the importance of ventilation and exposure control.
Thin or strain materials when necessary
Some coatings are ready to spray, while others may need straining or limited thinning. Straining removes lumps, dried skin, and debris that could block the tip. It is especially helpful when using paint that has been stored for a long time or opened previously.
Only thin a coating when the product instructions allow it. Too much thinner can reduce coverage, change the finish, weaken performance, or cause runs. Thick materials may need a stronger piston pump rather than additional thinner. If the coating still does not spray correctly at the recommended settings, use a machine designed for that material instead of changing the formula.
Check product data sheets for compatibility
The coating label and product data sheet should guide your setup. Look for the recommended spray method, tip size, pressure range, thinning limits, surface conditions, drying time, and cleanup products. These details are more reliable than guessing based on how the coating looks in the container.
Compare the product requirements with the sprayer manufacturer’s specifications. Confirm the maximum tip size, pressure range, flow rate, hose rating, and approved fluids. If the instructions are unclear, contact the coating manufacturer or equipment supplier before starting. A quick compatibility check can help prevent clogs, damaged seals, uneven coverage, and difficult cleanup.
When Should You Use an Airless Paint Sprayer?
An airless paint sprayer is most useful when you need to cover a large area efficiently. Instead of using compressed air, it relies on a pump to push paint through a small spray tip at high pressure. The paint breaks into fine droplets, creating a wide, even pattern across walls, ceilings, siding, fences, and other broad surfaces.
According to Graco’s guide to airless paint spraying, an airless sprayer can cover large surfaces up to 10 to 15 times faster than a brush and about four times faster than a roller. That speed makes it a practical choice for professional painters, contractors, maintenance crews, and anyone working on a sizable painting project.
An airless sprayer is not the best tool for every job. Masking, setup, cleanup, and overspray control can take longer than brushing or rolling when you are handling a small area. Consider the surface size, coating, finish requirements, and condition of the work area before choosing your equipment.
Paint large interior walls, ceilings, and open areas
Airless sprayers work well on broad interior surfaces, including drywall, ceilings, stairwells, warehouses, and unfinished rooms. Their wide spray pattern covers large sections quickly, making them useful for new construction, remodeling, commercial repainting, and other projects with plenty of open space.
They are especially practical when a room is empty or when furniture and flooring can be removed. With fewer obstacles, you can mask the remaining surfaces, maintain a steady spraying motion, and move across the area with fewer interruptions.
Protect floors, windows, trim, fixtures, and adjacent rooms before spraying indoors. Paint mist can travel farther than expected, especially when the sprayer is set to high pressure. Provide suitable ventilation and wear protective equipment recommended for the coating you are applying.
Coat exterior siding, fences, decks, and structures
Exterior projects often provide the open space an airless sprayer needs. Use one to apply paint or stain to siding, fences, decks, sheds, barns, garages, and other large structures. Spraying can reach grooves, gaps, and uneven areas that may take longer to cover with a brush or roller.
The Wagner Group lists large walls, exterior siding, fences, and decks among the common applications for airless spray painting. Many sprayers can also apply exterior materials such as latex paint, stains, sealers, masonry coatings, and certain elastomeric products.
Check the forecast before starting. Wind can carry overspray onto vehicles, windows, landscaping, and neighboring property. Avoid spraying when rain, extreme temperatures, or high humidity could interfere with drying or adhesion.
Handle commercial, construction, and maintenance projects
Airless sprayers are well suited to regular painting work and high-volume projects. Contractors may use them for apartment turnovers, offices, retail spaces, warehouses, schools, new construction, and large maintenance jobs. The faster application rate helps crews cover broad areas without repeatedly loading a brush or roller.
A sprayer can also support consistent production when several rooms or structures require the same coating. Choose a model with enough pressure, flow rate, hose length, and duty capacity for the material and project size. A handheld unit may suit occasional repairs, while a cart-mounted model is often better for extended professional use.
Plan the workflow before starting. Group areas by color and coating, stage supplies nearby, and allow time for masking, flushing, and cleanup between materials.
Cover textured, uneven, and hard-to-reach surfaces
An airless sprayer can apply an even coat across textured walls, masonry, rough siding, lattice, fences, and other irregular surfaces. A roller may miss deep recesses, while a brush can take longer to work coating into every uneven section. Spraying helps reach these areas with less direct contact.
The result still depends on preparation and technique. Clean loose dirt, remove peeling material, repair defects, and choose a tip that matches the coating. Hold the gun perpendicular to the surface and move at a steady pace. This helps cover recessed areas without creating heavy buildup on raised sections.
For ceilings, corners, and high surfaces, use suitable extension equipment and maintain stable footing. Do not use the spray pattern to compensate for poor access or an unsafe position.
Apply base coats and multiple colors
Airless sprayers are useful when a project requires primer, sealer, a base coat, or several finish colors. A sprayer can lay down a consistent first coat across a large surface, helping create an even foundation for later applications. This is helpful when covering a dark color, sealing porous drywall, or preparing new wood and masonry.
When applying multiple colors, organize the work to reduce cleaning and color changes. Complete one color in all planned areas before switching when possible. Use separate buckets, strainers, and clearly labeled materials to reduce contamination.
Some projects benefit from combining spraying with back-rolling. The sprayer applies material quickly, while a roller works the coating into textured or porous surfaces and leaves a uniform rolled texture. Test the process on a small area first, since the best method depends on the substrate and product instructions.
Choose another tool for small jobs, detail work, and occupied spaces
An airless sprayer may require more preparation and cleanup than it saves on a small repair. A brush or roller is often more practical for a single wall, a few doors, narrow trim, or minor touch-ups. These tools also provide more control around outlets, hardware, windows, corners, and decorative details.
Occupied interiors present another challenge. Furniture, carpet, personal belongings, multiple colors, and finished trim all require careful masking. In these settings, brushing and rolling may take less total time because you can begin sooner and protect a smaller area.
For fine finishes and smaller projects, an HVLP sprayer may be a better fit. Graco’s airless spraying guidance identifies HVLP systems as a suitable option for smaller projects that need precise application and less overspray.
Use a brush, roller, or combination when appropriate
You do not have to use just one application method. Many professional painters use an airless sprayer for broad surfaces, then switch to a brush or roller for edges, corners, repairs, and textured areas. This approach combines the speed of spraying with the control of traditional tools.
Back-brushing can help work stains and certain coatings into wood grain. Back-rolling can distribute paint across porous or textured surfaces and create a consistent finish. Brushing remains useful for cutting in around trim, windows, doors, and other areas that need a clean edge.
Consider the material, surface condition, finish, and available labor before choosing a method. Keep professional brushes, rollers, extension poles, painter’s tools, and masking supplies nearby so you can change techniques as the job requires.
How Do Airless Paint Sprayers Compare With Other Tools?
Choosing the right painting tool depends on the project size, coating, surface texture, desired finish, and level of control required. An airless paint sprayer can cover large areas quickly, but a brush or roller may be more practical for trim, tight spaces, small repairs, and occupied rooms.
Professional painters often use several tools on one job. For example, they may spray the open areas, then use a brush or roller to work around edges, corners, and textured sections. Comparing each tool’s strengths can help you choose an efficient setup and avoid unnecessary cleanup.
Choose airless sprayers for speed and brushes for detail
Airless sprayers are built for production work. They can cover broad surfaces quickly and apply a consistent coat without the repeated loading required with a brush. According to Graco’s airless spraying guide, airless spraying can be up to 10 times faster than brushing and at least four times faster than rolling.
That speed makes an airless sprayer useful for large walls, ceilings, fences, siding, and new construction. A brush remains the better choice for precision work, including window trim, corners, small repairs, and detailed edges. Many professional painters use both tools on the same project, spraying the open areas and brushing narrow sections or touch-ups.
Use airless sprayers for walls and rollers for texture
An airless sprayer can apply an even coat across large walls, ceilings, and textured surfaces. It can also reach grooves, recesses, and uneven areas that may take longer to cover with a roller. Wagner’s airless technology guide explains that airless systems can cover textured surfaces evenly when the pressure and spray tip match the material and surface.
Rollers still have an important role because they provide direct contact with the surface. A roller can preserve or create a specific texture, such as the stippled finish left by a nap roller. For smaller rooms, occupied spaces, or areas where overspray would be difficult to control, rolling may be more practical. You can also spray the coating and roll it immediately afterward to combine fast application with a familiar rolled finish.
Compare airless, HVLP, and compressed-air sprayers
Airless, HVLP, and compressed-air sprayers atomize paint in different ways. An airless model uses a pump to force coating through a small tip at high pressure. It does not require a compressor or turbine, which makes it well suited to thick materials and large surfaces.
An HVLP sprayer uses a high volume of air at low pressure. It generally provides more control and less overspray, making it useful for cabinets, furniture, trim, and other detail work. A compressed-air sprayer uses pressurized air from a compressor to break the coating into fine particles. It can produce an attractive finish, but it usually creates more overspray and requires additional equipment.
Graco’s comparison of spray technologies can help you match each system to the coating and finish you need. As a general guide, choose airless equipment for speed and coverage, HVLP for controlled detail, and compressed air for fine finishing when the setup suits the project.
Compare airless and air-assisted airless systems
Standard airless sprayers rely entirely on fluid pressure to atomize paint. This design delivers fast coverage and handles many thick coatings, but high pressure can create more overspray when the operator uses excessive pressure or the wrong tip.
Air-assisted airless systems combine fluid pressure with a smaller amount of compressed air. The air helps refine atomization, giving the operator more control and a finer finish than a standard airless sprayer. KTA University’s spray comparison explains how air-assisted airless equipment combines features of airless and conventional spray systems.
This setup can be useful for cabinets, doors, millwork, and other projects where finish quality matters as much as application speed. It usually costs more and requires an air compressor, so it may not be necessary for routine wall, ceiling, fence, or siding work. For many general painting jobs, a standard airless unit offers the more practical setup.
Manage overspray, transfer efficiency, and paint waste
Airless sprayers can reduce labor, but they do not eliminate paint waste. Fine droplets may drift beyond the target surface, especially when pressure is too high, the tip is worn, or the work area is not properly protected. Mask floors, windows, fixtures, vehicles, and nearby surfaces before spraying. Use suitable ventilation and respiratory protection, especially indoors or when working with solvent-based coatings.
Transfer efficiency also depends on the application method. Airless spraying generally places more coating on the surface than conventional compressed-air spraying because it does not use a large stream of air that can carry paint away. Even so, careful setup remains important. KTA University’s overview of transfer efficiency provides useful context when comparing spray methods.
Use the lowest pressure that produces a clean, even fan. Keep the gun perpendicular to the surface, maintain a steady distance, and overlap each pass consistently. These habits help reduce fogging, runs, uneven coverage, and unnecessary material use.
Combine spraying with back-brushing or back-rolling
Spraying does not have to replace brushing or rolling. On siding, masonry, rough wood, and other porous surfaces, back-brushing or back-rolling can work the coating into the texture and help create more uniform coverage. This method is especially useful when a surface has grooves, joints, or areas that are difficult to coat with spray alone.
A common process is to spray a manageable section, then immediately work the wet coating with a brush or roller. Keep a wet edge so the finish stays consistent from one section to the next. On some jobs, a sprayer can feed paint onto a roller, reducing the need to reload while retaining a rolled texture.
Use this combination when the coating needs to penetrate the surface or when the project calls for a specific texture. Spraying saves time during application, while back-brushing or back-rolling provides added control where the surface requires it.
What Tradeoffs and Mistakes Should You Expect?
An airless paint sprayer can cover large surfaces quickly, but that speed comes with extra preparation, practice, and cleanup. Spraying creates a fine mist that may settle beyond the target surface, so the finished result depends on more than the sprayer. Masking, coating selection, pressure settings, and hand movement all affect the quality of the work.
The biggest mistakes usually happen when someone rushes the setup or treats the sprayer like a brush or roller. Take time to read the equipment and coating instructions, test the spray pattern, and protect nearby surfaces. Keep your paint supplies and protective equipment ready before starting, including masking materials, filters, cleaning supplies, and suitable personal protective equipment.
Small details also matter during cleanup. Paint left inside the hose, gun, or pump can harden and cause problems on the next job. A worn tip can change the spray pattern, while excessive pressure can create overspray and waste material. Use the following guidelines to avoid common issues.
Mask surfaces and control overspray
Spraying is fast once the work begins, but masking can take longer than expected. Cover floors, windows, trim, doors, gutters, fixtures, furniture, vehicles, and nearby surfaces with suitable plastic sheeting, drop cloths, or painter’s tape. Seal edges and gaps where paint mist could collect.
Overspray can travel through open windows, doorways, and ventilation paths. Close or cover openings when practical, and inspect the surrounding area before spraying. Outdoors, wind may carry paint onto neighboring buildings, vehicles, landscaping, or walkways. Avoid spraying when weather conditions make control difficult.
Plan your spray direction so the fan moves toward the work area rather than toward exposed surfaces. Keep extra masking materials nearby in case you discover an unprotected edge. The Wagner Group’s airless painting guide explains why preparation is an important part of the spraying process.
Clean and maintain the sprayer regularly
Cleaning an airless sprayer takes longer than washing a brush or roller, but skipping it can damage the equipment and affect the next application. Flush the pump, hose, gun, filter, and spray tip after every use. Follow the coating manufacturer’s instructions when choosing water, cleaning solution, or another compatible flushing material.
Allow extra time when switching between colors or moving from a water-based product to a solvent-based product. Paint left in the hose can contaminate the next color or coating. Remove and inspect the filter and tip during cleanup, and check seals and connections for wear.
Never leave paint sitting in the system longer than the equipment or coating instructions permit. Review the manufacturer’s sprayer maintenance guidance for flushing, storage, and routine inspections.
Account for the learning curve on small areas
An airless sprayer is not always the most practical choice for a small room, a single door, or a few pieces of trim. Setup, masking, and cleanup may take longer than brushing or rolling. Small areas also leave less room for technique mistakes because uneven passes, heavy edges, and overspray are easy to notice.
New users need time to learn how pressure, paint thickness, tip size, gun distance, and movement work together. Poor setup can cause splattering, uneven coverage, heavy edges, or clogged tips. Before choosing a sprayer, compare the complete project time with the time required for a brush and roller.
For small or detailed work, a brush and roller may be more efficient. For large walls, ceilings, siding, fences, or production work, the sprayer’s faster application may justify the additional preparation.
Match the spray tip and pressure to the job
The spray tip controls the amount of material leaving the gun and the width of the spray pattern. Tip sizes are measured in thousandths of an inch, and a larger opening generally applies more material. Start with the coating manufacturer’s recommended tip range rather than choosing a size based only on the project surface.
Pressure also affects the finish. Too little pressure can create tails, an uneven fan, or poor atomization. Too much pressure can produce excess overspray, waste material, and wear the tip more quickly. Set the pressure only as high as needed for a consistent pattern.
If the correct pressure still produces an uneven fan, stop and check the tip, filter, coating consistency, and hose connections. KTA University’s airless spraying guide offers useful information about tip selection, spray patterns, and application technique.
Thin materials only when necessary and avoid incompatible coatings
Many airless sprayers can apply thick paints, primers, stains, and specialty coatings without thinning. Adding water, solvent, or an additive when it is not needed can change the product’s coverage, drying time, sheen, or performance. Always read the coating’s product data sheet before changing its consistency.
If the material is too thick for the selected tip or equipment, first try the manufacturer’s recommended adjustment. You may need a different tip, a suitable pressure setting, or a compatible additive for that specific coating. Some water-based paints may permit a product such as Floetrol, but use it only when the paint manufacturer allows it.
Do not combine coatings, solvents, or additives based on guesswork. Confirm compatibility with both the coating instructions and the sprayer manual. When in doubt, test the adjusted material on scrap before applying it to the finished surface.
Move at the right speed and hold the gun at the right distance
Keep the spray gun perpendicular to the surface instead of swinging it in an arc. Hold it at a consistent distance, generally about 12 to 18 inches from the surface, unless the equipment or coating instructions specify otherwise. Moving too close can create runs and heavy coverage, while moving too far can create dry spray and uneven color.
Start moving before pulling the trigger, then release the trigger just before stopping the pass. Keep each pass straight and overlap the previous pass consistently. Moving too slowly applies too much paint in one area. Moving too quickly leaves thin coverage and may require additional passes.
Maintain the same hand speed and distance across the entire surface. The KTA application guidance explains how gun distance and movement affect coverage and finish quality.
Practice on cardboard or scrap material
Test the sprayer before applying paint to the finished surface. A piece of cardboard, scrap siding, plywood, or another similar material gives you a safe place to check the spray pattern. Look for an even fan with consistent coverage and no heavy lines at either edge.
Use the test area to adjust pressure, confirm the tip size, and practice your hand speed. If the pattern spits, tails, or produces large droplets, stop and correct the setup instead of trying to compensate while painting.
Practice is especially important when using a new sprayer, coating, tip, or pressure setting. It can also reveal whether the material needs straining or a different application method. Testing first is far easier than correcting a poor finish on a wall, ceiling, fence, or exterior surface.
Check clogs, worn tips, and pressure problems
A sudden change in the spray pattern may point to a clogged tip, dirty filter, worn tip, loose connection, or pressure problem. If the fan becomes narrow, uneven, weak, or irregular, stop spraying and follow the equipment manufacturer’s pressure-relief procedure. Lock the gun trigger before inspecting or removing a tip.
Never use your hand to check for a blockage, and never point the gun at yourself or another person. Clean the tip and filter with the recommended tools, then test the sprayer again. Replace a worn tip when it allows too much material through or creates an inconsistent fan, even when the pressure setting appears correct.
During maintenance, keep track of small parts such as intake valves, outlet valves, seals, balls, and springs. Losing one part during disassembly can leave the sprayer unusable until a replacement is available.
How Do You Choose an Airless Paint Sprayer?
The right airless paint sprayer depends on the coating, project size, work environment, and amount of control you need. A compact handheld model may suit a small repair or touch-up, while a contractor-grade unit is better for repeated work across walls, ceilings, siding, fences, or commercial spaces.
Before buying, compare the sprayer’s specifications with the coatings you plan to use. Check the product data sheet for recommended pressure, tip size, thinning instructions, and material compatibility. The Wagner guide to airless spray painting explains why pump capacity and coating compatibility matter when selecting equipment.
Match pressure and flow to the coating
Paint viscosity affects how well a sprayer performs. Thin materials, such as stains and some sealers, usually require less pressure and flow than latex paint, elastomeric coatings, primers, or masonry products. If a machine cannot deliver enough pressure, it may produce an uneven pattern, fail to atomize the coating, or clog repeatedly.
Compare maximum pressure, measured in PSI, with the maximum flow rate, usually listed in gallons per minute. Do not choose a machine based on PSI alone. The sprayer must also move enough material for the tip size and coating. A contractor-grade piston pump is often a better choice for thick materials and regular professional use. Always confirm that the machine is approved for the coating you plan to apply.
Select the correct spray tip and fan width
The spray tip controls the amount of material released and the width of the spray pattern. Tip sizes are measured in thousandths of an inch. A larger orifice applies more material and may suit thick coatings, while a smaller opening generally works better for thinner materials and finer applications.
The first digit in a three-digit tip number commonly indicates the approximate fan width when the gun is held about 12 inches from the surface. The remaining two digits indicate the orifice size. For example, a 515 tip produces an approximately 10-inch fan with a 0.015-inch orifice. Use the coating label or product data sheet as a starting point, then confirm the recommendation with the manufacturer. KTA University’s airless spraying guide explains how tip size affects flow and spray width.
Compare electric, gas-powered, handheld, and cart-mounted models
Electric airless sprayers work well for many interior and exterior projects where an electrical connection is available. They are often quieter and simpler to use than gas-powered models, making them practical for homes, offices, and smaller commercial sites. Handheld electric sprayers are easy to carry and can suit cabinets, doors, accent walls, and limited-area repairs.
Gas-powered models are useful for large exterior projects, new construction, and properties without reliable electrical service. Cart-mounted sprayers typically offer larger pumps, longer hoses, and better support for frequent professional use. A handheld model may be convenient for occasional work, but a cart-mounted unit is usually more comfortable during long production days. Graco’s airless spraying overview outlines several equipment types and their common applications.
Balance portability, hose length, and job-site mobility
A sprayer should be easy to position without requiring you to carry a heavy machine from room to room. Handheld units offer excellent portability, but their smaller capacity may require more frequent refilling. Cart-mounted machines weigh more, although wheels make them easier to move across many job sites.
Hose length also affects productivity. A longer hose lets you leave the sprayer in one location while moving around a room, scaffold, or exterior wall. This reduces the need to carry equipment and keeps the paint container in a stable position. Avoid choosing a hose that is longer than the machine can support, since excessive length can affect pressure and add cleaning time. Consider stairs, narrow rooms, landscaping, scaffolding, and storage before buying.
Match the duty cycle to the project size
Duty cycle describes how much work a sprayer can handle before cooling, performance, or maintenance becomes a concern. A homeowner painting one room does not need the same equipment as a contractor coating several homes each week.
For occasional repairs, small rooms, doors, or furniture, a compact electric or handheld sprayer may provide enough capacity. Larger projects require a pump that can run consistently and maintain even output for extended periods. Contractor-grade equipment is a better match for multiple rooms, exterior siding, fences, new construction, and commercial maintenance.
A machine with too little capacity may require frequent pauses, experience overheating, or wear out sooner. A much larger unit can add cost, weight, and cleanup time without improving the finish. Match the sprayer to the work you regularly perform, not just the largest project you might handle once.
Choose replaceable tips, filters, and serviceable parts
Spray tips wear as paint and other coatings pass through them. A worn tip can create an uneven fan, place too much material in the center of the pattern, and increase overspray. Replaceable tips make it easier to restore a clean spray pattern without replacing the entire gun or machine.
Filters, inlet screens, valves, packings, and other service parts also affect long-term ownership costs. Check whether replacement components are readily available and whether the manufacturer provides cleaning instructions, parts diagrams, and repair support. This is especially important for professional painters who rely on their equipment throughout the year.
Ask how easily you can remove and clean the gun filter, manifold filter, and suction components. Small internal parts, including valve balls and springs, can be misplaced during maintenance, so clear instructions and a serviceable design are valuable. Keep spare tips and filters available when a project cannot afford extended downtime.
Review manufacturer specifications before buying
Compare the machine’s specifications with the coatings and surfaces you commonly handle. Pay attention to recommended tip sizes, maximum tip size, gallons-per-minute output, maximum pressure, hose length, voltage or fuel requirements, and approved materials. A sprayer rated for interior latex paint may not be suitable for fireproofing, highly textured coatings, or solvent-based products.
Also check the manufacturer’s guidance for extension cords, cleaning fluids, temperature limits, and storage. Product data sheets often list thinning requirements, application methods, and compatible equipment. When specifications are unclear, contact the manufacturer or a knowledgeable supplier before ordering.
For Integrity Supply customers, this comparison can help identify equipment suited to recurring painting, construction, maintenance, and safety work. Choosing a machine based on actual coating requirements and job conditions helps prevent poor spray patterns, unnecessary downtime, and avoidable equipment wear.
How Do You Set Up an Airless Paint Sprayer?
An airless paint sprayer can cover large areas quickly, but careful setup affects the finish, material use, and safety of the job. Before you begin, read the sprayer manual and the coating manufacturer’s instructions. Pressure ranges, spray tip sizes, priming steps, and cleaning requirements vary by model and product.
Gather the supplies you need before opening the paint: drop cloths, masking materials, clean containers, paint filters, compatible cleaning fluid, gloves, eye protection, and respiratory protection when required. Inspect the hose, gun, tip, guard, filters, suction tube, and power cord or fuel system for damage.
Prepare the work area before turning on the sprayer. Remove loose paint and contaminants, protect everything that should stay clean, and make sure the coating is suitable for airless application. Treat the gun as a high-pressure tool at all times. Before removing a tip, filter, or fitting, lock the trigger and follow the manufacturer’s pressure-relief procedure. The U.S. Consumer Product Safety Commission’s paint safety guidance also recommends proper ventilation and protective equipment when working with coatings.
Prepare the surface, work area, and coating
Start with a clean, dry, sound surface. Remove dust, grease, mildew, loose paint, and other contaminants. Scrape or sand peeling areas, repair holes and cracks, and let patching compounds dry completely. A sprayer applies coating efficiently, but it will not hide poor preparation or repair work.
Move furniture and removable items out of the area. Place the sprayer on a stable, level surface where the hose will not create a trip hazard. Stir the coating from the bottom of the container, then confirm that it is approved for airless application. Product instructions usually list the recommended tip size, pressure range, and thinning requirements, so review the coating’s technical data sheet before filling the unit.
Mask floors, fixtures, windows, and nearby surfaces
Airless sprayers create fine overspray that can travel beyond the target area. Remove switch plates, hardware, light fixtures, and other items that can come off easily. Cover floors with drop cloths, then protect windows, trim, cabinets, countertops, doors, and permanent fixtures with masking paper or plastic sheeting.
Secure masking materials with painter’s tape and check for gaps around outlets, corners, and window frames. For exterior work, protect vehicles, landscaping, nearby siding, and neighboring structures. Wind can carry overspray farther than expected, so postpone the job when conditions make containment difficult. If you are preparing older painted surfaces, review the EPA’s lead-safe renovation guidance before disturbing the coating.
Check weather, ventilation, and substrate conditions
For exterior work, check the forecast before starting. Rain, high humidity, strong wind, extreme temperatures, and a cold substrate can affect adhesion and drying. Follow the coating label for acceptable application conditions because limits vary between products. Do not spray a surface that is damp from rain, dew, or washing.
For interior work, provide fresh air without creating a draft that carries overspray through the building. Open suitable windows and doors, use approved ventilation equipment when necessary, and keep unprotected people away from the area. Never use a fuel-powered sprayer in an enclosed space because exhaust can create a serious hazard. Review OSHA’s ventilation guidance when planning work in an occupied or commercial building.
Mix and filter paint before filling the system
Mix the coating according to the manufacturer’s instructions. Stir from the bottom of the container so settled material becomes evenly distributed. Do not add thinner simply to make paint easier to spray. Thinning can change coverage, drying time, sheen, and performance, and some coatings should not be thinned at all.
If thinning is allowed, add only the specified amount and mix it thoroughly. Strain the coating through a clean paint filter before it enters the sprayer. Filtering catches skin, dried particles, and clumps that could clog the pickup tube, gun filter, or spray tip. Use a clean container when possible, and keep the paint covered while you work. For specialty coatings, follow the product data sheet rather than general recommendations.
Prime the pump and remove air from the hose
Place the suction tube in the paint and the return tube in a waste container. Set the prime or pressure control as directed, then start the sprayer according to the manual. The pump should draw coating from the container and send it through the return tube until the material flows steadily without bubbles.
Next, direct the gun into a waste bucket while the tip and guard are removed. Release the trigger lock, hold the gun firmly, and switch from priming to spraying as instructed. Continue until the hose contains paint and the flow is consistent. Graco’s airless spraying guide explains the basic equipment sequence. Relieve pressure before installing the tip and guard.
Test the spray pattern on cardboard or scrap material
Do not begin on the finished surface. Spray onto a large piece of cardboard, scrap board, or masking paper first. This test confirms that the pump is delivering paint, the tip is installed correctly, and the pattern suits the coating.
Look at the spray fan from several angles. It should distribute paint evenly from one side to the other. Heavy paint at the edges may indicate low pressure, an unsuitable tip, or a partially blocked tip. Excessive mist may indicate too much pressure. Practice moving your arm at a steady speed while keeping the gun at a consistent distance. This short test can reveal setup problems before they affect a wall, ceiling, or finished surface.
Adjust pressure without creating excess overspray
Begin with a lower pressure setting and increase it gradually until the spray pattern becomes even. Use enough pressure to atomize the coating without creating a cloud of unnecessary mist. Excess pressure can waste paint, increase cleanup, wear the tip faster, and leave a rough finish.
If the pattern remains uneven at a reasonable pressure, stop and inspect the tip, filter, and coating viscosity. Increasing pressure will not solve every problem. The Wagner airless spraying guide explains how pressure, material flow, and atomization work together. Make small adjustments on test material, then check the finish before moving to the project surface.
Hold the gun perpendicular at the proper distance
Hold the gun at a right angle to the surface rather than angling it from side to side. Keep the tip about 12 to 18 inches from the surface, unless the sprayer or coating instructions specify a different distance. Moving too close can create runs and heavy coverage. Holding the gun too far away can produce dry spray and unnecessary overspray.
Move the gun with your arm and shoulder, not only your wrist. Keep it parallel to the surface throughout each pass. When coating corners, edges, or narrow sections, maintain the same position as much as the space allows. Consistent distance and angle help create an even film thickness across the area.
Pull the trigger before each pass and release it after
Start moving the gun before pulling the trigger. Release the trigger just before the gun stops at the end of the pass. This technique prevents paint from building up at the beginning and end of each stroke. Avoid holding the trigger while changing direction or walking between sections.
Work in manageable areas so you can maintain a wet edge. If you need to pause, release the trigger, lock it, and place the gun in a safe position. Never leave a pressurized gun unattended. The Graco spray technique guide recommends controlling the trigger during each pass to help maintain consistent coverage and reduce wasted material.
Overlap passes without moving too slowly
Overlap each pass by about 30% to avoid visible stripes and thin gaps. Follow a consistent pattern, such as working from the top of a wall downward or moving across siding in even bands. Keep the gun moving at a controlled pace. Moving too slowly can create runs and heavy coverage, while moving too quickly can leave a thin coat.
Watch the surface as you work. If you see sagging, runs, or wet buildup, stop spraying that section and adjust your speed, distance, or pressure. Do not immediately spray around a heavy area to cover it. Let the coating settle according to the product instructions, then correct it if needed. For many surfaces, two light coats produce a better result than one heavy coat.
Plan color changes to reduce cleanup time
Group work by color, coating type, or location whenever possible. Complete all suitable sections with the first material before switching to another product. Keep unused paint covered while you work, and label partially filled containers so you can identify them later.
When changing colors, follow the sprayer manual for flushing and refilling. Water-based coatings generally require water for cleanup, while solvent-based products may require a specific compatible cleaning solvent. Never mix cleaning products, and do not pour coating or solvent waste into a drain unless local regulations permit it.
If you will resume the same color soon, check whether the manufacturer provides a short-term storage method. For longer pauses or final shutdown, complete the full cleaning process rather than leaving coating inside the pump or hose. Proper planning reduces downtime and helps prevent dried material from clogging the equipment.
How Do You Use, Clean, and Maintain an Airless Paint Sprayer Safely?
An airless paint sprayer can help professional painters, contractors, and maintenance teams cover large surfaces efficiently, but it demands careful handling. The pump forces coating through a small spray tip at very high pressure, so improper use can cause serious injury or damage nearby surfaces. Before operating the equipment, read the sprayer manual, inspect the hose and fittings, and confirm that the coating is compatible with the machine.
Prepare the work area before starting the sprayer. Cover floors, fixtures, windows, vehicles, and anything else that could collect overspray. Keep other people and pets outside the spray area, and gather the correct personal protective equipment. Graco’s airless spraying safety guidance recommends locking the gun trigger and relieving system pressure before changing a tip or making adjustments.
Cleaning should begin as soon as the job ends. Paint left in the pump, hose, gun, or tip can dry, create blockages, and place unnecessary strain on the equipment. Use the cleaning solution recommended for the coating and follow the sprayer manufacturer’s instructions. Water-based and solvent-based products may require different cleaning methods, and cleaning products should never be mixed unless the labels specifically allow it.
Prevent high-pressure injection injuries
Never point an airless spray gun at yourself, another person, an animal, or any part of your body. A high-pressure stream can penetrate the skin, even when the wound looks small. Do not use your hand, finger, or a rag to check for leaks or stop the spray. Keep the tip pointed toward the work surface or a safe collection area whenever the gun is pressurized.
Use the gun guard and tip guard supplied with the sprayer, and keep them in place during operation. If paint penetrates the skin, seek emergency medical care immediately and tell the medical team that the injury involved high-pressure paint. Do not treat the injury like an ordinary cut. Review the manufacturer’s airless sprayer safety instructions before using unfamiliar equipment.
Wear eye protection, gloves, coveralls, and respiratory protection
Wear safety glasses or a face shield to protect your eyes from paint mist, splashes, and cleaning fluid. Chemical-resistant gloves help keep coatings and solvents off your skin, while coveralls reduce exposure to overspray. Choose clothing that covers your arms and legs, especially when spraying ceilings, overhead surfaces, or enclosed areas.
Respiratory protection depends on the coating, application, and work environment. Read the product’s safety data sheet and use a respirator approved for the specific hazard when required. A disposable dust mask is not automatically suitable for paint vapors. Wagner’s airless spray painting guide explains how PPE helps reduce exposure to overspray and fumes.
Ventilate indoor work areas safely
Provide steady airflow when spraying indoors, but do not rely on ventilation as a replacement for respiratory protection. Open doors and windows where practical, and use suitable fans to move contaminated air away from the work area. Position fans carefully so they do not blow wet paint onto nearby surfaces or spread an unsafe spray cloud.
Keep people and pets out of the area until the coating has dried and fumes have cleared according to the product instructions. Never spray near flames, sparks, pilot lights, heaters, or other ignition sources. Some coatings and cleaning solvents are flammable, so check the label and safety data sheet before beginning. Wagner offers additional guidance on ventilation for airless spraying.
Lock the trigger and relieve pressure before adjustments
Engage the gun’s trigger lock whenever you stop spraying, move the equipment, or set the gun down. Before changing the tip, removing the guard, disconnecting the hose, cleaning the gun, or inspecting a blockage, shut off the sprayer and follow the manufacturer’s pressure-relief procedure.
Pressure can remain trapped in the hose after the motor stops. Keep the tip pointed into a suitable waste container, then trigger the gun only as directed by the manual. Confirm that the pressure has dropped and that no material is being discharged before continuing. If the sprayer has a prime or drain valve, use it according to the manufacturer’s instructions. Graco’s pressure-relief guidance should take priority because controls vary by model.
Flush the pump, hose, gun, and tip after each use
Clean the sprayer as soon as possible after finishing. Paint can dry inside the pump, hose, gun, and tip, causing clogs or damage to seals. Use the cleaning solution recommended for the coating. Water is commonly used for many water-based paints, while compatible solvent-based cleaners may be needed for oil-based products. Always follow the paint label and equipment manual.
Relieve pressure before cleaning, then circulate the appropriate solution through the system until the discharge runs clear. Flush the pump, hose, gun, and spray tip, and collect waste in a suitable container. Do not pour paint residue or cleaning fluid onto the ground or down a drain. KTA University provides additional information about flushing airless spray equipment after use.
Clean filters, guards, and spray tips
Remove and clean the gun filter, manifold filter, inlet screen, tip, and tip guard according to the equipment manual. Dried paint and debris can restrict flow, create an uneven fan, and force the pump to work harder. Use the correct brush and cleaning solution, and avoid damaging fine screens or seals with sharp tools.
Inspect the tip for wear while cleaning it. A worn tip may produce a heavy center, an inconsistent pattern, or require more pressure than usual. Replace it when necessary to help maintain a consistent spray pattern and reduce wasted coating. Reinstall every part correctly before pressurizing the sprayer. Graco’s maintenance recommendations include regular cleaning of filters, guards, and tips.
Clear clogs without touching the spray tip
A clogged tip can cause a weak stream, an uneven fan, or no spray at all. Never touch the tip with your fingers, hold it against your skin, or cover it with a cloth while the sprayer is pressurized. The blockage can release suddenly and inject paint into the skin.
Engage the trigger lock, relieve pressure, and use the reversible tip feature if your model includes one. Reversing the tip and briefly triggering the gun usually directs material backward through the opening. Return the tip to its normal position once the blockage clears, then test the pattern on scrap material. If the clog remains, follow the manufacturer’s cleaning procedure and remove the tip only after pressure has been released. Wagner explains how to clear airless spray clogs safely.
Store the sprayer to prevent clogs and damage
After cleaning, inspect the hose, gun, tip, guards, fittings, and power cord for wear or damage. Store the equipment with the recommended storage fluid or preservative if the manufacturer requires one. This helps protect internal components and keeps moisture or leftover paint from damaging the pump.
Keep the sprayer in a clean, dry location away from freezing temperatures, direct sunlight, dust, and unauthorized users. Coil the hose without sharp bends, and avoid placing heavy tools on it. Store tips, filters, and other small parts together so you can inspect them before the next job. Proper storage helps prevent equipment damage and dried coating inside the system, as noted in KTA University’s airless equipment care guidance.
Frequently Asked Questions
What is an airless paint sprayer used for?
An airless paint sprayer is useful for covering large surfaces such as walls, ceilings, siding, fences, decks, warehouses, and commercial interiors. It can apply many paints, primers, stains, sealers, and specialty coatings when the product and equipment are compatible. Brushes and rollers may be more practical for small repairs, trim, and detailed work.
How do I choose the right spray tip?
Choose a tip based on the coating manufacturer’s recommendation, material thickness, desired fan width, and sprayer capacity. Larger orifices generally suit thicker coatings, while smaller openings work better with thinner products. Test the selected tip on cardboard or scrap material before spraying the finished surface.
Do I need to thin paint for an airless sprayer?
Not always. Many airless sprayers can apply latex paint, primers, stains, and other coatings with little or no thinning. Only thin a product when the label or technical data sheet permits it, and use the specified amount. Straining the material may be helpful when it contains dried particles or debris.
How can I prevent uneven coverage and excess overspray?
Use the lowest pressure that produces an even spray pattern. Hold the gun perpendicular to the surface at a consistent distance, move at a steady pace, and overlap each pass evenly. Practice on scrap material first, and protect nearby surfaces with suitable masking materials.
What safety steps should I follow when using an airless sprayer?
Wear the protective equipment required for the coating, provide proper ventilation, and keep people and pets away from the spray area. Never point the gun at anyone or touch the spray stream. Lock the trigger and follow the manufacturer’s pressure-relief procedure before changing tips, clearing clogs, disconnecting parts, or cleaning the equipment.