

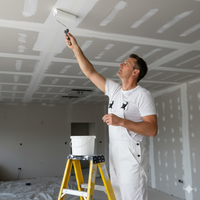


















A drywall patch may look simple, but the finished result depends on what happens before and after you apply the adhesive mesh. A patch that is too small, compound applied too heavily, or rushed drying time can leave cracks, ridges, and visible outlines beneath the paint. If you want to learn how to repair a hole in drywall with a patch kit, start by gathering the right materials for the damage. A utility knife, measuring tape, putty knives, joint compound, sanding tools, primer, and paint can help you complete the repair properly. This guide walks through the process in clear, manageable steps.
Key Takeaways
- Match the repair method to the damage: Use spackle for small holes, patch kits for moderate openings, and supported drywall inserts for large, deep, unstable, or irregular damage.
- Prepare a safe, stable surface: Check for wiring and plumbing, remove loose material, clean and dry the area, protect nearby surfaces, and wear eye and respiratory protection.
- Finish with patience and precision: Apply thin compound coats, let each layer dry, sand lightly, prime the repair, and match the wall’s texture, paint color, and sheen.
What Tools and Materials Do You Need for a Drywall Patch Kit?
A successful drywall repair starts with the right supplies. Before opening your patch kit, gather everything needed for cutting, filling, sanding, priming, and painting. Having your tools within reach helps you work carefully and prevents rushed decisions while the compound is wet.
The size, depth, and location of the hole determine which materials you need. A small nail hole may require only spackle and a putty knife. A larger opening may call for an adhesive mesh patch, joint compound, a drywall saw, sanding tools, and several coats of finishing material. You can compare patching compounds, painter’s tools, and safety equipment through Integrity Supply’s online catalog.
Choose a patch, spackle, or joint compound
Choose a repair material based on the size and depth of the damage. Spackle works well for small nail holes, shallow dents, and minor surface damage. It is easy to apply and often dries quickly. Larger holes usually need an adhesive mesh or metal patch to cover the opening before you apply joint compound.
Some drywall repair kits include a patch and compound, while others require you to buy these items separately. Read the product instructions to confirm that the materials are compatible. Lightweight spackle is convenient for small repairs, but it may not provide enough coverage or strength for a larger opening. All-purpose joint compound is useful for covering patch edges and creating a smooth finish.
If the hole is deep, apply the compound in several thin layers. One thick layer may shrink, crack, or remain soft beneath the surface. The U.S. Gypsum repair guide provides additional information about using joint compound for drywall finishing.
Keep multiple putty knife sizes ready
A putty knife spreads spackle and joint compound across the damaged area. Keep at least two sizes nearby so you can use the right tool for each stage of the repair. A 4-inch knife gives you control when applying compound directly over the patch. A 6-inch or 10-inch knife helps feather the edges into the surrounding wall.
Flexible knives are useful for smoothing compound, while a stiffer knife can help remove loose drywall and scrape away dried ridges. Choose blades that are clean and free from nicks. A damaged edge may leave lines or grooves in the compound, creating more sanding work later.
Clean the blade after each use, before the compound hardens. Keep a damp cloth or small bucket of water nearby for this purpose. For larger repairs, a wider taping knife can help distribute compound evenly and reduce visible transitions around the patch.
Add a utility knife, drywall saw, tape measure, and pencil
A utility knife helps trim loose paper, score damaged drywall, and clean up rough edges. For larger or irregular openings, use a drywall saw to create a clean shape that is easier to patch. A tape measure lets you check the hole and patch dimensions, while a pencil gives you a clear guide for marking cuts.
Measure the damaged area at its widest points before deciding whether to enlarge it. If you need to square the opening, mark each cut carefully and remove only the unstable material. A straightedge can help create cleaner lines for larger repairs.
Work slowly when cutting into drywall. Hidden electrical wiring, plumbing, or HVAC components may be behind the wall. If you are unsure what is inside the wall, stop before cutting and consult a qualified professional. The Consumer Product Safety Commission’s electrical safety information explains why caution around concealed wiring is important.
Stock sanding sponges, fine-grit sandpaper, primer, and paint
After the compound dries, sanding sponges and fine-grit sandpaper help smooth ridges and blend the repair into the wall. Use a medium-fine grit to level uneven areas, then switch to a fine grit for the final pass. Sand gently and check the surface often. Pressing too hard can damage the patch or expose the drywall paper around its edges.
Keep primer and matching paint ready before you start the repair. Joint compound absorbs paint differently from finished drywall, so primer helps create a more consistent surface. Use a stain-blocking primer if the wall has water marks or other discoloration, but first address the source of the moisture.
Match the paint color, sheen, and application method as closely as possible. A roller, brush, or texture tool can leave a different finish. If the wall has a textured surface, you may also need a texture product that matches the surrounding pattern. A drywall sanding guide from 3M offers useful preparation tips.
Use a stud finder and noncontact voltage tester
Before cutting or pressing tools into the wall, check for hidden hazards. A stud finder can help locate framing and show where the drywall is supported. Some models also detect electrical wiring, but these readings are not a substitute for a dedicated voltage tester.
Use a noncontact voltage tester according to the manufacturer’s instructions. Test it first on a known live outlet to confirm that it is working. Then check the area around the hole before cutting. If the tester signals electricity, stop and investigate instead of continuing with the repair.
Turn off the appropriate circuit when necessary, and confirm that the area is no longer energized before working. Do not rely on a wall switch alone, since a switch may not disconnect every wire in the box or wall cavity. The Electrical Safety Foundation International’s safety guidance includes additional information about reducing electrical risks during repair work.
Protect the area with a drop cloth, dust mask, and eye protection
Drywall dust spreads quickly, so cover the floor and nearby furniture with a drop cloth before cutting or sanding. Move fragile items out of the work area, and use painter’s tape to protect trim, cabinets, and surfaces that should remain clean. Keep the work zone organized so you do not trip over tools or cords.
Wear safety glasses to protect your eyes from falling particles and use a dust mask or properly rated respirator while sanding. Gloves can protect your hands from sharp drywall edges, but choose a pair that does not reduce your grip or control. Long sleeves can also help limit contact with dust and rough materials.
Keep the area ventilated, but avoid pointing a fan directly at the repair because it can spread dust throughout the room. Clean the work area with a suitable vacuum after sanding, rather than sweeping the dust into the air. OSHA provides guidance on selecting respiratory and eye protection when airborne dust or debris may be present.
How Do You Choose the Right Patch Size and Type?
Choosing a drywall patch involves more than matching the hole by sight. Measure the damaged area, inspect the surrounding drywall, and consider the wall’s thickness and texture before selecting a repair product. The right patch should cover the opening securely while sitting flat enough for easy finishing.
Small nail holes and shallow dents may only need spackle or lightweight joint compound. Larger punctures usually need an adhesive mesh patch, metal-reinforced patch, or piece of matching drywall. If the surrounding surface feels soft, crumbles when pressed, or shows water damage, pause before patching. Those conditions may require drywall replacement or another repair method.
Match the repair to the hole size
Start by comparing the opening with the repair materials available. Small holes from nails, screws, or wall anchors can often be filled directly with spackle or joint compound. For damage several inches wide, choose a mesh, adhesive, metal, or drywall patch that can bridge the opening and remain stable beneath the compound.
A hole about the size of a fist generally needs a drywall patch or California patch instead of compound alone. DIY Craftsy’s drywall repair guide recommends covering the opening with a patch, applying joint compound, and smoothing the surface as it dries.
Do not use a small patch on a large or unstable hole. If the surrounding drywall flexes, cracks, or crumbles, remove the weak material and choose a larger repair method.
Measure the hole at its widest points
Measure the opening before selecting a patch. Drywall holes are rarely perfectly square or round, so measure from top to bottom on both sides. Then measure from left to right across the top and bottom. Record the largest height and width, following the approach described in this drywall measurement guide.
Use those dimensions to determine whether a premade patch will cover the damage. For an uneven opening, measure across the widest points rather than relying on the shortest distance. A patch that misses even one damaged edge can leave a weak area that cracks under the compound.
If you plan to cut a drywall insert, measure the opening twice and mark the dimensions clearly. A snug insert is easier to support and finish than one surrounded by large gaps.
Choose a patch that overlaps the hole
Select a patch that extends beyond the damaged area on every side. As a general guideline, it should overlap the hole by at least 1 inch in all directions. Stanley’s drywall repair instructions explain that this overlap gives the patch enough solid surface to bond securely.
For example, a hole measuring 3 inches by 3 inches needs a patch at least 5 inches by 5 inches. If the opening is near a corner, trim, seam, or outlet, make sure the patch can lie flat without contacting those surfaces.
Do not place a patch over loose, crumbling, or torn drywall paper. Overlap only helps when the patch rests on firm, clean material. Remove unstable edges first, then measure the opening again before choosing the final patch size.
Match the patch to drywall thickness and texture
A patch can cover the opening perfectly and still look uneven if it does not match the existing wall. For a drywall insert, choose material with the same thickness as the surrounding panel. A thinner piece may sit below the wall surface, while a thicker piece can create a raised area that requires extra compound.
Wall texture also affects the finished appearance. Smooth walls usually blend with several thin coats of compound. Orange peel, knockdown, and other textured surfaces may need a matching texture product after the repair. For a cutout insert, DIY Craftsy recommends measuring carefully and cutting once to create a close fit.
If the wall has a specialty texture, photograph the surface or bring a small sample to a paint and hardware supplier. Matching the texture before painting can make the final touch-up much less noticeable.
Confirm adhesive, reinforcement, and compound compatibility
Read the patch kit label before purchasing or applying it. Some kits include adhesive mesh, while others use metal reinforcement, fiberglass backing, or a separate support system. Each design may require a specific compound or application method.
Check the manufacturer’s instructions for surface preparation, drying time, and the recommended number of coats. Home Depot’s drywall repair guidance notes that many kits include a 4-by-4-inch adhesive patch, with larger sizes available for bigger openings.
Confirm that the patch will adhere to your wall surface. Dust, grease, loose paint, and torn paper can weaken the bond. If the kit calls for joint compound over mesh or metal, apply enough to cover the reinforcement without creating one thick layer. Thin, compatible coats are easier to smooth and less likely to crack.
Prepare the Drywall Hole and Work Area
Proper preparation makes a drywall repair safer, cleaner, and easier to hide. Before applying a patch kit, inspect the opening, protect the surrounding area, and create a firm, clean surface for the repair materials. Do not rush this step. A few extra minutes spent checking for utilities and removing unstable drywall can prevent larger problems later.
Check for hidden wires, plumbing, and obstructions
Inspect the hole and the surrounding wall before inserting a utility knife or drywall saw. Look for electrical wires, plumbing pipes, HVAC components, insulation, and framing behind the opening. Keep your tools shallow, especially when you cannot see clearly into the wall.
A stud finder can help locate framing, but it may not identify every wire or pipe. Take extra care around outlets, switches, plumbing fixtures, and heating or cooling vents. STANLEY recommends inspecting the area for wires and obstructions before cutting or enlarging a drywall hole.
If you cannot determine what is behind the damage, stop and ask a qualified professional to inspect it.
Turn off power if utilities are exposed or damaged
If you find exposed electrical wiring or damaged cables, stop working immediately. Turn off the power to the affected circuit at the breaker panel. Then use a noncontact voltage tester according to the manufacturer’s instructions to check the area. Do not rely only on a wall switch, because wiring may still carry power.
Never cut, move, or cover damaged electrical wiring with drywall compound. Contact a licensed electrician if the insulation is torn, wires are loose, or you cannot identify the correct breaker. Safety guidance for drywall work also recommends turning off power before cutting into walls or ceilings.
If plumbing or another utility appears damaged, leave it accessible and arrange for the appropriate professional to make the repair.
Protect floors, furniture, and nearby walls
Drywall repairs create fine dust and may involve joint compound, primer, and paint. Move furniture away from the work area, or cover it securely with plastic sheeting. Place a drop cloth beneath the hole to catch dust, drywall scraps, and drips. Tape the edges down if the cloth slides across the floor.
Cover nearby trim, flooring, and wall surfaces that you do not plan to repair. Keep a small container nearby for debris so loose pieces do not spread through the room. A plastic sheet or drop cloth provides simple protection and makes cleanup easier.
Wear safety glasses and a dust mask while trimming, sanding, or brushing away drywall debris. Keep the work area well ventilated, but avoid using a fan that could spread dust throughout the room.
Remove loose paper, gypsum, and unstable edges
A patch needs a firm surface to adhere to, so remove loose material around the hole. Use a sharp utility knife to trim away torn paper, crumbling gypsum, and frayed edges. Cut carefully instead of pulling damaged pieces away, since pulling can enlarge the hole or tear the paper farther across the wall.
Brush away loose dust and chunks with a soft brush or dry cloth. The remaining drywall should feel stable when you press it lightly. If the opening has a raised lip, trim it flush with the surrounding surface.
This preparation follows the same basic method recommended for removing frayed drywall paper and loose material before applying a patch. Do not worry about making the opening perfectly smooth at this stage. Focus on removing anything loose that could lift beneath the patch or joint compound.
Square irregular damage only when necessary
Small round or roughly shaped holes do not always need to become square. If a self-adhesive patch covers the damage with enough overlap, keeping the opening small usually means less cutting and less finishing work.
For crushed, jagged, or irregular damage, a square or rectangular opening can create cleaner edges and make a replacement drywall piece easier to fit. Use a pencil, level, and straightedge to mark the shape, then cut carefully along the lines. Check behind the drywall again before making the opening larger.
Avoid removing sound drywall simply to create a perfectly shaped hole. The right choice depends on the patch kit, the condition of the surrounding surface, and the size of the damaged area. A larger structural repair may need backing material or a drywall insert rather than a basic surface patch.
Clean and dry the surface
Remove dust, grease, cobwebs, and loose particles from the drywall around the hole. Wipe the area with a lightly damp cloth, taking care not to saturate the paper. Too much moisture can soften the drywall and interfere with adhesion.
Allow the surface to dry completely before applying a patch or compound. It should feel clean and firm, not damp, greasy, or powdery. Cleaning the wall around the hole helps the repair material sit evenly and reduces the chance of bumps beneath the finished surface.
If the wall has a glossy coating or heavy grime, clean it gently and let it dry. Do not patch over active water damage, soft drywall, or a damp surface. Fix the source of the moisture first and replace any drywall that has lost its strength.
Seal torn drywall paper to prevent bubbling
Torn drywall paper can absorb moisture from joint compound and create bubbles beneath the repair. If the paper is lifted but still attached, trim away the loose portion with a utility knife. Remove curled edges rather than leaving them beneath the patch, where they may become visible as the compound dries.
Apply a thin layer of joint compound over exposed or torn paper, then smooth it with a putty knife. Allow that layer to dry fully before continuing. Sealing torn drywall paper helps create a more stable surface and reduces bubbling.
Check the instructions for your patch kit before applying any sealer near an adhesive-backed patch. The adhesive area must remain clean and free of compound. Once the sealed area is dry, lightly sand raised spots and remove the dust before installing the patch.
How Do You Repair a Drywall Hole With a Patch Kit?
Once the damaged area is clean and the patch is ready, the repair is fairly straightforward. Work carefully when positioning the patch and spreading joint compound. A smooth finish depends on a secure patch, thin coats, and enough drying time between steps.
Center and mark the patch
Measure the hole at its widest points, then choose a patch that extends at least 1 inch beyond the opening on every side. This overlap gives the patch enough solid drywall to grip. Hold the patch over the hole and mark its position with a pencil, making sure it sits evenly over the damaged area.
If your kit includes a self-adhesive mesh patch, use it as a guide before removing the backing. The STANLEY drywall repair guide also recommends making sure the patch extends beyond the hole in all directions. Remove loose paper and crumbling gypsum that could keep the patch from sitting flat.
Press an adhesive patch onto clean drywall
Peel off the backing without touching too much of the adhesive. Align the patch with your pencil marks, then press it firmly over the hole. Start in the center and work toward the edges to push out air pockets. Apply steady pressure around the entire perimeter so the adhesive bonds with the surrounding drywall.
The surface must be clean, dry, and free from dust for the patch to hold. If the patch is too large, trim it with scissors before removing the backing. The DIY Playbook’s small-hole repair instructions recommend making a mesh patch about 1 inch larger than the hole on every side.
Secure reinforced or metal patches as directed
Some kits include a metal or reinforced patch rather than adhesive mesh. These patches may require joint compound, screws, or both. Follow the instructions included with the product, since attachment methods vary. Keep the patch level with the surrounding drywall, and avoid forcing it into an uneven opening.
For a larger hole, you may need a wood backing strip behind the drywall. This gives the patch a solid surface to attach to when no stud is available. The large-hole repair instructions from Instructables explain how to attach a 1-by-4 backing piece with drywall screws. Set screw heads slightly below the surface without tearing the drywall paper.
Check for wrinkles, bubbles, and loose edges
Inspect the patch before applying compound. Run your fingers around all four edges and press down any lifted areas. Look for wrinkles, bubbles, and gaps between the patch and the drywall. Even a small loose section can flex beneath the compound and cause cracks as the repair dries.
If a self-adhesive patch will not lie flat, remove it and reposition it before continuing. Scrape away loose paint and dust, then press the patch onto stable drywall. Every edge should make full contact with the wall. Taking a moment to check the patch now can prevent ridges and cracks during sanding and painting.
Mix the compound as directed
Use the compound recommended for your kit, such as premixed joint compound, spackle, or quick-setting repair compound. If the product comes as a powder, add the amount of water listed on the package and mix it until smooth. Avoid adding extra water unless the instructions specifically permit it.
The compound should spread easily while remaining firm enough to stay on the putty knife. A mixture that is too thin may sag, while one that is too dry can drag across the mesh. The Nations Drywall repair guide recommends quick-setting compound for some repairs. Mix only the amount you can use within the product’s working time.
Apply a thin first coat over the patch and fasteners
Use a putty knife to spread a thin layer of compound across the center of the patch. Press firmly enough to work the compound through the mesh, but avoid pulling the patch loose. Cover the full patch, then apply compound over any recessed screw heads if your kit uses fasteners.
The first coat does not need to look perfect. Focus on filling the mesh and securing the patch. A thin layer dries more evenly and is easier to sand than a thick one. Wipe excess compound from the surrounding wall as you work, while leaving enough material beyond the patch to begin blending the repair.
Cover the patch edges and let the coat dry
Extend the compound slightly beyond each edge of the patch to create a gradual transition into the original wall. Use the clean edge of your putty knife to remove heavy buildup, then leave the surface undisturbed. Drying time depends on the product, coat thickness, humidity, and room temperature, so follow the package directions.
Do not sand or apply another coat while the compound feels cool, soft, or damp. It may look dry on top while remaining wet underneath. Once the first coat has hardened, inspect the repair in good lighting. Visible edges, low spots, or exposed mesh can be corrected with another thin coat.
Build a Smooth, Seamless Surface
A drywall patch can be secure and still remain visible after painting if the compound ends sharply or leaves ridges around the repair. Your goal is to create a gradual transition between the patch and the surrounding wall. Work with thin layers, use the right knife size, and inspect the surface before sanding. Taking a little extra time here can help the finished repair blend into the wall.
Extend compound beyond the patch
Spread joint compound over the patch, then carry it at least 1 to 2 inches beyond the patch edges. This wider application helps soften the raised center and creates a gradual transition into the existing drywall. Keep the compound thin around the outer edge, and use the clean edge of your putty knife to remove excess material.
Cover the entire patch, including its edges and any exposed fasteners, before worrying about minor uneven areas. The first coat does not need to look perfect. Its purpose is to establish a smooth base for the following layers. The USG drywall repair guide provides additional instructions for spreading compound over a wider area.
Feather the edges with a wider putty knife
Use a wider putty knife, such as a 6-inch or 10-inch model, to feather the compound around the repair. Hold the blade at a low angle and pull it outward from the center. Apply overlapping strokes in several directions to flatten ridges and thin the compound near the perimeter.
Feathering leaves more compound over the center and less near the edges. Wipe the blade clean between passes so dried particles do not drag across the surface. A wider knife creates a more gradual transition and usually produces better results on larger repairs or smooth walls. If the compound begins to pull or tear, stop and let the area dry before making another pass.
Apply several thin coats
Build the repair with several thin coats instead of applying one thick layer. Thick compound can shrink as it dries, leaving a depression or causing cracks around the patch. Thin coats dry more evenly, are easier to control, and usually require less sanding.
Let each layer extend slightly beyond the previous one, while keeping the outer edges as thin as possible. After a coat dries, gently scrape away any raised ridges before adding the next layer. This gradual approach levels the patch without creating a noticeable mound. Lowe’s drywall repair instructions also recommend building up joint compound in layers and smoothing each application.
Let each coat dry before adding another
Allow every coat to dry completely before applying more compound. Drying time depends on the product, layer thickness, humidity, airflow, and room temperature. The surface may appear dry while the material underneath remains soft, so follow the time listed on the product label.
Applying a new layer too soon can pull up the first coat, create soft spots, or trap moisture beneath the surface. Test the area lightly with a fingertip. If it feels cool, flexible, or gummy, give it more time. Good ventilation can help, but avoid using intense heat to force the compound dry because rapid drying can contribute to cracking.
Fill ridges, low spots, pinholes, and seams
Once the main coats have dried, inspect the repair for small imperfections. Apply a thin skim coat to fill pinholes, shallow dips, visible seams, and knife ridges. Hold the blade nearly flat against the wall and use light pressure to avoid removing too much compound.
For a low spot, add compound only where it is needed, then feather the edges into the surrounding surface. Do not keep sanding a depression in an attempt to level it. Instead, remove loose dust and crumbs, apply another thin coat, and let it dry before smoothing the area again. Small corrections at this stage can prevent defects from showing through the primer and paint.
Inspect the repair from multiple angles before sanding
Before sanding, inspect the patch under good lighting. Shine a work light across the wall or view the repair from several angles. Side lighting can reveal raised edges, shallow dips, scratches, and seams that are difficult to see when you look directly at the patch. Gently run your fingertips over the area as well, since touch can reveal uneven spots your eyes may miss.
Scrape away small ridges with a clean putty knife. Fill low spots and pinholes with another thin coat, then allow it to dry completely. When the surface looks flat and feels even, you can begin sanding. This inspection helps you correct flaws before drywall dust spreads through the work area.
How Do You Sand, Prime, and Paint a Drywall Patch?
A drywall patch needs more than a coat of paint to disappear. The compound must dry completely, the surface needs careful sanding, and the repair should be sealed with primer before you paint. Rushing any of these steps can leave ridges, dull spots, rough edges, or a patch that remains visible under the finished paint.
Work in good lighting and inspect the repair from several angles. A bright work light can reveal shallow dents and sanding marks that are easy to miss under normal room lighting. Keep your drywall repair tools nearby so you can correct small imperfections before moving on to the next step.
Let the compound dry completely
Wait until the joint compound feels firm and looks consistently dry before sanding. Drying time depends on the thickness of the coat, room temperature, humidity, and the type of compound you used. A thin layer may dry within a few hours, while a deeper repair may need to dry overnight.
Do not assume the compound is ready because the surface feels dry. Press lightly in an inconspicuous area with a fingertip. If it feels cool, soft, or rubbery, give it more time. Sanding too soon can pull compound from the patch, create grooves, or cause the surface to crumble.
For larger repairs, follow the product instructions for drying and recoating. Ready-mixed compounds dry as moisture leaves the material, while setting-type compounds harden through a chemical reaction. The compound should be dry throughout, not only on the surface, before you begin sanding.
Start with medium-fine grit and finish with fine grit
Begin with medium-fine sandpaper, such as 120- or 150-grit, to smooth raised edges and remove small ridges. Use a sanding sponge or block to keep pressure even across the repair. Avoid wrapping loose sandpaper tightly around your fingers, since concentrated pressure can create dips in the compound.
Once the patch feels level, switch to fine-grit sandpaper, such as 180- or 220-grit. This finer abrasive removes scratches and prepares the surface for primer. USG’s drywall sanding guidance recommends working carefully to avoid damaging the drywall face.
Use a clean section of sandpaper when the abrasive becomes clogged with compound. A worn or loaded sheet may polish the surface instead of smoothing it. Sand in light, even strokes, and check the patch with your hand after each pass.
Sand lightly without damaging the patch or paper
Use light, controlled strokes across the compound and its edges. Your goal is to level the repair, not remove every trace of material. Pressing too hard can expose the patch, tear the drywall facing, or create a shallow depression that requires another coat.
Keep the sanding tool moving instead of working aggressively in one spot. Run your fingers over the patch after sanding, since they can often detect a ridge or low spot more easily than your eyes can. If you feel an uneven area, mark it lightly with a pencil and address it with a small amount of compound.
Stop immediately if you expose the paper face of the drywall. Apply a thin layer of compound to the damaged section, let it dry, and sand it gently after curing. Torn or fuzzy paper may also need a sealing primer before you apply more compound or paint.
Remove dust before priming
Drywall dust can prevent primer from bonding evenly and may leave a gritty texture in the finished paint. After sanding, remove dust from the patch, surrounding wall, and nearby surfaces. A vacuum with a soft brush attachment works well for loose dust. You can also wipe the area with a clean, slightly damp microfiber cloth.
Avoid saturating the drywall with water. Excess moisture can soften the compound and damage the paper surface. If you use a damp cloth, allow the wall to dry fully before applying primer.
Protect yourself while sanding and cleaning. Wear eye protection and a properly fitted dust mask, especially when working overhead or repairing a large area. The National Institute for Occupational Safety and Health offers guidance on selecting and using respirators for airborne particles.
Recreate the surrounding wall texture
A smooth patch can stand out on a textured wall, even when the paint color matches. Compare the repaired area with the surrounding surface to identify the texture pattern. Common finishes include orange peel, knockdown, and lightly stippled textures.
Apply a small amount of texture first, then build it gradually. If you have not used a texture product before, practice on cardboard or scrap drywall. Match the size and spacing of the existing texture instead of creating a dense, raised spot over the patch.
Let the texture dry according to the product instructions before applying primer. If the repair is near a corner, ceiling, or trim, protect nearby surfaces with painter’s tape and a drop cloth. Remove the tape before the texture fully hardens to help prevent a ragged edge.
Spot-prime compound and exposed paper
Joint compound is porous, so it can absorb paint faster than the finished wall around it. This difference may leave a dull, uneven area known as flashing. Apply a drywall primer or suitable interior primer over the compound, exposed paper, and new texture.
Use a brush or small roller to cover the repair without leaving heavy drips. Extend the primer slightly beyond the compound edge so the transition is sealed. If the drywall paper is torn or fuzzy, choose a primer made for porous or damaged surfaces before applying more compound.
Let the primer dry completely, then inspect the repair again. If you still see a ridge, low spot, or texture difference, correct it before painting. Benjamin Moore’s primer guidance explains why repaired and porous surfaces often need primer rather than paint alone.
Match the paint color, sheen, and application method
Use leftover wall paint if it remains usable and has been stored properly. If you need new paint, take a clean sample from the wall to a paint retailer for color matching. Match the sheen as well as the color, since flat, eggshell, satin, and semi-gloss finishes reflect light differently.
Use the same application method as the surrounding wall whenever possible. A short-nap roller can recreate a rolled finish, while a brush may suit a small, smooth section. Stir the paint thoroughly and test it in an inconspicuous area before covering the repair.
Paint can look slightly different over fresh primer than it does over an older wall. If the patch remains visible after one coat, let the paint dry completely before deciding whether another coat is needed. Applying more paint while the first coat is still wet can create uneven coverage.
Feather paint beyond the repair
Do not leave a hard paint edge directly around the patch. Extend the paint slightly beyond the primed area, then gradually reduce pressure on the roller or brush as you move into the surrounding wall. This creates a softer transition and helps prevent a noticeable square or circle.
For a rolled wall, lightly roll in several directions while the paint is workable, then finish with strokes that follow the existing wall pattern. Avoid repeatedly brushing or rolling paint that has started to set, since this can create an uneven texture.
Use enough paint to cover the repair, but avoid applying a thick layer that forms a raised outline. Once the area dries, inspect it under normal room lighting and from the side. If the patch still shows, determine whether the issue is texture, color, sheen, or surface level before applying another coat.
Avoid Common Drywall Repair Mistakes
A drywall patch may seem like a quick repair, but small shortcuts can remain visible after the wall is painted. An undersized patch can crack around the edges, while a thick layer of compound may shrink, sag, or take much longer to dry. Rushed sanding can also leave dips, ridges, or scratches that become more noticeable under fresh paint.
Good preparation prevents many of these problems. Before you begin, check the area for hidden utilities, remove loose drywall, and make sure the surface is clean, dry, and stable. Choose a patch that extends beyond the damaged opening, then apply compound in several thin coats instead of trying to cover everything at once.
The final steps deserve the same care. Give the compound and primer enough time to dry, sand with light pressure, and compare the repaired area with the surrounding wall before painting. Texture, color, and sheen can all affect how well the repair blends in. If the damage is near electrical wiring or plumbing, stop work and contact a qualified professional rather than guessing what is behind the wall.
Choosing a patch that is too small
Select a patch that extends beyond the hole on every side. A reliable guideline is to choose a patch at least 1 inch larger than the opening in all directions. This overlap gives the patch more solid drywall to grip and helps reduce cracking around the repair. STANLEY Tools recommends allowing enough coverage and support when selecting a drywall patch.
Measure the hole at its widest and tallest points, then compare those measurements with the patch itself. Do not rely only on the size printed on the package. If the opening has loose or irregular edges, remove the unstable material or square the hole only as much as necessary. The goal is to create a firm surface without making the damaged area larger than it needs to be.
Skipping utility checks or surface preparation
Check the area before cutting, sanding, or driving fasteners into the drywall. Look for nearby outlets, switches, vents, plumbing fixtures, and other signs that wires or pipes may run behind the wall. A noncontact voltage tester can provide an additional check, but it cannot identify every hazard. If you suspect damaged wiring or plumbing, stop and call a qualified professional.
After checking the area, remove loose paper, crumbling gypsum, dirt, and dust from around the opening. Wipe the surface clean and let it dry. These basic preparation steps help the patch adhere properly. STANLEY’s drywall repair guide also recommends checking for obstructions and cleaning the surface before beginning the repair.
Applying compound to damp or unstable drywall
Joint compound needs a firm, dry surface. If the drywall feels soft, swollen, damp, or crumbly, the patch may not adhere securely. Moisture can also indicate a plumbing leak, roof issue, or other source of water damage. Repair that underlying problem first, then replace or remove any drywall that cannot provide a stable base.
Press gently around the opening to check whether the surrounding material feels solid. Remove loose sections and allow the area to dry completely before applying compound. Covering wet drywall can lead to peeling, stains, mold growth, or repeat damage. Angi’s drywall repair guide recommends wiping the area down and confirming that it is dry and stable before continuing.
Leaving bubbles beneath an adhesive patch
An adhesive patch must make full contact with the drywall. If the patch bridges part of the hole or an edge remains lifted, it can flex when you spread compound over it. That movement may cause cracks, ridges, or a visible outline after painting.
Press the patch from the center toward the edges to help remove trapped air. Then run a clean finger or the flat side of a putty knife around all four edges. Every edge should rest against solid drywall, not over loose paper or an unsupported gap. Replace the patch if it will not lie flat. Super Shooters explains that incomplete edge contact can allow a patch to move and crack.
Using one thick coat instead of thin coats
A thick layer of joint compound may seem like a time-saver, but it often dries unevenly and shrinks as moisture leaves the material. The result can include cracks, soft spots, or a raised center that requires extensive sanding. Apply a thin first coat over the patch and fasteners, then let it dry fully before adding another.
Extend each new coat slightly beyond the previous one. This creates a gradual transition between the repair and the surrounding wall. Remove excess compound with the putty knife while it is workable, but avoid pressing so hard that you expose the patch. Nations Drywall recommends using thin layers and allowing each layer to dry before applying the next.
Sanding too soon or too aggressively
Sanding compound before it has dried can pull material from the repair and leave a soft, uneven surface. Follow the product’s drying instructions and check that the compound has reached a consistent, firm finish. Cool or humid conditions may lengthen drying time, so allow extra time when necessary.
Use a sanding sponge or fine-grit sandpaper with light pressure. Focus on raised edges and visible ridges instead of removing large amounts of material. Wipe away dust and inspect the repair from several angles as you work. Nations Drywall advises taking a patient approach because aggressive sanding can damage the compound and surrounding drywall paper.
Painting before the compound and primer dry
Paint applied over damp compound may dry with dark patches, uneven sheen, or a soft finish. It can also make the outline of the repair more noticeable. Let the final coat of compound dry completely, then remove all sanding dust before applying primer.
Primer helps create a consistent surface because joint compound and exposed drywall paper absorb paint differently from previously painted areas. Apply a suitable drywall primer to the repair and follow the product’s recommended drying time. Lowe’s drywall repair guidance recommends allowing the compound to dry properly before painting for a more even, durable finish.
Ignoring wall texture or paint sheen differences
A smooth patch can stand out on a textured wall, even when the paint color matches. Compare the repaired area with the surrounding surface before painting, then recreate the texture with the appropriate product and tool. Practice on scrap drywall or cardboard first so you can adjust the pattern and material amount.
Paint sheen also affects how visible a repair will be. Flat, eggshell, satin, and semi-gloss finishes reflect light differently, so use the closest match available. Apply the paint with the same type of roller, brush, or sprayer used on the rest of the wall. DIY Playbook recommends matching both the existing texture and paint sheen for a more consistent finish.
When Is a Patch Kit Not Enough?
Patch kits are useful for small, shallow damage, including nail holes, screw holes, and minor dents. They are not designed to restore drywall that has lost its structure or has an underlying moisture, utility, or movement problem. Adding more joint compound will not make a weak repair stronger. The finished area may crack, sink, or remain visible after painting.
Before repairing a larger hole, find out what caused the damage and inspect the surrounding drywall. Check for soft spots, spreading cracks, stains, musty odors, and signs of movement. If the damage involves hidden wiring, plumbing, mold, or structural concerns, pause the project and contact a qualified professional. A smooth surface matters, but the repair also needs a stable, dry, and secure base.
Repairing large, deep, or irregular holes
A patch kit may not provide enough support when a hole is larger than about two inches, extends through most of the drywall, or has jagged, unstable edges. Rather than covering the opening with several thick layers of compound, cut away the damaged section and create a clean square or rectangle. This gives you a solid shape for fitting replacement drywall.
Measure the opening at several points and cut a replacement piece from drywall with the same thickness as the existing panel. Attach it to nearby studs when possible. If there is no stud behind the opening, install a small piece of lumber as backing, then fasten the replacement panel to it. The large-hole repair steps from Instructables explain how backing supports a replacement piece. Finish the seams with drywall tape and several thin coats of joint compound.
Fixing damage near corners, seams, ceilings, or trim
A small hole becomes more challenging when it sits beside an inside or outside corner, ceiling line, drywall seam, baseboard, window casing, or door trim. These areas receive light from different directions, so ridges and uneven transitions can remain visible after painting. You also have less room to feather the compound into the surrounding surface.
Use a narrow putty knife to fill the damaged area without spreading compound heavily onto the adjacent surface. After the first coat dries, use a wider knife to blend the edges gradually. Damage across a drywall seam may require new tape, while damage beside trim may require careful removal and replacement of the molding. Large repairs deserve extra time, since an uneven patch can show through the finished paint, as Home Repair Central’s drywall guide explains.
Replacing water-damaged, soft, or mold-affected drywall
Joint compound cannot restore drywall that has absorbed water or lost its strength. Press the area around the hole with a gloved hand. If the panel feels soft, crumbles easily, has recurring stains, or smells musty, remove the affected section instead of sealing it beneath a patch. Painting over damaged drywall can hide the problem without solving it.
Find and correct the moisture source first. Common causes include leaking pipes, roof problems, window openings, and appliance connections. Let the framing dry completely, then inspect it for additional damage before installing new drywall. Mold-like growth may require specialized handling, particularly when it covers a large area or returns after cleaning. Review the EPA’s mold cleanup guidance before deciding whether the repair is suitable for a do-it-yourself project.
Addressing holes near electrical, plumbing, or HVAC lines
A hole near an outlet, switch, light fixture, supply line, drain, duct, or vent requires additional caution. Wires and pipes may run through studs, and HVAC components can sit directly behind the drywall. Do not assume that an open section is clear simply because you cannot see a utility from the surface.
Before cutting, use a stud finder and a noncontact voltage tester. Turn off power to the relevant circuit when appropriate, and make shallow cuts until you understand what is behind the panel. If you find damaged wiring, leaking plumbing, contaminated insulation, or a punctured duct, stop work and contact a qualified professional. Lowe’s drywall safety recommendations also advise checking for studs and electrical wires before cutting.
Investigating recurring cracks or wall movement
A patch kit can hide a crack for a short time, but it cannot correct movement in the wall. If the same crack returns after repair, examine its pattern and location. A straight crack along a drywall seam may indicate loose tape or joint movement. A crack that widens, runs diagonally from a corner, appears around doors and windows, or occurs with sticking doors may point to movement in the framing or foundation.
Photograph the crack, mark its ends lightly with a pencil, and record the date. Check it again after normal use and after significant weather changes. Avoid repeatedly filling a moving crack without investigating the cause. A drywall contractor, building professional, or structural specialist can help determine whether the problem relates to settling, framing, moisture, or another building issue.
Use a larger insert, backing, or professional repair when needed
When damage exceeds the size recommended for a patch kit, use a larger drywall insert with solid backing. A properly supported insert distributes stress across the repair and provides a stable base for tape and finishing coats. Cut the opening into a regular shape, install backing where necessary, and match the replacement drywall to the existing panel thickness.
Professional help is the better choice when the damage involves mold, an active leak, structural movement, multiple utilities, or a large ceiling section. It can also be worthwhile when the repair is on a highly visible wall or must match a textured finish. For holes larger than two inches, Instructables recommends cutting a clean rectangle or square instead of covering an irregular opening with a small adhesive patch.
Frequently Asked Questions
What size drywall hole can a patch kit repair?
Patch kits work best for small holes, nail holes, screw holes, and shallow dents. Damage larger than about 2 inches, deep openings, or holes with weak edges may need a drywall insert, backing, tape, and several finishing coats.
How much larger should a drywall patch be than the hole?
Choose a patch that extends at least 1 inch beyond the opening on every side. Measure the hole at its widest and tallest points, then confirm that the patch will sit flat on firm drywall.
How many coats of joint compound should I apply?
Most repairs need several thin coats rather than one thick layer. Let each coat dry completely, then scrape or sand raised areas before adding the next. Thin layers reduce shrinkage, cracking, and excess sanding.
Do I need primer after patching drywall?
Yes. Joint compound and exposed drywall paper absorb paint differently from the surrounding wall. Applying drywall primer over the repair helps create a more even finish and can reduce visible dull spots after painting.
When should I hire a professional for drywall repair?
Contact a qualified professional if the drywall is soft, damp, mold-affected, or near damaged wiring or plumbing. Professional help may also be appropriate for large holes, recurring cracks, ceiling damage, structural movement, or repairs near corners and seams.