

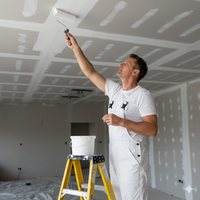





















A paint edger tool can make repeatable straight runs easier, but it is not an automatic masking device and cannot correct a rough or uneven joint. The right choice depends on the edge, surface texture, coating, and degree of control the job requires. A little testing before a full run helps prevent paint transfer onto trim and wasted touch-up time.
What should a paint edger tool do?
An edger is a compact applicator intended to place paint close to an adjoining surface while reducing the need for a full-width brush. Designs include flat pads, small rollers, and guide plates or wheels that track beside trim. These tools can help on repeated straight runs, such as a wall beside door casing, when the surface is consistent and the guide can travel without catching.
Think of the edger as a controlled applicator rather than a guarantee of a perfect line. Dust, uneven trim, rough texture, excess paint, and a guide that rides onto the adjoining surface can all spoil the result. The painter still needs a steady hand, a clear view, and a plan for corners and interruptions. An edger can save repeated brush loading on an appropriate edge, but it may add steps if the room has many short sections that require constant repositioning.
Before shopping, define the finish standard. A utility room edge that will be viewed from across the room may tolerate a different method than a high-visibility line beside contrasting trim. Also decide whether the aim is to reduce time, reach a difficult edge, or improve repeatability. Those are separate goals; one tool may help with one and not the others.
How do you choose a paint edger tool for the edge?
Start with geometry. A broad wall-to-ceiling run differs from narrow window trim, an inside corner, or a textured transition. Match the applicator width and shape to the available space. If the tool has wheels or a guide plate, check whether these can travel smoothly along the actual edge without catching on joints, hardware, caulk ridges, or changes in surface level.
Next, consider how the tool loads and releases paint. A pad that holds a moderate amount may cover a useful distance, but an overloaded pad can leave a heavy start mark or push paint onto trim. A small roller can suit a longer open run, while a brush may provide better control around detailed profiles. When the room has several edge types, ease of refilling and cleaning may matter more than maximum coverage on one straight stretch.
| Job condition | Possible method | What to verify |
|---|---|---|
| Long, accessible straight edge | Guided pad or small roller edger | Guide tracks without catching; width fits the line |
| Narrow trim or detailed profile | Angled brush or narrow applicator | Applicator reaches the edge without flooding it |
| Rough or textured adjoining surface | Brush, careful cut-in, or masking plan | Method controls paint without skipping or bridging texture |
| Short runs and many corners | Brush or compact edger that repositions easily | Tool can stop and turn cleanly |
| Repeated work across a room | Edger suited to the dominant straight runs | Comfort, refill routine, cleaning, and replacement parts |
Use the table as a screening guide, not a substitute for a test. A tool that seems suitable on paper can still ride badly on a particular casing or skip over wall texture. Check the edge in the actual room, including the places where it changes direction or meets another material.
What should you compare before buying a paint edger tool?
Look beyond the product name. Compare the contact surface, guide design, handle position, refill method, and use instructions. A low-profile head may fit near a ceiling or casing, but it should remain easy to keep level. A longer handle can extend reach but may reduce fine control. Check whether the applicator is reusable or replaceable and whether the maker specifies paint types or cleaning methods.
Assess the coating and surface together. Paint viscosity, surface texture, temperature, and the required finish affect how material transfers. Follow the paint label and tool directions. Do not assume a tool suitable for one water-based coating is also suitable for every solvent-based product. If compatibility is unclear, confirm it before purchase or use.
Consider the whole task rather than only the tool price. Include the time needed to mask, load, reposition, clean, and correct mistakes. If a long uninterrupted run makes up most of the room, a guided edger may earn its place. If most edges are short, ornate, or obstructed, a brush may avoid repeated setup. For a professional buyer, the best choice is often the one that reduces total handling and rework while meeting the finish requirement.
For related hand tools and application supplies, browse painting supplies. A specific 1.5-inch angle paintbrush is one example to compare when a brush offers more control around a profile or tight transition.
How should you prepare before using a paint edger tool?
Preparation prevents many common failures. Confirm that the coating suits the surface and conditions. Check that the adjoining trim or ceiling is clean, dry, and sound. Remove dust and loose material using a method appropriate for the surface. Protect floors and nearby objects. Repair a damaged or irregular edge before painting; an applicator cannot make an uneven joint look straight.
- Read the paint label and edger instructions, including coating limits, loading guidance, and cleaning directions.
- Inspect the applicator for dried paint, lint, damage, or a loose guide. Clean or replace parts as directed.
- Stir the paint as instructed and pour a manageable amount into a tray or container that allows controlled loading.
- Keep a clean cloth and small brush nearby for corrections, corners, and places the edger cannot reach.
- Test on scrap material or an inconspicuous area with the same texture and edge arrangement.
- Set up a stable stance and lighting that lets you see the contact point without leaning or stretching around an obstruction.
Masking remains useful on delicate finishes, complicated profiles, or edges where a mistake would be costly. Press tape down carefully and check that it is suitable for the surface and coating. Tape cannot compensate for dust, loose paint, or an uneven edge. Plan removal according to the tape and paint instructions rather than leaving it in place indefinitely.
Before opening the container, stage the work. Move furniture or cover it, protect the floor, and arrange the tray where it will not be kicked or tipped. Keep the brush, rags, and any cleanup materials within reach. This matters on a ladder or in a tight room, where reaching for supplies mid-pass can lead to an uncontrolled stop.
How do you load and guide a paint edger tool?
Begin with a small amount of paint. Load the pad or roller according to the maker's directions, then remove excess so it does not form a bead at the edge. Test the first pass on a spare surface. Start slightly away from a corner or endpoint and move toward it with controlled, overlapping passes. Keep a guide in contact with its reference surface only when the design calls for contact. Pressing hard can force paint past the applicator or make it track unevenly.
Watch the leading edge as you move. Reposition your hand and body so you can see the line instead of stretching around an obstruction. Reload before the applicator begins to skip, but avoid repeatedly passing over paint that is starting to set. Stop short of tight corners and finish the small area with a brush if that gives better control.
Keep the tool flat and use a consistent pace. If paint builds up on the guide, stop and clean it before continuing. A contaminated guide can transfer paint to trim or drag a ridge along the line. Work in manageable sections so that coverage stays even and you do not need to rush to maintain a wet edge. On a long wall, choose section lengths that let you maintain a comfortable stance and inspect the line as you go.
Where the ceiling meets a wall, keep the head orientation consistent and avoid twisting your wrist at the end of each pass. For casing, make shorter strokes if the trim profile changes or the guide begins to lift. Do not force one continuous stroke through an obstruction. Stop, reset the tool, and overlap the next controlled pass slightly on the wall side, taking care not to build a ridge.
How should you test the line and correct problems?
Inspect the test area from normal viewing distance and at an angle that reveals gaps. Look for skips, heavy edges, paint on the adjoining surface, and a wandering line. Diagnose the cause before making another pass. A dry applicator, an overfilled pad, a poorly seated guide, and a rough edge require different corrections.
- Paint crosses onto trim: Reduce the load, clean the guide, and realign it. Wipe fresh excess promptly using a method suitable for the coating and surface.
- The line has gaps: Check for even contact. Reload lightly and fill isolated gaps with a brush rather than pressing harder.
- The line is wavy: Improve your stance and sightline, slow down, and work in shorter sections. If the edge itself is irregular, change to a brush or masking plan.
- Paint leaves ridges or a thick start: Remove excess paint, begin away from the corner, and avoid repeatedly working material that is setting.
- The tool catches or skips: Check for debris, dried paint, joints, caulk ridges, and a guide that does not suit the profile.
For a fair evaluation, change one variable at a time. If the first test is too heavy, reduce the load but keep the same speed and angle. If that improves transfer, you have a useful adjustment. Changing the load, pressure, speed, and tool angle all at once makes it difficult to learn which factor caused the result.
Allow the coating to dry as directed before judging the final appearance. Wet paint may look different from the finished film. Avoid scraping or rubbing a fresh line; use the product's cleanup directions if correction is needed. If a line needs a second coat, follow the recoat instructions and use the same careful edge method rather than trying to correct the line while the first coat is tacky.
How do project conditions affect a paint edger tool?
Room layout changes how useful an edger is. A vacant room with long walls gives the guide space to track and lets the painter work in a steady sequence. A furnished room, narrow stairwell, or area full of built-ins may force awkward positions and frequent stops. In those settings, a compact brush can be easier to control even if it requires more frequent loading.
Surface condition matters just as much. Smooth drywall beside smooth trim can provide a clear track. A textured wall, uneven plaster, or a caulk bead that varies in height can interrupt contact. Test the actual edge, not a nearby flat patch. If the tool bridges valleys in texture, paint may pass under its guide and land on the protected surface. Choose a brush or masking strategy if the test shows that risk.
Lighting and reach are practical variables. Strong side lighting can reveal missed spots and waviness, while poor visibility encourages overcorrection. A long handle may help reach a high edge from a stable position, but it can make a small head harder to steer. Do not stretch or lean from a ladder to extend a pass. Reposition the ladder or use an appropriate extension arrangement recommended for the tool.
Consider coating behavior as well. A product that levels or dries differently from the coating used in a previous room may require a fresh test. Follow label directions for environmental conditions and recoat timing. If the application becomes sticky or begins to drag, stop and review the conditions instead of adding pressure or repeatedly retracing the line.
When is a brush or tape better than a paint edger tool?
An edger is most useful when its guide can travel along a clear, reasonably consistent edge. A brush may be better for ornate trim, narrow corners, small patches, and irregular transitions because the painter can steer the bristle tip directly. Tape can help protect a contrasting surface when the finish is sensitive or the line is highly visible, though it requires careful placement and removal at the appropriate stage.
For a textured wall meeting smooth trim, test before committing. Texture can create channels beneath an edger guide, allowing paint to reach the trim. A brush can let you work paint into the wall edge while directing bristles away from the trim. By contrast, on a long smooth run, a properly selected edger may reduce repeated brush loading. Choose the method that fits the surface and your control, not simply the method that appears fastest.
A useful comparison is to test a short section with the intended edger and another with a brush. Keep the paint, preparation, and lighting the same. Compare line quality, time spent correcting, and how comfortably you can maintain the position. For a delicate surface, include a small tape test and check whether the tape lifts existing finish or leaves residue. This brief comparison is more reliable than assuming a tool will behave like another model you have used.
How can a professional buyer plan a repeatable workflow?
For a crew or a series of similar rooms, make the process consistent without assuming every edge is identical. Identify the dominant edge type, select the applicator for that condition, and record the settings that worked: approximate load, pass length, and where a brush finish was needed. The notes need not be complicated. A short checklist can help another painter avoid repeating a failed test.
- Walk the room and mark the long, open runs separately from corners, interruptions, and damaged areas.
- Prepare and protect the work area before loading the tool.
- Run a short test at a representative edge, then inspect it after the coating has dried enough to judge.
- Use the edger only on matching runs; switch methods at profiles or texture that defeat the guide.
- Pause at a planned point to clean the guide and confirm the pad is transferring evenly.
- At the end, review the room from normal viewing distance and make corrections using the coating directions.
This approach avoids treating an edger as a one-tool solution. On one room, the best plan may be the tool for the long ceiling lines and a brush for doors and windows. On another, textured walls may make the brush the better choice throughout. The purpose of a repeatable workflow is to reduce uncertainty and touch-up, not to force identical equipment onto different conditions.
How should you clean and store a paint edger tool?
Clean the tool promptly using the method specified for the coating and applicator. Remove the pad or roller if the design allows it, and pay attention to the guide and seams where paint can dry. Do not immerse parts the instructions identify as non-washable. Dry reusable parts fully before storage, and replace worn applicators when they no longer transfer paint evenly. Protect the tool from dust and deformation.
For a tool used between work sessions, do not improvise a storage method that conflicts with the paint or tool instructions. Clean it fully if directed, or follow the stated short-term handling method where one is provided. Label replacement pads or parts so they can be matched to the tool later. Dried material on a guide can scratch a surface or shift the line on the next job.
Dispose of leftover paint and cleaning material according to the product label and applicable local requirements. Do not pour coatings or wash water into a drain unless the product instructions and local rules explicitly allow it. Keep paint and tools away from children and follow the label's safety directions.
What should you check before starting the next edge?
Before repeating the process in another area, check the tool, edge, and work plan again. A change from smooth drywall to textured plaster, or from broad ceiling line to narrow casing, may call for a different applicator. Confirm that the guide is clean, the coating remains within its stated use conditions, and nearby surfaces are protected. When the next edge is not a good match, change methods rather than forcing the tool through a job it cannot control.
If buying supplies for more than one kind of edge, compare the tool against the other items in the painting setup. A brush, masking material, and suitable surface-preparation supplies can complement an edger rather than duplicate it. Browse the Painting collection to review related application supplies, and use the product directions to confirm that each item suits the coating and surface.
For help with a larger supply list or product selection, call Integrity Supply at (866) 918-0300.
Explore painting tools and supplies
Choosing a paint edger tool means matching its shape and guide to the edge, testing paint transfer, and applying a light, controlled pass. Careful preparation and a brush for detail work will usually matter more than speed.