

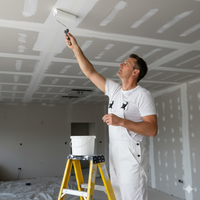



















Choosing a new drywall primer is an important step between finishing the joints and applying paint. Bare drywall absorbs paint unevenly: the paper face, joint compound, and sanded areas can take up paint at different rates. A suitable primer helps create a more consistent surface for the finish coat. In most cases, start with a drywall primer labeled for new or bare drywall, follow its directions for your wall conditions, and allow it to dry as the label specifies before painting.
Call Integrity Supply at 866-918-0300 for product guidance
Why does new drywall need primer?
New drywall is not a uniform, ready-to-paint surface. A finished wall usually includes large areas of paper facing, joint compound over seams and fasteners, and patches where the surface has been sanded. Those materials can differ in porosity and texture. If you apply finish paint directly, the paper and compound may absorb it differently. The result can look dull or uneven in some spots, even when the paint color and application are otherwise sound.
Primer is a preparatory coating, not a substitute for finishing the drywall correctly. It helps reduce uneven absorption and gives the topcoat a more consistent base. It can also make flaws easier to see: once a wall is primed, shallow ridges, pinholes, and sanding marks may stand out under side lighting. That gives you a chance to correct them before the finish paint goes on.
A primer coat will not hide every defect or make a poorly prepared wall smooth. It will not correct loose tape, deep gouges, raised seams, dust, or water damage. Those need to be addressed first. Nor should you assume that one primer coat makes every surface ready for any paint or sheen. Read the product label and the finish-paint instructions, and judge the actual wall after the primer dries.
Which new drywall primer should you use?
For a typical interior wall with new, unpainted drywall, choose a product whose label specifically identifies it for new drywall, bare drywall, or drywall and joint compound. Product names and formulas vary, so use the intended-use language and application directions on the container rather than relying on a generic name alone. A drywall primer is designed for the absorption differences commonly found on a new wall.
Water-based PVA drywall primers are commonly used for this purpose. Other water-based acrylic or latex primers may also be labeled for new drywall. What matters most is that the specific product is approved by its manufacturer for the surface and conditions you have. Do not assume every general-purpose primer is interchangeable, or that a product suitable for a previously painted wall is the best choice for bare drywall.
Check the label for the following before buying:
- Approved surfaces: Look for explicit directions for new or bare drywall and joint compound.
- Interior or exterior use: Match the intended location. A standard interior drywall primer is not automatically appropriate for an exterior wall or a damp area.
- Condition limits: Review any temperature, humidity, ventilation, or substrate requirements.
- Application tools: Confirm whether the product can be applied by brush, roller, or spray, and whether any method needs a particular setup.
- Recoat and topcoat directions: Note the stated drying time, minimum time before recoating, and compatible finish coats.
- Cleanup and safety: Follow the container's ventilation, protective equipment, cleanup, and disposal instructions.
Use a different type of primer when the wall presents a specific condition and the label calls for it. For example, a stain-blocking or specialty primer may be appropriate for a known stain or other substrate issue, but do not use a specialty product as a default just because it sounds stronger. Identify the condition, check that the product is intended for it, and confirm that it can be used on the drywall. If the problem is active moisture, repair the source and let the materials dry; primer is not a moisture fix.
Primer and paint combinations can be useful for some projects, but a combined product should not be assumed to replace a dedicated drywall primer on bare new drywall. Verify the product's label for that exact use. If it does not clearly state that it is suitable for new drywall, ask the manufacturer or choose a product that does.
Primer options at a glance
| Option | When it may fit | What to verify |
|---|---|---|
| Drywall primer, often PVA | Ordinary new, bare interior drywall and joint compound | Label approval for new drywall, application method, drying and topcoat instructions |
| Water-based acrylic or latex primer | When the specific product label includes new drywall among approved surfaces | Do not infer suitability from the broad product category; check intended surfaces |
| Stain-blocking or specialty primer | A defined stain or substrate condition for which the label recommends it | Cause of the condition, drywall compatibility, ventilation and topcoat requirements |
| Primer-and-paint product | Only when the manufacturer states it is suitable for bare new drywall | Whether it is a true fit for the substrate and project, not just previously painted walls |
This comparison is a starting point, not a replacement for the product label. Manufacturers may use different formulas and instructions within the same general category. If the wall has unusual materials, repairs, contamination, or environmental exposure, resolve those details before selecting a coating.
How should you inspect and prepare new drywall?
Good primer application begins with a finished, clean, dry surface. Walk the whole wall before opening the container. Use a work light held at an angle to reveal ridges and shallow depressions that overhead lighting can hide. Check seams, corners, screw or nail heads, repaired areas, and the edge where drywall meets trim. Work slowly: a defect that seems minor before painting may be more visible after the wall has a consistent coat and the finish paint reflects light.
- Confirm the finishing is complete. Joint compound should be dry and sanded according to the compound manufacturer's instructions. Tape should be secure, fasteners covered, and seams blended into the surrounding surface.
- Correct visible defects. Fill pinholes and shallow divots with an appropriate joint compound or patching material. Scrape or sand ridges carefully without tearing the drywall paper. Let repairs dry fully, then sand them smooth.
- Remove sanding dust. Use a suitable brush, vacuum attachment, or other method appropriate to the surface and dust-control plan. Avoid simply spreading dust across the wall with a dry cloth. Follow tool and product instructions, and use suitable protective equipment.
- Check for contamination or dampness. Remove dirt or residue with a method compatible with the substrate and let the surface dry. Investigate water marks, musty conditions, or active leaks instead of coating over them.
- Protect the room. Cover floors and nearby items, and mask trim or surfaces that should not receive primer. Painter's tape and drop cloths can help with protection; choose products and use them as directed. Integrity Supply has a painter's tape option and a drop cloth product page to review.
- Check the room and product directions. Make sure the conditions meet the label requirements for temperature, ventilation, and application. Keep people and pets away as the label directs.
Dust deserves particular attention. Fine sanding dust can interfere with a coating's contact with the surface and leave a rough or gritty finish. Do not start priming while compound dust is still settled on the wall, ledges, or floor where it can be stirred back into the work. Use appropriate dust protection and cleanup practices; avoid methods that spread airborne dust through occupied rooms.
Do not over-sand drywall paper. If sanding breaks or fuzzes the paper face, stop and address the damaged area using a repair method suitable for that condition before coating. Applying primer over torn, loose, or fuzzy paper may not create a smooth finish. If damage is widespread or the repair is uncertain, consult the drywall or coating manufacturer guidance rather than trying to conceal it with extra primer.
How do you apply new drywall primer?
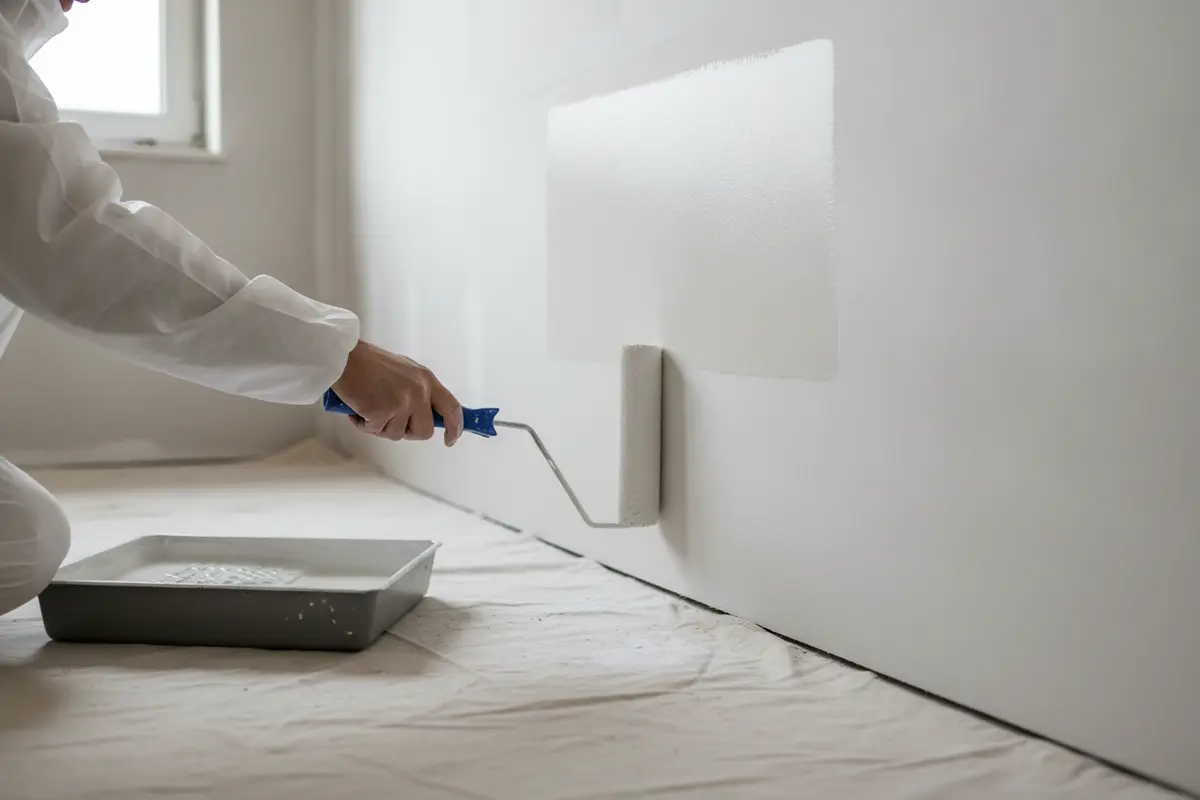
Use the application method allowed by the product label. Rollers and brushes are practical for many room projects; spraying may be an option when the product and equipment directions allow it and the room can be properly protected. A roller cover's material and nap should be chosen for the coating and surface according to the manufacturer or supplier's guidance. Integrity Supply's roller cover product page is one example of an application accessory to review; match any tool to the primer directions and wall.
- Read and mix as directed. Review the full label before use. Stir the primer if instructed. Do not thin it or combine it with another product unless the manufacturer explicitly permits that procedure.
- Set up a manageable work area. Pour an amount that is practical for the work in progress, and keep the container closed when possible. Arrange the roller, brush, tray, masking, and lighting so you can maintain a steady pace without stepping over wet areas.
- Cut in carefully. Use a brush to coat edges, corners, and around obstacles where a roller cannot reach. Keep the cut-in area reasonably close to the section you are rolling so it does not dry far ahead of the field, following product directions.
- Load the roller evenly. Work the roller in the tray until the cover is coated without dripping. Excess material can create splatter, heavy ridges, and uneven build. Do not press hard to force a nearly dry roller to cover more wall.
- Work in sections. Apply primer in overlapping passes and maintain a wet edge where practical. Use consistent pressure and finish strokes in a consistent direction. Avoid repeatedly rolling an area that has begun to set, which can leave texture or disturb the coating.
- Keep the film even. The goal is a continuous, even application at the rate and thickness specified by the product manufacturer. Bare spots, puddles, drips, and heavy lap marks call for correction while the coating is still workable, if the label permits.
- Inspect as you go. Use adequate lighting to check the wall for missed areas and runs. Look from more than one angle, especially around corners and repaired sections.
- Clean tools and close the container. Follow the product's cleanup instructions promptly. Store or dispose of materials according to label directions and local requirements.
For larger walls, plan your stopping points before starting. A corner, doorway, or other natural break is easier to manage than a stop in the middle of a broad, uninterrupted wall. Keep your pace steady and maintain overlap between passes. If you need to pause, follow the label about handling the wet edge and restarting; do not assume a dried edge will disappear under the next coat.
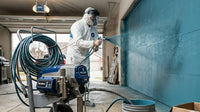
If spraying, verify that both the coating label and sprayer instructions allow the product and setup. Protect adjoining surfaces thoroughly, control overspray, and use the required personal protective equipment and ventilation. Do not alter the primer's viscosity unless its manufacturer permits thinning and specifies how. Spray technique and equipment settings vary, so follow the relevant manufacturer instructions rather than relying on a universal pressure or tip size.
How long should new drywall primer dry?
There is no single drying time that applies to every primer, room, or wall. Use the product label's stated drying and recoat times, and consider the conditions the label identifies. Temperature, humidity, airflow, film thickness, and substrate condition can affect drying. A wall that feels dry at the surface may not be ready for a topcoat if the product instructions require more time.
Apply primer only when the room and wall meet the label's conditions. A cool, humid room or limited airflow may extend drying, while airflow or temperature outside the permitted range can also affect results. Do not speed the process with unapproved heat or forceful airflow. If the room conditions are unsuitable, wait until they fall within the product's stated range.
Before painting, check the whole surface. It should be dry according to the label, not tacky, and free of fresh dust or contamination. Follow any instructions about sanding between coats or before the finish coat. Some products may call for another primer coat in certain circumstances; others may not. Do not decide by habit alone. Review the label and assess whether the wall has uniform coverage and an appropriate surface for the selected topcoat.
Drying and curing are not always the same thing. A coating may be ready for a recoat after the label's minimum time while continuing to develop its final properties. Respect the manufacturer's directions for recoating, handling, ventilation, and room use. When conditions are borderline or the coating remains soft or tacky, allow more time and consult the manufacturer instructions before proceeding.
Should you prime the whole wall or only repaired spots?
The answer depends on the product directions and the condition of the wall, but new drywall often includes several different surface materials across one continuous plane. A single spot repair may be treated differently from a wall made up of broad areas of exposed joint compound, multiple patches, or varied absorption. Read the primer label for its directions on bare drywall and repairs, then consider how extensive and consistent the surface is.
Spot priming can be useful when a small repair is made to an otherwise sound, previously coated surface, if the coating instructions support that approach. A new wall is a different situation: paper facing, joints, fasteners, and repairs may all be unpainted. Treating only visible compound strips can leave other areas unprimed and may not create the consistent base intended for the finish paint. Do not use the repair-only approach as a shortcut unless the manufacturer says it is suitable for the surface you have.
For a continuous new drywall wall, follow the primer label's coverage directions over the intended area. Keep the application even, including the field between seams and the corners. If the wall includes an area that is already coated, identify that material and check whether the primer can be applied over it. Avoid mixing different preparation strategies across a wall without considering their effect on the final appearance. If the substrate changes, a small test area or product-manufacturer guidance may help clarify the correct sequence.
After a repair on a wall that has already been primed, let the patch dry fully, sand it carefully, remove dust, and use the primer or spot-treatment steps specified by the product makers. Feather the repair so there is no raised edge, and check it in angled light. The object is to prepare the repaired area and maintain a uniform surface, not to build a thick isolated patch of primer that changes the wall's texture.
When a room has multiple adjoining walls, decide whether each surface is bare, previously coated, or repaired before starting. Record the product used on each area if you may need to continue later. Consistent preparation from one wall to the next helps you avoid overlooked spots and makes it easier to diagnose a difference in appearance after painting. When in doubt, use the label's stated surface list or contact its manufacturer with a clear description of each layer.
What should you check before applying the topcoat?
Primer is a useful inspection stage. Once it is dry, look at the wall under bright, angled light. Check for ridges at joints, visible fasteners, pits, scratches, raised paper fibers, missed patches, roller texture, drips, or differences in sheen and coverage. A primer coat can make flaws easier to notice because the wall is more visually consistent, but it cannot level the surface by itself.
If you find a flaw, correct it before finish painting. Let repairs dry, sand carefully, remove the dust, and spot-prime the repaired area if the materials or primer directions call for that step. Avoid sanding aggressively through the primer or damaging the paper. Follow the compound and primer instructions for any repair sequence. After correction, recheck the area in the same lighting.
Confirm that the finish paint is compatible with the primer and suitable for the room and intended use. Read both product labels. Check whether the paint calls for a specific primer, a particular number of coats, or a waiting interval. A finish coat can have its own application and recoat directions that differ from the primer's. The term "paint-ready" should mean the actual surface is clean, dry, sound, and prepared according to both manufacturers' instructions, not merely that a primer was applied.
If the color or finish plan changes, use the finish-paint manufacturer's recommendations to determine whether the primer coat is suitable. Do not add tint or other material to primer unless the product directions allow it. Likewise, do not assume a dark or vivid topcoat will cover in one coat; coverage depends on the product, color, substrate, and application. Follow the paint label and inspect the actual result after the first finish coat has dried as directed.
How do surface condition and wall texture affect the primer plan?
Not every new drywall surface absorbs or handles primer in exactly the same way. A smooth wall with carefully finished joints presents different application challenges from a wall with a pronounced texture, multiple repairs, or areas of exposed compound. Look at the whole plane, not just one spot, before deciding how to proceed. The primer label remains the starting point, but the wall's condition helps you identify where preparation or a correction may be necessary.
On a smooth finish, slight variations in joint feathering can catch the light. Primer may reveal the transition between compound and paper, particularly when the wall is viewed from the side. Examine seams at several angles and check whether the joint edges blend into the field. If a seam looks like a ridge before priming, it will not become flat because a coating covers it. Correct the surface while you can still inspect the compound directly.
Textured drywall creates its own practical considerations. Recesses can be harder to coat evenly, while high points may receive more friction from a roller. Use an application method and tool compatible with both the texture and the primer, and work the coating into the surface without pressing so hard that you damage it. Avoid assuming that a thicker application is the solution to texture. Follow the label's coverage and film guidance, and check that recessed areas are not being skipped.
Repairs also affect the plan. A small patch may absorb differently from the surrounding face, and multiple repairs can make the wall's porosity less consistent. Make sure patches are dry, smooth, and dust-free before priming. Where compound was sanded, remove the residue, then coat the repair as part of the whole wall when the product instructions allow. If the primer directions call for spot-priming repaired areas, follow that sequence. Do not create isolated glossy or raised spots by leaving excess coating at the edges of a patch.
Edges and corners can be easy to miss. The roller may not reach tightly into an inside corner or behind an obstruction, and a brush can leave a different texture than the roller. Cut in neatly and blend the application in a way that is consistent with the product instructions. Check corners and edges after the coat has dried. If a band around the room looks different, evaluate whether it is a coverage gap, a texture difference, or a lighting effect before adding more material.
Room lighting changes what you notice. A wall that appears even in soft daylight may show ridges when a bright fixture is installed. Use a work light during the inspection, and view the wall from normal standing positions as well as from an angle. The aim is not to make primer perform as a finish coat, but to catch repair and application problems before paint makes them more difficult to correct.
How can you estimate material and organize the work?
Begin with the product label's stated coverage and your measured surface area. Measure the wall height and width, account for openings where practical, and include all surfaces that will be coated. Treat the result as a planning estimate, not a guarantee. Coverage can change with the surface, texture, application method, roller loading, and the amount of product left in equipment. A rough or unusually absorbent surface may use more material than a smooth test area suggests.
Do not compare containers only by their advertised coverage if the products have different intended uses or application instructions. Make sure the candidate primer is appropriate for new drywall first. Then compare the amount needed, the label directions, the cleanup requirements, and the time available for the job. If you are unsure whether a product is suitable for the wall, buying a larger quantity does not solve that uncertainty; confirm the use before committing to the full project.
For a multi-room job, make a simple room-by-room plan. Note which areas are ready for coating, which still need sanding or patching, and where furnishings or access may slow work. Finish and clean one zone before opening the next if that is easier to manage. Keep wet work separate from sanding and dusty tasks so settled dust is not carried back to a freshly primed surface. Protect walking paths and make sure doors and windows can be used as needed for safe ventilation under the label's directions.
Check that you have enough compatible application tools before starting. A roller cover, tray, extension pole where useful, brush for edges, masking materials, and floor protection can reduce interruptions. Use tools suitable for the product and surface, not simply whatever is already on hand. Inspect covers and brushes for loose fibers or debris that could become trapped in the coating. If you reuse tools, clean and store them according to their manufacturers' directions.
Plan around drying time rather than assuming that priming and topcoating will fit into a single block of work. The label's minimum recoat time depends on its stated conditions, and poor airflow or humidity can affect the schedule. Arrange other tasks that do not disturb the coated walls while primer dries. Do not place furniture against a wall or apply finish paint early because the room's schedule is tight. Waiting for the required conditions is usually simpler than repairing a coating problem afterward.
Before starting, make sure the work area is safe and the product is handled responsibly. Read warnings, provide the ventilation the manufacturer specifies, and use the protective equipment called for by the product and the work conditions. Keep containers away from children and pets, and avoid eating or drinking in the work area. Follow label guidance for spills, cleanup, storage, and disposal. If you are working in an occupied building, consider how people will move through the room and keep them clear of wet surfaces and dust-producing work.
What common new drywall priming problems can you troubleshoot?
The wall looks patchy after priming. What should you do?
First distinguish between a visual difference in the primer film and a missed or unevenly coated area. Inspect under consistent lighting after the primer has dried for the period specified on its label. Differences can relate to uneven application, varying absorption, a dusty surface, or repairs that were not fully blended. If the product label permits another coat and the wall needs more uniform coverage, apply it according to the directions. Do not use extra coats to conceal raised seams or other surface defects; repair those first.
Joint compound shows through the finish paint. Why?
Joint compound and drywall paper may absorb finish paint differently when the wall has not been properly prepared. Uneven priming, skipped areas, or a primer not intended for bare drywall can contribute to an inconsistent appearance. Check the primer and paint labels, verify that the primer coat was continuous, and inspect the wall for differences in texture. If the topcoat has already been applied, allow it to dry as directed before deciding on a correction. A compatible primer or additional paint may be appropriate, but follow the manufacturers' directions for recoating rather than applying a product blindly.
Primer feels rough or gritty. How can you fix it?
Dust, debris, dried splatter, or an overly textured application can leave a rough surface. Let the coating dry as directed, then determine whether gentle sanding is allowed by the product instructions. Use suitable dust controls and clean the surface before recoating. If the roughness is caused by torn drywall paper or a raised joint, fix the underlying condition instead of repeatedly coating it. Protect the room and use appropriate protective equipment during sanding and cleanup.
There are roller lines, lap marks, or drips. What went wrong?
These marks can result from uneven loading, excessive material, inconsistent pressure, working over coating that has started to dry, or poor lighting. Follow the label's guidance for correcting defects. Once dry, a small ridge may be sanded carefully if permitted, then cleaned and recoated as appropriate. A deep run or broader uneven area may need a more complete correction. For the next section, load the roller evenly, work at a steady pace, maintain a wet edge where possible, and avoid pressing hard or overworking a setting film.
The primer stays tacky longer than expected. Should you paint?
Do not apply the topcoat until the primer meets the product's drying and recoat requirements. Review the label for temperature, humidity, ventilation, and film-thickness guidance. Allow additional time when conditions may slow drying. If it remains tacky well beyond the stated window, or the coating appears abnormal, contact the product manufacturer for advice. Applying paint over a primer that has not dried as required can lead to an unsatisfactory result.
A stain or damp spot appears on the new wall. Can primer cover it?
Do not treat an unexplained stain as a simple coating issue. Find out whether it comes from a leak, residue, corrosion, or another source, and resolve the cause first. Let the substrate dry and repair damaged materials. A specialty stain-blocking product may be relevant only if its label covers the specific stain and substrate. If moisture is active, coating over it does not fix the problem and can leave the wall vulnerable to further damage.
How can you avoid wasted time and material?
Before opening primer, calculate what the project needs using the coverage information on the product label and the measured wall area. Treat coverage figures as estimates subject to surface condition and application. New drywall, patching, texture, and application technique can affect how much material is used. Buying enough to keep work moving is useful, but avoid relying on a blanket quantity rule that ignores the actual room or product.
Organize work in a practical sequence. Finish sanding and dust removal before laying out tools. Mask adjacent surfaces and protect floors. Set aside enough time to apply the coating without rushing and to let it dry for the label's full interval. If several rooms are involved, plan around access and ventilation so that people are not walking through a freshly coated area or disturbing dust from unfinished work.
Keep the container label available throughout the project. Record the product name and any batch details that may help if you need to ask the manufacturer a question. Do not pour leftover material back into a container if it has been contaminated, and do not transfer it into an unlabeled vessel. Follow label guidance for storage and disposal.
When the material is unfamiliar or the wall has unusual conditions, a small test area can help you assess handling and appearance before continuing, provided the manufacturer allows it. A test patch does not override the product instructions or guarantee the entire wall will behave identically. It is a practical way to identify obvious compatibility or application concerns early.
When should you stop and get product-specific advice?
Pause before coating if you cannot identify the surface, the wall is damp, the paper is damaged, a stain has no known cause, or previous materials may be incompatible. Also stop if the primer label does not clearly include the intended use, if room conditions fall outside its limits, or if the primer behaves differently from its instructions. The right next step may be a repair, a different product, or guidance from the coating manufacturer.
For help comparing painting supplies, Integrity Supply serves painting and contractor customers nationwide and has been in business since 2000. Its catalog spans painting, safety, hardware, and construction supplies, with roughly 70,000 products from 300 manufacturers described by the customer; not every item is stocked in-house. You can explore the available angled paint brush option as one example of a related application tool, and confirm any product's current details and intended use on its page and label.
Call 866-918-0300 to discuss painting supplies
Frequently asked questions about new drywall primer
Can you paint new drywall without primer?
It is generally better to prime bare new drywall with a product labeled for that surface before applying finish paint. Paper and joint compound can absorb paint differently, which may create an uneven-looking finish. Follow the primer and paint manufacturers' instructions for your project.
Is PVA primer suitable for new drywall?
Many PVA drywall primers are intended for new drywall, but confirm that the specific product label lists bare drywall and joint compound as suitable surfaces. Product directions for application, drying, and topcoating take precedence over assumptions based on the primer type.
How many coats of primer does new drywall need?
There is no universal number for every product and wall. Start with the manufacturer's directions, apply an even coat, then inspect the dry surface. Apply another coat only if the product directions and the wall's coverage or condition call for it. Additional primer will not replace proper joint finishing or repairs.
Should you sand after priming drywall?
Only sand if needed to correct a rough spot and if the primer and paint instructions allow it. Let the coating dry as directed, sand gently with suitable dust controls, and remove dust before painting. Avoid sanding through the primer or damaging the drywall paper.
Can you use a roller to prime new drywall?
Use a roller when the primer label allows it. Select a cover suitable for the coating and surface, load it evenly, and apply the primer in overlapping passes without excessive pressure. Use a brush for edges and details, and follow product directions for the required film and drying time.
For a reliable finish, match the primer to the actual wall, prepare the drywall carefully, apply an even coat, and let it dry according to the label before correcting any remaining flaws and painting.